How to Manually Install WordPress Using FTP
Updated on Feb 10, 2025
WordPress is renowned for being simple to install. In the previous part of this tutorial we discussed how to install it via the Softaculous Apps Installer. While Softaculous is available with all FastCloud hosting plans, it might not be available on other hosting services so knowing how to install WordPress manually is important.
In general, it is good to know how to manually install and not rely on automated installers. Third-party software, like the Softaculous Apps Installer, can be handy but nothing beats the full control manual installation gives you. WordPress is no different. You also get to experience the process so you can be prepared when an automated installer is not available. It helps that the process usually takes less than five minutes to complete.
Table of Contents:
Download and Extract the WordPress Files
For the manual WordPress install, the first step is obtaining the software itself. You can download the application's primary installation package via the official WordPress website. There, you will see a Get WordPress button in the top right. That is where you will find the latest WordPress release. Download the archive and then locate it on your computer.
Latest Version
We always advise getting the most recent stable version of WordPress for security reasons. It will ensure that your website is shielded from most, if not all, known security vulnerabilities. The WordPress team works hard on patching all those known security holes, which is why using the latest stable version of the application is important.
Once you have the archive you can extract it to take a look at the files and the structure within it. You do not need to do anything to any of the files or directories, as the archive contains everything you will need to launch your WordPress website. Next, time to upload WordPress to your hosting account.
Upload Your Files
Your next step is to upload the downloaded WordPress files to the hosting account directory where your application belongs. Naturally, you should place the files in the root directory for the domain you want the website to live under. To do so you can use an FTP client to connect to your hosting account or use a file browser if your hosting offers it.
FastComet File Management
Here at FastComet our customers can manage their files and directories via FTP or the File Manager tool in their cPanel account. The FTP service does not require you to log into your cPanel and you can use a local client to access your files. Read our tutorial for more information.
On the other hand, the File Manager tool does not require you to have a local FTP client and you can work with your files directly in your cPanel account. It is handy since you will need to log in to create a database for your WordPress website anyway. Check out our tutorial about the File Manager here.
Regardless of your chosen method of uploading the files, you must ensure that they are not in the wordpress directory the archive extracts to. Everything from that directory must be in the root directory of your chosen doman. Otherwise the URL for your new WordPress website will have to include the wordpress subdirectory (https://example.com/wordpress). Of course, if that is your intention feel free to keep the files in that subdirectory.
The installation process can start once all of the files have been uploaded to the chosen folder. The process is incredibly straightforward and the WordPress developers should be praised for how they have set everything up. Before we begin the installation process, though, you have to create a database since WordPress needs one to work.
Create a MariaDB Database
Depending on your hosting account and the control panel it uses, the process of creating a database can differ. Here at FastComet we use cPanel as our hosting control panel which makes everything very straightforward.
Creating a database is no different with the tools that cPanel provides. All you need to do is head to the Database Wizard tool.
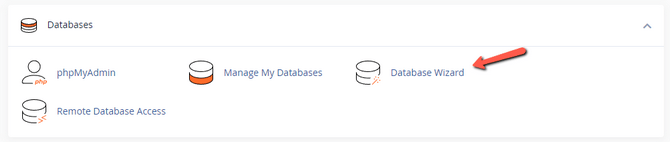
From there on simply follow the provided instructions. The process is extremely easy but ensure to note down the database name, user and password as you will need those for the WordPress setup.
Database Wizard
For more information you check our How to Create a Database via cPanel tutorial on the steps to take.
Once you have set up your database it is time to begin the installation process.
Set Up WordPress
To start, go to the URL associated with the folder where you uploaded the WordPress files. For example, if you want to use WordPress with the primary domain of your hosting account then you should have placed the files in the public_html directory. Open your browser and go to your domain (https://example.com).
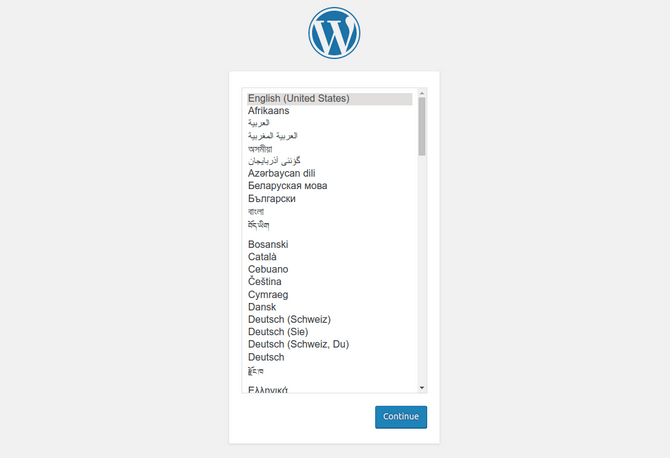
You should see the first step of the WordPress setup: language selection. Make your pick and then click on Continue.
On the next page you will see a message from WordPress informing you of its database requirements. To summarize it, you must have a database prepared and have its name, user, password, host and prefix handy. A database is required as WordPress is a PHP/MariaDB-based platform. Here is a quick explanation of what each of those items entails.
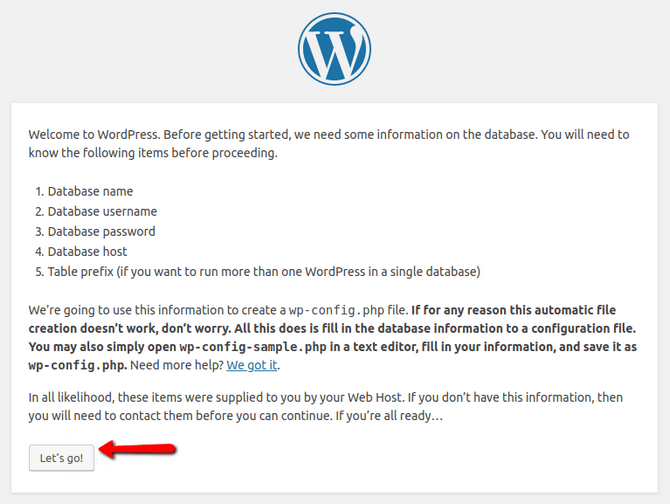
- Database name - The name of your database;
- Database username - The name of the user you have granted privileges to operate with the database;
- Password - The password for the user you have added to the database;
- Database host - The hostname of the database server. If the MariaDB server is hosted on the same server as your hosting account is, use localhost. All our customers should use localhost or 192.168.0.1 for the value of this field unless the database is situated on a separate server;
- Table prefix - The prefix for the tables in the database of the application. Databases for different WordPress instances should have different prefixes. Also, for security reasons, it is highly recommended you change this prefix from the default "wp" one.
The next step is to click the Let's go! button to start the installation procedure. Fill all the database fields on the next page.
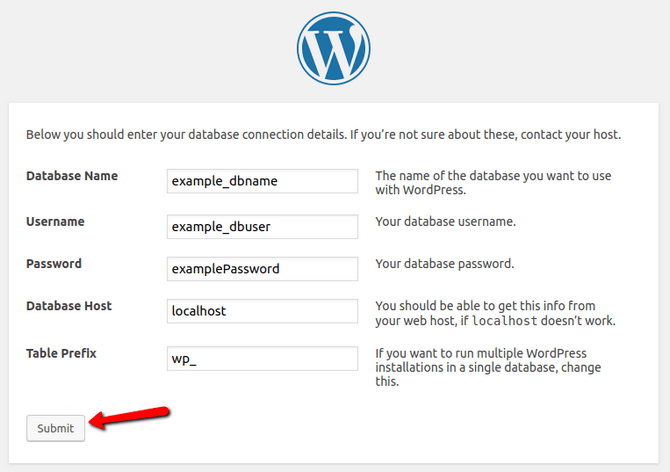
As soon as you fill in all the required information, press Submit and continue with the next step.
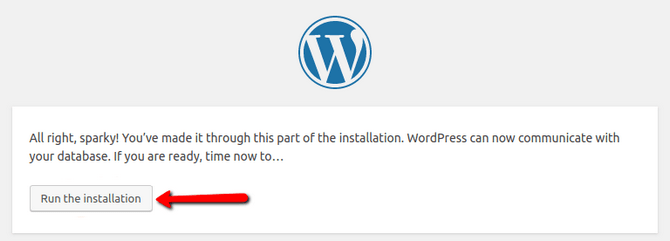
The following page will let you know that the information you submitted regarding your database is accurate and the installation process can move on. If there are any errors you will see them here, too. Go ahead and press Run the Installation.
The final page is to create an admin account and finish up the installation process.
Create an Administrator Account
You are almost done! All that is left is to create an Administrator Account. Fill in the following information on the page but ensure you remember what you write as that is your way of logging into the WordPress dashboard.
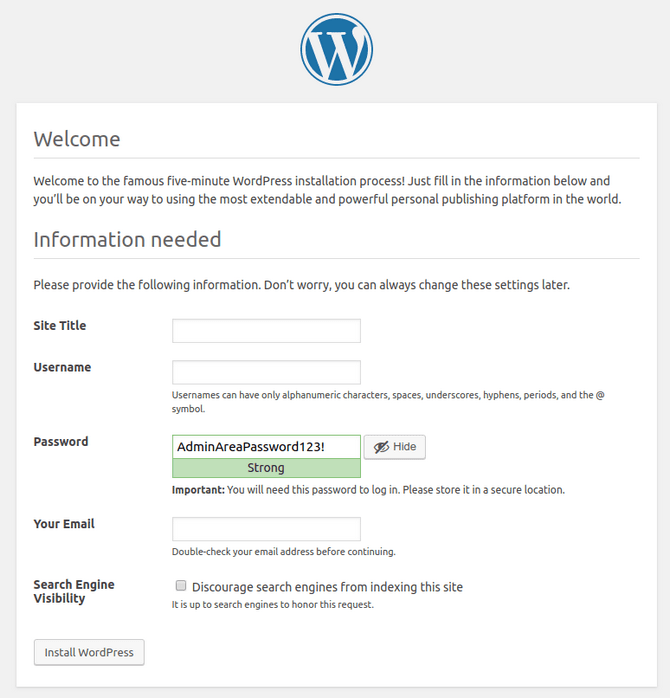
- Site Title - Your website's title. It appears at the top of your website page;
- Username - The account name used for logging into the admin area of your WordPress platform;
- Password - The password needed to access your WordPress admin account. Please take note that you must enter your password twice for confirmation. Always use a strong password;
- Your Email - This email address will be used by the platform to give you reports and, in some situations, to configure plugins;
- Search Engine Visibility - Search engines can index your website unless you choose this option. If you do so, the installer will add a few extra lines to your website's robots.txt file, disabling the search engines' ability to index your website.
Once everything is set up properly you will see the final page of the installatio process.
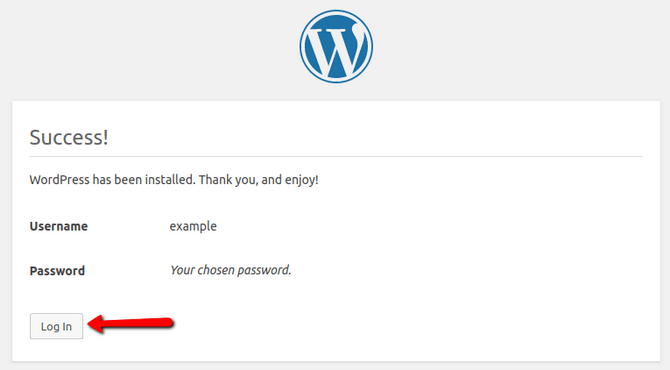
You can click the Log In button to access the admin section of your website.
Congratulations! You have installed WordPress manually on your hosting account. Not difficult at all, right?

WordPress Hosting
- Free WordPress Installation
- 24/7 WordPress Support
- Free Domain Transfer
- Hack-free Protection
- Fast SSD Storage
- Free WordPress Transfer
- Free CloudFlare CDN
- Immediate Activation