MailChimp Widget for WordPress
Updated on Dec 6, 2022
With the aid of Mailchimp, marketers may send mass emails to clients, consumers, and other interested parties. The three primary components of email marketing are the foundation of the application:
- managing subscriber lists;
- building email campaigns;
- reviewing campaign reports.
Simple tools provided by Mailchimp make it easy to construct email campaigns with a professional appearance. We will walk you through the setup of Mailchimp in this tutorial, including how to sign up, install the related WordPress plugin, add a subscriber list, and place it on your website’s front end.
To use the MailChimp plugin in WordPress, you need to:
How to Register for Mailchimp
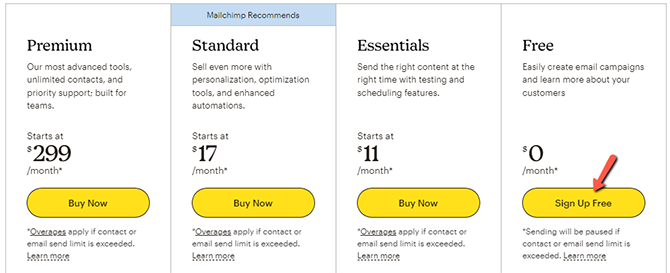
You must sign up for a Mailchimp account to connect the services to your WordPress website. Simply go to the Mailchimp Official website and click the Sign Up Free option if you do not already have an account.
Afterward, enter your selected Username, a password that satisfies all of the requirements for your new Mailchimp account, and the email address where confirmation of this registration will be sent to you.
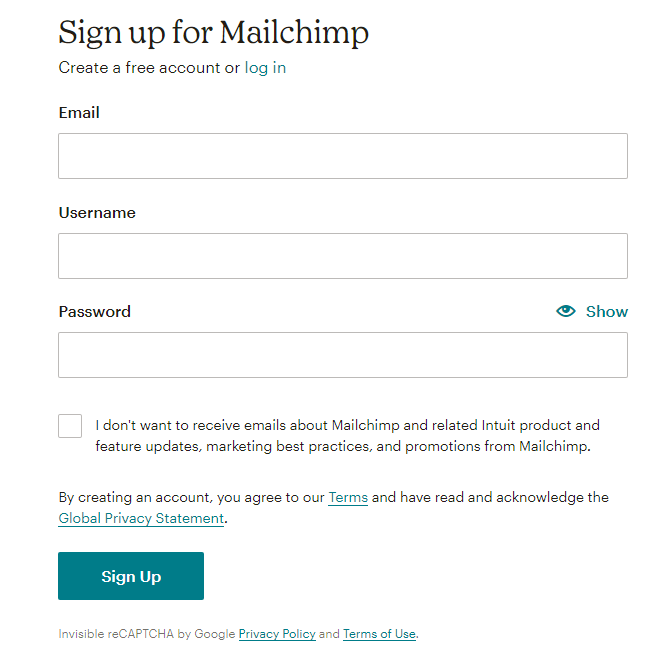
Your supplied email address will be used to send you a confirmation email after you click the Create My Account button. You must confirm the registration before being taken to a new page where you can enter your personal and business data. You will be taken to your MailChimp dashboard after you have signed in.
How to Install and Activate the Mailchimp widget
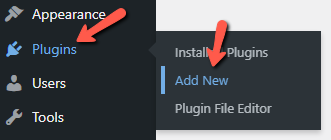
- Go to the Plugins → Add New section of your WordPress Admin Dashboard to add the Mailchimp Widget plugin.
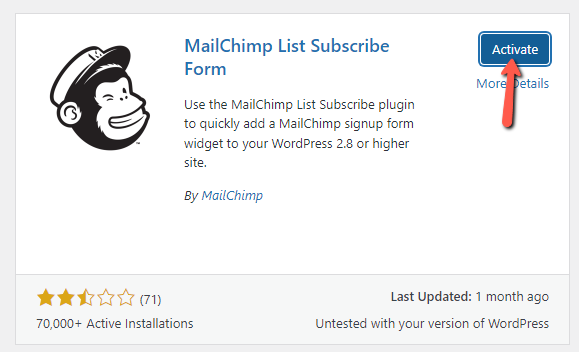
- Submit the search after entering Mailchimp List Subscribe Form in the search box. To begin the installation process, click the Install Now option.
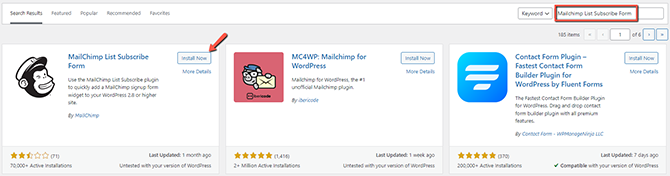
- Click the Activate button when the installation is finished.
How to Generate API Key
The Mailchimp for WP menu will appear in your WordPress Dashboard once the plugin has been installed and active. You will need to link the Mailchimp plugin with the service when you click on it.
To link the widget to your Mailchimp account, you will want a working Mailchimp API Key. Paste your Mailchimp key by going to Settings → Mailchimp Setup.
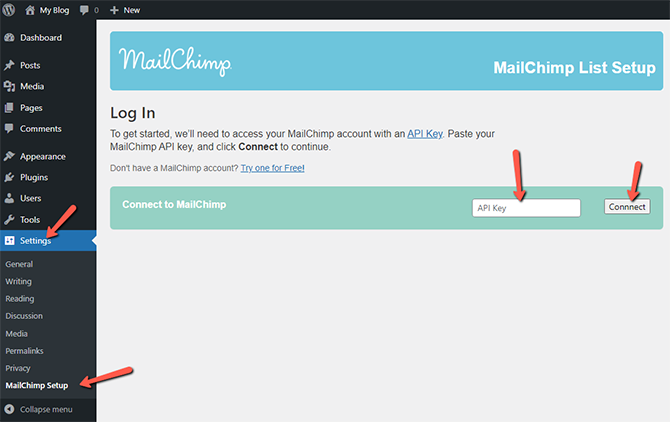
Paste the API Key in the empty field and select Connect.
When you successfully connect the service to the widget, the gray Not Connected indication will change to a green Connected one.
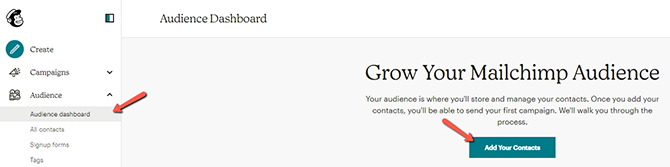
The next step is configuring the Mailchimp mailing lists and other settings you want to appear on the front end of your website. To enable the subscription option, you will first need to create a mailing list via their website if you haven't already. You can achieve that by clicking the Audiences tab and choosing the Audience Dashboard. After that, click on the Add Your Contacts button:
Once the email list has been created, go back to WordPress and click Update List.
How to Make the Widget Visible
You must include the widget in your website's layout for users to see it. Go to Appearance → Widgets to accomplish that.
Now insert the Mailchimp List Subscribe Form block to the right Sidebar or Footer menu by dragging it from the left area. Additionally, you can click the widget, which will be placed automatically in the chosen location. You can access the widget and change its title by selecting it from the menu. Simply save the adjustment by clicking elsewhere on the page.
Users may now type their email addresses and subscribe to your newsletters on the front end of your store.
After that, they will only need to verify the subscription and will be able to receive newsletters from your website.

WordPress Hosting
- Free WordPress Installation
- 24/7 WordPress Support
- Free Domain Transfer
- Hack-free Protection
- Fast SSD Storage
- Free WordPress Transfer
- Free CloudFlare CDN
- Immediate Activation