Installation with WP Toolkit
Updated on Apr 26, 2023
There are many different ways to install WordPress, either automatically or manually. For instance the Softaculous Apps Installer is another service we offer, which can install WordPress with just a few clicks. In this tutorial, though, we will take a closer look at how to install WordPress via the WP Toolkit.
This post includes:
Adding a Domain
First, you must ensure that the domain you wish to install WordPress on was added to your cPanel account. You can check that using the Domains tool in cPanel. If the domain is absent, it can be added by clicking Create A New Domain. Afterward, write the name of the domain. Then, untick the Share Document Root box. Otherwise, the domain will be assigned to the directory of the Primary Domain of the cPanel account. That is not good if you want the website to be a separate entity. Finally, click on Submit.
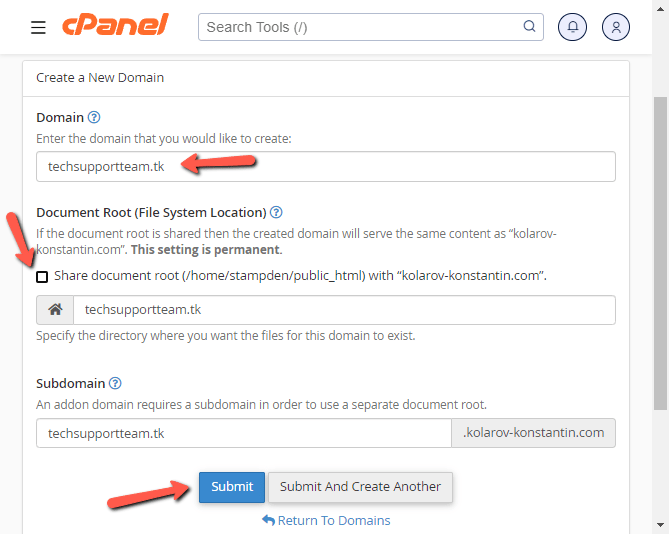
You will see a green message in the top-right of the screen, letting you know that the domain has been successfully added. You might also notice that the system will create a subdomain, and that is perfectly normal. That subdomain will become important later on when forcing HTTPS on the website. For now, though, please find the WP Toolkit itself. It is located in the Domains section of your cPanel.
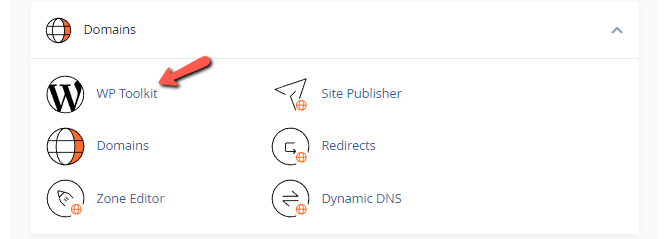
When you open it, you will have a screen showing you all the currently installed WordPress websites on the cPanel. If this is your first installation, the field will be empty, but click on the Install button, and the process will begin. There will be three fields: General and WordPress Administrator, Database, and Automatic Update Settings. We will now go into more detail about each and how each will affect the installation.
General and WordPress Administrator
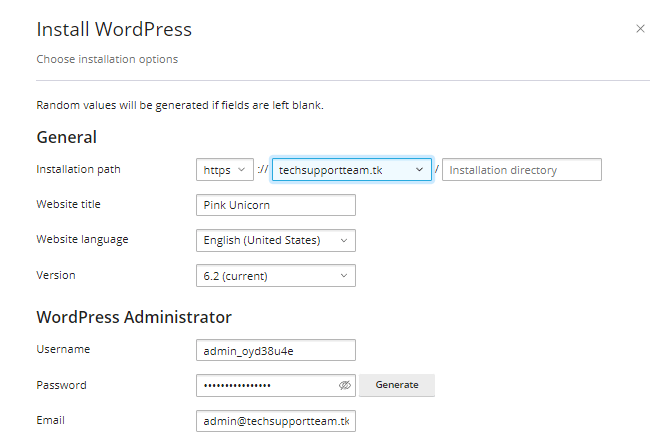
As the name suggests, these fields are the general options for your website: the domain that the website will be installed on; the directory it will be installed in; and its Title, Language, and WordPress Version. These are just the installation's first steps, but they are essential. Please be sure you set them up correctly.
Below them, you will find the WordPress Administrator settings. Here you can change the administrative user's name and the password and email address it will use. The WP Toolkit usually assigns a strong username and password, so you can use what the Toolkit has generated for you or use your own. Clicking on the eye icon next to the password will reveal it.
Database
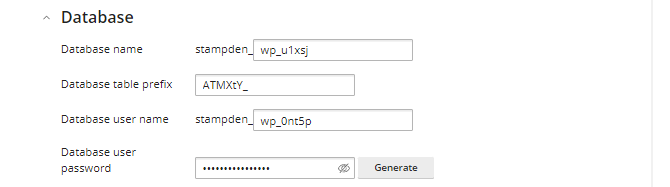
This tab will let you edit your website's database information: its Name, Table Prefix, Username, and Password. You can assign any values you wish here. Still, one thing must be noted: the database name and username will always begin with your cPanel username. You can see in the screenshot above that, in our case, the username is always in front of the fields for the database name and username. Again, clicking on the eye next to the password will reveal it if you want to note it somewhere. Aside from these settings, you do not need to do anything else regarding the database. The WP Toolkit will create the database itself and then configure it to work with the website: you don't have to bother making it manually or assigning it to the website. The Toolkit handles all of that.
Automatic Update Settings
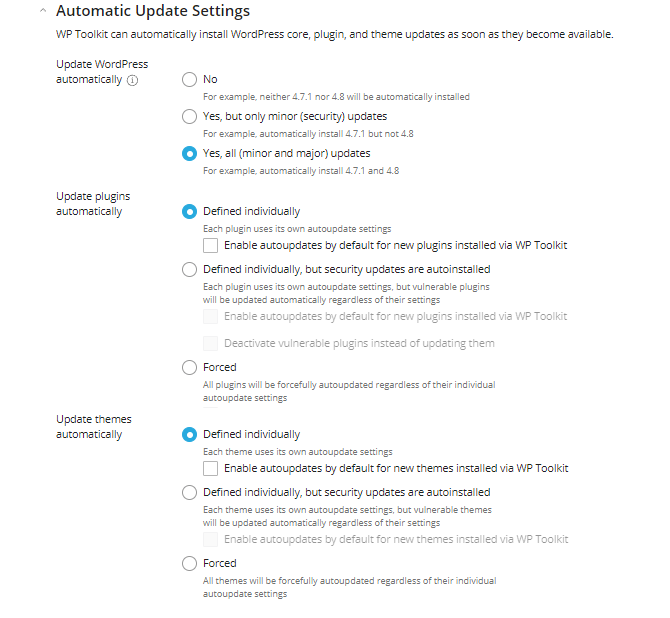
That is also an essential installation step, as it will dictate when the WordPress core files, plugins, and themes update. For instance, as can be seen in the screenshot above, the default settings are that the WP Toolkit will automatically update the core files of your website but will not do that for its plugins or themes. That means whenever a new version of WordPress is available, the WP Toolkit will perform the update on its own. That is immensely handy! Plugins and themes, on the other hand, will not be updated automatically by default. If you would like to turn on automatic updates for them, you can either do it in this step or later on via the administrative dashboard.
Warning
The reason why automatic updates for plugins and themes are turned off by default is because they can cause issues for your website. While automatically updating the core files rarely, if ever, causes issues, a plugin or theme can cause much more damage if the newer version is not compatible with anything on your website. That is why plugin and theme updates are left to the user’s discretion.
Final Touches
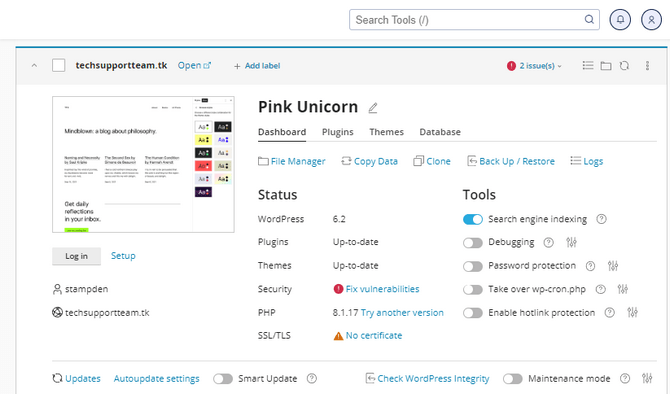
When you are satisfied with the settings of your website, click the Install button. You will see a progress bar in the bottom right of the screen, where you can track its progress. Once the installation is over, you will see a window, prompting the installation of plugins and themes and a success message in the bottom right. You can proceed to install any plugins or themes you wish from here. That will take you to the WP Toolkit interface for plugins and themes itself, or you can close the window if you prefer to postpone that. Plugins and themes can always be installed later on. Once everything is set, you will see that the website has been added to the list of installed ones, and all its information is present.
That is it! You have successfully installed a WordPress website via the WP Toolkit!

WordPress Hosting
- Free WordPress Installation
- 24/7 WordPress Support
- Free Domain Transfer
- Hack-free Protection
- Fast SSD Storage
- Free WordPress Transfer
- Free CloudFlare CDN
- Immediate Activation