CDN
Updated on Mar 7, 2024
The CDN section contains all the relevant options for connecting to and serving content through a CDN. LiteSpeed typically works best with QUIC.cloud, but it is not the only CDN it is compatible with. CloudFlare is another big name in the CDN industry, and it can be set up to work effortlessly with the LiteSpeed Cache plugin. Regarding the choice between QUIC.cloud and CloudFlare, there is one significant difference to consider: QUIC.cloud is exclusive to WordPress and optimized for it, while CloudFlare will offer better general performance for any website. QUIC.cloud is also easier to set up, while CloudFlare requires more involvement when it comes to connecting your website to it. Fortunately, LiteSpeed Cache can work with both, and you can set either of them up in this section.
You Will Read About These Tabs
CDN Settings
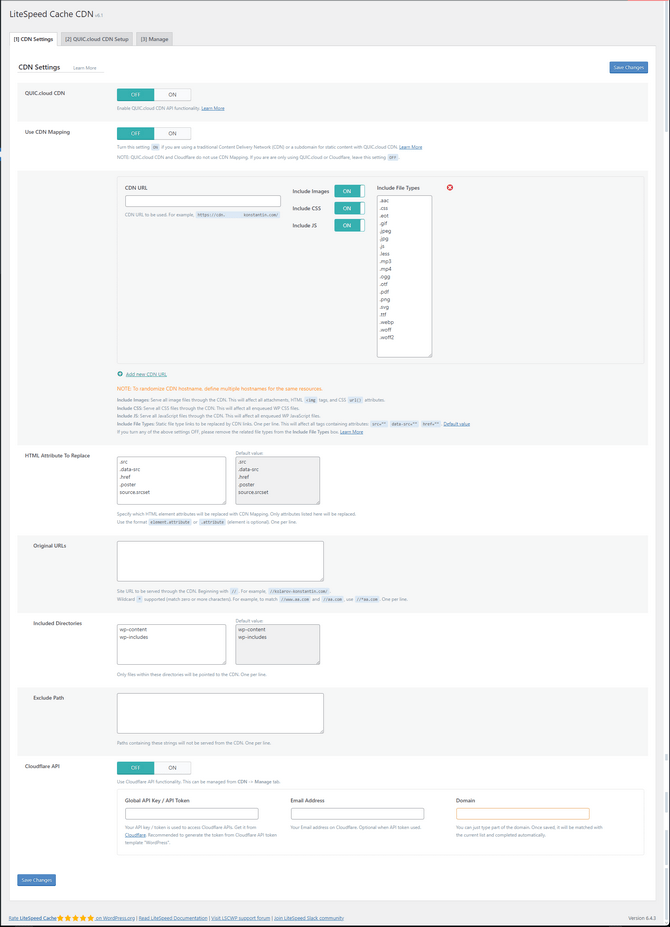
The first tab is CDN Settings, and this is where the majority of options are.
- QUIC.cloud CDN - Turn this ON if you want to use QUIC.cloud. There is nothing else to do here. Setting it up is in the next tab;
- Use CDN Mapping - You can specify multiple CDN paths for your content. If you are using only one CDN, then you need to fill only one box. If you are using multiple, you have to add another box for each path you use. Do not use this option if you are using QUIC.cloud or CloudFlare;
- CDN URL - The base URL for content served through a CDN. It must be a full URL beginning with http. The switches beside it allow you to decide what content is served through the CDN. You can also specify the file types to be served by adding them to the field next to the switches;
- HTML Attribute to Replace - Choose which HTML element attributes will be replaced with CDN Mapping;
- Original URLs - URLs of sites to be served through the CDN;
- Included Directories - Directories within these fields will have their files routed through the CDN;
- Exclude Path - Files within these directories will NOT be served through the CDN;
- CloudFlare API - Connect your CloudFlare cache to your LiteSpeed Cache plugin. You can control it through this interface instead of CloudFlare’s website. To connect, input your Global API Key/Token, CloudFlare Email Address, and Domain. Once connected, you can go to the Manage tab and control it from there.
That is all for the CDN Settings tab. Next is the super-easy process of setting up your website with QUIC.cloud.
QUIC.cloud CDN Setup
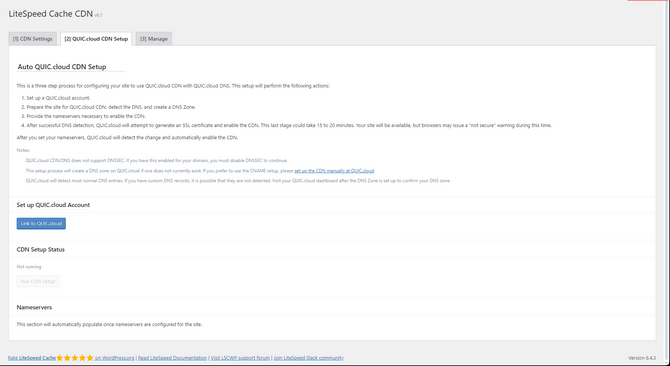
Connecting your website to QUIC.cloud’s services is very simple and can be easily performed from the QUIC.cloud CDN Setup tab. To begin, click Link to QUIC.cloud and input your account information. If you don’t have an account, you can create one here, too. If you have just created an account, you may be returned to the QUIC.cloud CDN Setup tab. The button may have changed to Run CDN Setup, so click it instead.
It may take QUIC.cloud a few minutes to set everything up for your website, but the upside is that you don’t have to do anything yourself. Once the setup is done, you will receive an email on your registered account with QUIC.cloud. You can also refresh the page and see that it has changed.
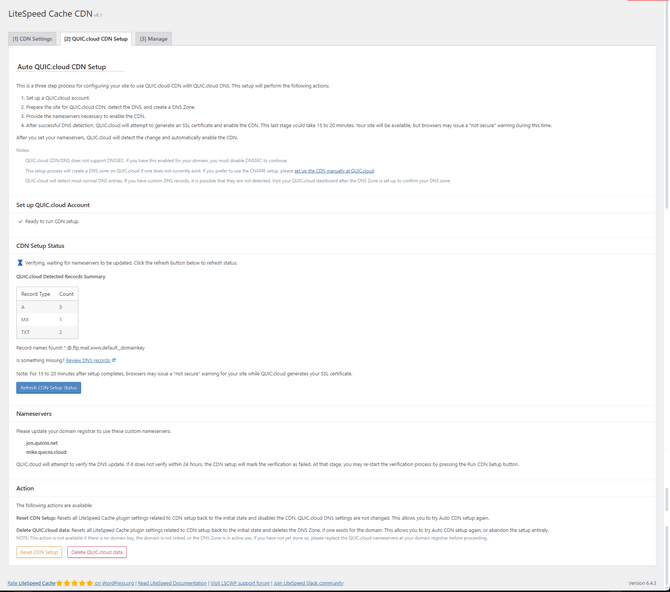
Check your email for the new Nameservers you have to assign to your domain to finalize the process.
If you are our customer, we have an excellent tutorial on changing your Nameservers via our interface right here. If not, please log into your account on the website you purchased the domain from (the Registrar) and follow their instructions to change the Nameservers. Remember that Nameserver changes can take up to 24 hours to propagate, but that shouldn’t be the case here.
While waiting, you can also click the Review DNS Records link to inspect the DNS records the setup detected on its own. Additionally, the two buttons at the bottom of the screen will allow you to either start the setup process anew or terminate it altogether.
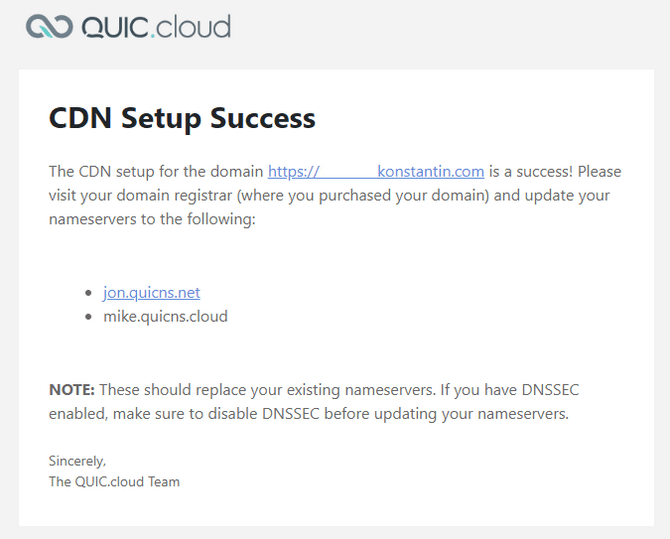
Once the Nameserver verification is completed, QUIC.cloud will also attempt to issue an SSL certificate if your domain does not have one yet. When everything is done, you will see this screen informing you the website is linked to QUIC.cloud.
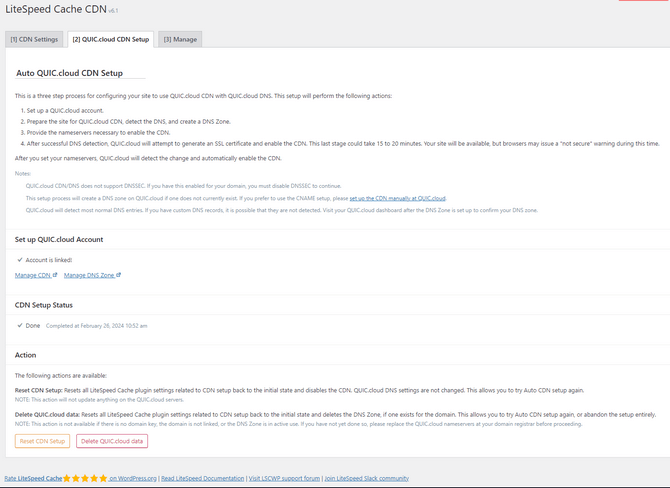
Finally, if you would like to opt out of QUIC.cloud, you can follow these steps.
- Replace the nameservers at your domain registrar so you are no longer using the QUIC.cloud Nameservers;
- Press the Delete QUIC.cloud Data button;
- Visit your QUIC.cloud Dashboard, click on this domain, navigate to Settings, and click the Delete Domain link at the bottom of the screen;
- Back in the LiteSpeed Cache Plugin, navigate to General > General Settings, clear the Domain Key field, and press the Save Changes button.
Manage
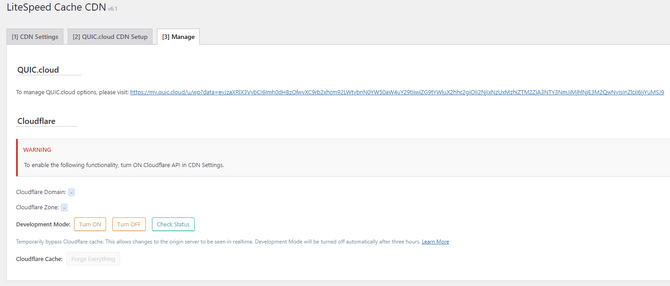
The final tab is Manage. Here, you can find a link to the QUIC.cloud dashboard, where you need to go to manage that CDN account. Additionally, if you have set up the CloudFlare CDN in the CDN Settings tab, you will be able to see the domain linked to CloudFlare, as well as the CloudFlare Zone (informational only). You can also turn Development Mode on or off if you need to bypass CloudFlare’s cache. Speaking of which, you can also purge it from here. You must head to your dashboard on CloudFlare’s website for any other configurations.
And that concludes the CDN section of the LiteSpeed Cache plugin. It is handy if you already use CloudFlare or want to start using QUIC.cloud.

WordPress Hosting
- Free WordPress Installation
- 24/7 WordPress Support
- Free Domain Transfer
- Hack-free Protection
- Fast SSD Storage
- Free WordPress Transfer
- Free CloudFlare CDN
- Immediate Activation