Install and Manage Updates
Updated on Apr 27, 2023
The WP Toolkit offers many options for managing plugins, themes, and the core files of your website. If you have seen any of our previous tutorials about plugins or themes, then you are probably well aware of what those options are. However, what if you wanted to handle updating your website on a more objective level? The WP Toolkit has you covered!
While you can update each plugin and theme – or your website's core files – individually, the WP Toolkit allows you to update everything simultaneously with just a few clicks. Whether to update everything on just one website or for all of your websites, the WP Toolkit will show you detailed information about what needs to be done. Please follow along, and we will show you exactly how to initiate Maintenance Mode, bulk-update, and configure automatic updates and Smart Update.
This post includes:
Initiate Maintenance Mode
Maintenance mode will hide your website from the public. Anyone who opens your website while in this mode will see the maintenance screen instead of the website's actual content. That is good because seeing the maintenance screen will stop the public from actually seeing and using the website. That will stop any orders, for instance, from coming in while you are working on your website; it will also prevent the public from actually seeing the changes you are working on while you are working on them.
Note
Maintenance mode is like a curtain over your website, unveiling the brand-new site underneath when lifted. It is always recommended to turn it on while updating your website (be it its core files, plugins, or themes). Such updates can sometimes make your website look different or even broken, and the maintenance mode will stop users from actually seeing that.
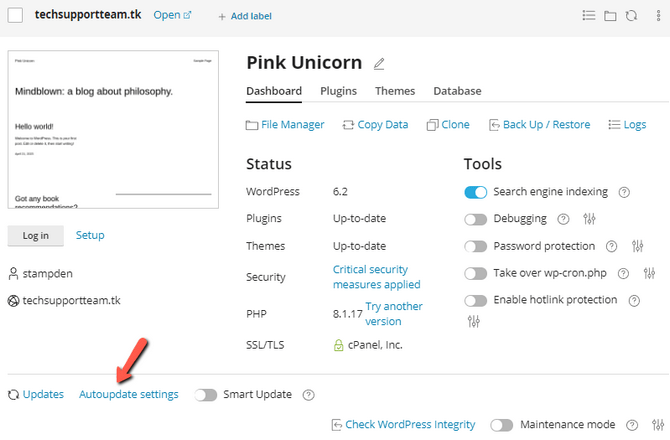
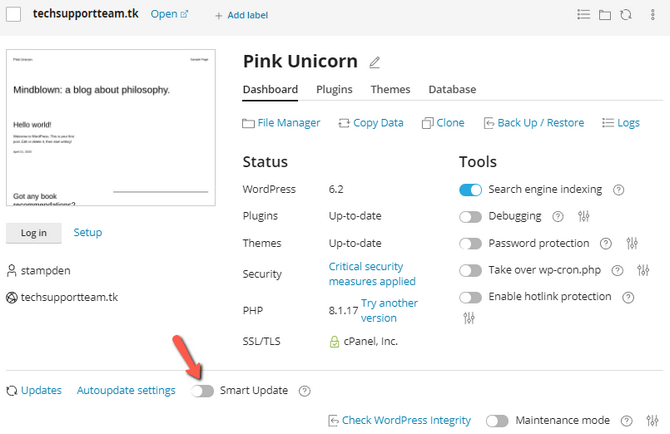
The WP Toolkit can enable maintenance mode on your website with the flick of a switch. Open the dashboard for your website, and you will see the switch there.
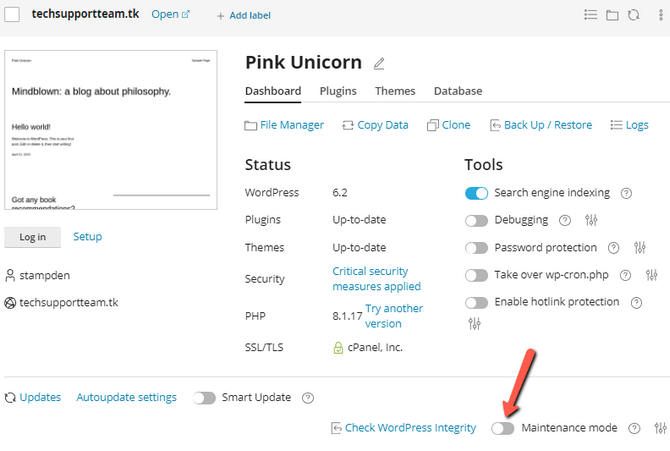
When you turn it on, the preview of the website will also change to reflect the maintenance mode. You can also see a little question mark next to it, giving you a brief blurb of what the mode entails and what it will do for your website. Next to that is the button for the maintenance mode settings as well. You can customize the maintenance mode screen with these settings.
Before you commit to them, you can click Preview, and after a few seconds, your website will open in a new browser tab and show you what the maintenance page looks like. The maintenance mode does not need to be enabled to preview the changes either. You can preview them at your leisure.
When maintenance mode is on, you can be confident that the public will not see any changes you make. That is immensely useful because it allows you to work calmly on your website without the pressure of users trying to access and interact with the website itself. Just remember to turn it off after you are done!
Scan and Install Updates
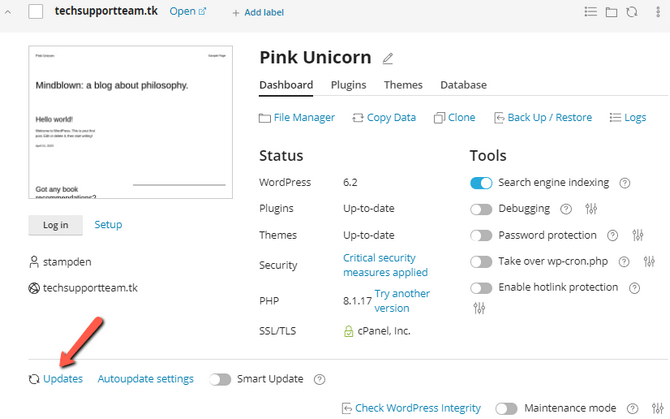
Finding out what needs updating starts here: scanning for updates. Typically, the WP Toolkit will perform that independently, but you can initiate a manual scan yourself. That can be done for an entire website or all websites currently managed by the WP Toolkit. The scanning process itself is straightforward. If you would like to scan only a single website, then click on Updates.
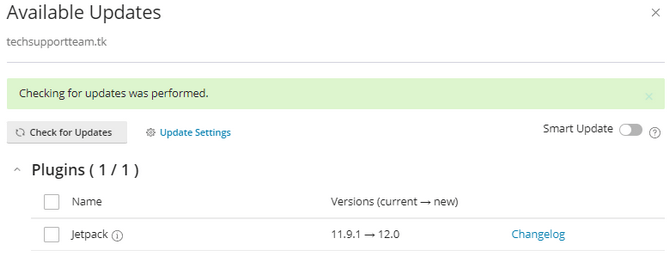
That will open a page from the left of your screen and show you any plugins, themes, or core files that need an update. As we mentioned earlier, the WP Toolkit will perform such scans independently. You can already see that one plugin needs updating in the screenshot above. If you would rather be safe, you can run an update scan yourself by clicking Check for Updates. After a few moments, you will be presented with the scan's results: a list of what needs an update. There will likely be a link to a changelog as well, in case you want to read up on what is different in this new version. Select what you want to update via the checkbox next to the item, then click Update.
The process will begin, and once it is done, you should see a message which informs you that everything was updated successfully. But what if you need to update more than one website? Click on this Updates button then.
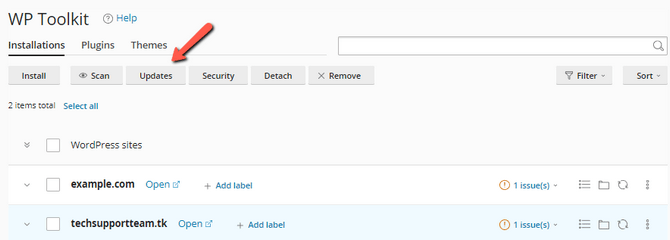
The Toolkit will run another scan and show you what websites have something that needs updating. You can also run a manual scan from Check Updates. You will see columns for each website's core files, plugins, and themes in the list. If there is a green tick, everything in that column is up-to-date. If there is a number, then something needs an update. You can click that number to get the name of what needs an update or click on the arrow under Details.

The Details page will show you more information about the items that can be updated on the website. If it looks familiar, it is because it is the same page from earlier in this tutorial. You can go back to the previous screen via the arrow in the top left or click the Update button to update only the current selection. If you want to update everything on a specific website, select it from the list in the update overview screen and click Update. That will initiate the update process for the selected websites. During the process, you will see the websites being removed from the list until you receive the success message.
And there you have it! Everything is up-to-date and done for all your websites with just a few clicks. That is the fantastic thing about the WP Toolkit: it allows you to manage multiple websites simultaneously. It removes the need to log individually into each website and perform these updates from there, which can save a lot of time.
Autoupdate Configuration and Smart Update
But what if you could completely automate the updating process and make it safe? The WP Toolkit can help with that! You can decide if the Toolkit will automatically update your website's core files, plugins, themes, or all of them! The Toolkit also has the option to test the updates first before applying them to your live website. That is the Smart Update option, and we will explore it and the automatic updates in this tutorial.
Firstly, let us discuss the Autoupdate function. It is straightforward and exactly what you would think after reading the name. It lets you decide if your website's core files, plugins, and themes will be updated automatically whenever a new version is available. As you can imagine, that can be very handy! The Autoupdate Settings is what you need to click on to begin.
This menu will show individual settings for the WordPress' core files, plugins, and themes. By default, only the core files will be updated automatically. At the same time, plugins and themes will use their individually assigned update settings. These settings are set from the website's administrative dashboard on a per-plugin or per-theme basis, but you can change that en-masse from the WP Toolkit. Here is what the Autoupdate settings look like by default.
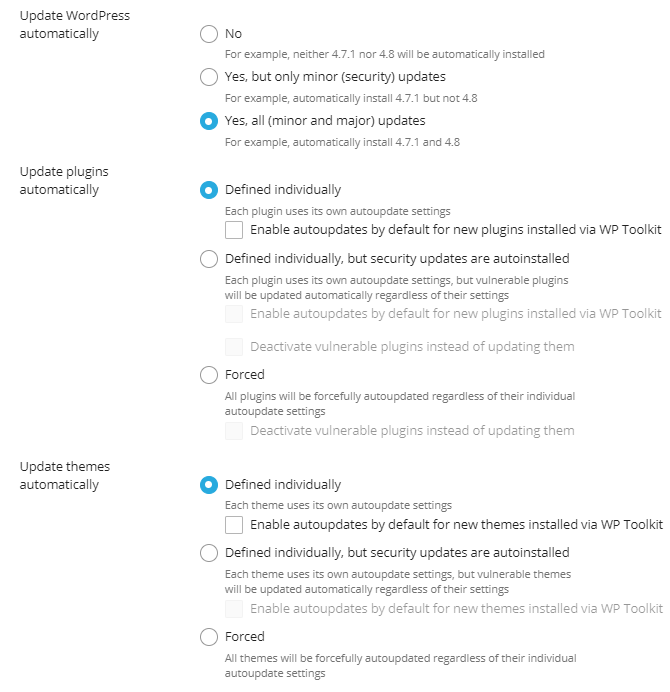
But you can change them according to your preferences. For the core files, you can choose if you want only minor (security) updates to be applied but skip the major ones. For plugins and themes, you can choose to force all updates if you want them always to be up-to-date, or you can have only minor updates installed. You can also enable automatic updates for any plugins installed via the WP Toolkit. With these settings, you can pick and choose how you want automatic updates to be handled. If you are confident that all themes and plugins won't break your website, then turning automatic updates on for them can be an easy and painless way to keep your website up-to-date.
However, if you are still wondering if something will go wrong when you perform an update, the Smart Update function will help you immensely.
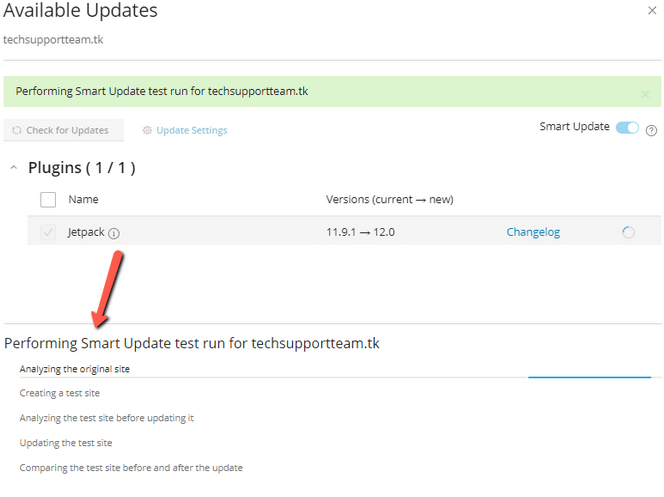
The Smart Update function will clone your website, apply the updates and then perform several checks to see if there are any errors or other issues with the website after the updates. That is an excellent bit of functionality because it will not affect your live website. Instead, it will show you what will happen if you run the updates in a controlled test environment. If everything is fine, you can apply those updates to your live site, knowing they will function without an issue. It is important to note that the Smart Update will also work for manual updates via the WP Toolkit, not just the automatic ones. We installed an outdated plugin on our website and turned SmartUpdate on to show you how it works. We then went to the Updates tool, selected our plugin, then ran the Smart Update tests. The process began, and you can see all the checks that the system is making at the bottom of the screen.
The process may take a while since the website has to get cloned first and then updated, but once it is done, you should see a screen similar to this.
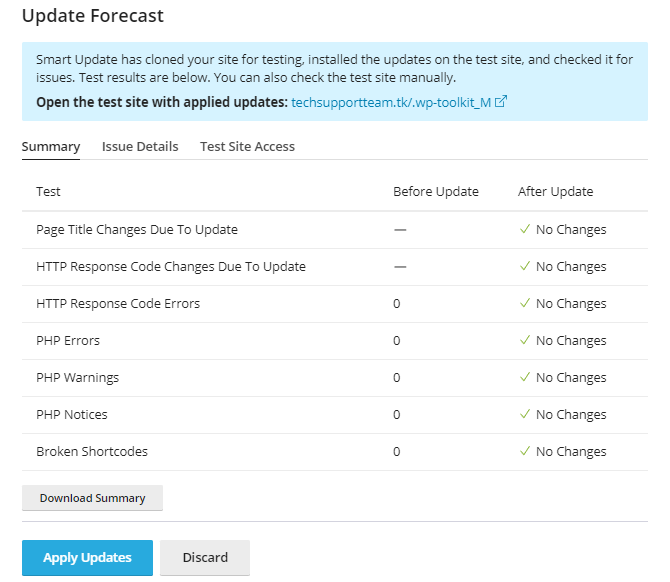
As you can see, our case has no actual warnings or errors. There is also an Issue Details tab, which will show you more in-depth information about any errors which might have arisen. Finally, the Test Site Access will allow you to actually open the clone of your website (frontend and backend) and review it further.
If everything is as per your expectations and no errors were encountered during the test, you can apply the updates from the button at the bottom of the screen. You will have to confirm your choice, and then the system will update the tested elements. Finally, the cloned website will be removed, and you should see the green message of success.
We hope you can see the power and convenience of the Autoupdate and the Smart Update functions. After selecting when you want your website's elements to be updated, turn Smart Update on and let the system do the rest. Of course, you will have to review the Smart Update test results yourself. You can do that at your convenience without actually committing to the updates themselves first. Open the WP Toolkit occasionally to determine if any new updates are being tested. Take a look at the test results, and approve the update if you are satisfied. The Smart Update is excellent even if you don't have Autoupdate turned on since it can give you a safety net when manually updating via the WP Tookit's interface. No more broken websites because something on your website doesn't play nice with the rest!

WordPress Hosting
- Free WordPress Installation
- 24/7 WordPress Support
- Free Domain Transfer
- Hack-free Protection
- Fast SSD Storage
- Free WordPress Transfer
- Free CloudFlare CDN
- Immediate Activation