How to Improve the Security of Your Website
Updated on Dec 6, 2022
WordPress is a widely distributed Opensource platform and basically everyone can have access to its default code no matter if that person is a simple user, hacker or a developer. The default code of the platform is secured enough and there are no reports recently for weak elements that might cause your website to be hacked.
In many cases however, the users or the developers are using resources which are distributed not by the authors of the platform but from 3rd parties which might seems to be quite questionable sometimes. Usually using a free resource such as plugin or a template on your website does not always mean that it will lack security or you will face similar issues with it. However commonly the free templates or plugins are not secured enough and they are providing security holes which the attackers of your website might take serious advantage from.
Basically there are few ways to deface or hack user website build with WordPress. The most commonly used method is for a malicious file to be uploaded on the website and then executed directly so it can provide a web interface to the hackers. With the help of that web interface the attackers can basically do anything with your website..
To improve the security of your WordPress, follow these steps:
Disable PHP execution
There are two directories in your WordPress that are writable by default. The /wp-includes/ directory contains themes and plug-ins which can create files on their own and the /wp-content/uploads/ directory is used by the users to upload content on your website so both of these folders must be writeable. Unfortunately, this brings security vulnerability with the PHP files in those folders. A malicious PHP file can be uploaded and executed in order to compromise your website and even the entire server on which it is situated. As changing the write permissions is not a good solution in this case, you can instead remove the execution permissions on files with the extension PHP. In this tutorial, we will show you a few ways to do this depending on your configuration, rights and specific needs using the .htaccess file or the Apache configuration file.
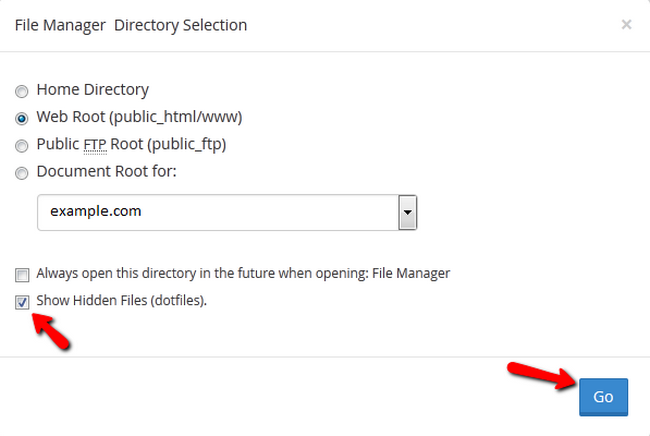
If an .htaccess file is not available for you to edit, you can create a new one via your cPanel>File Manager. Make sure to check the Show Hidden Files (dotfiles) option when selecting a directory.
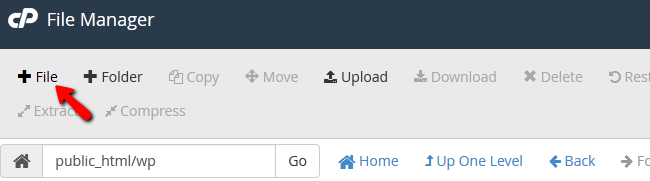
You will now need to click on the +File section.
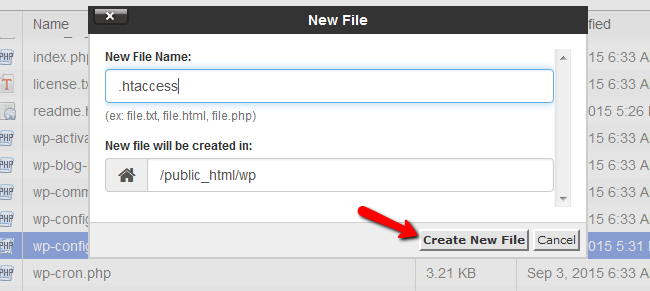
Name the file .htaccess and hit the Create New File button.
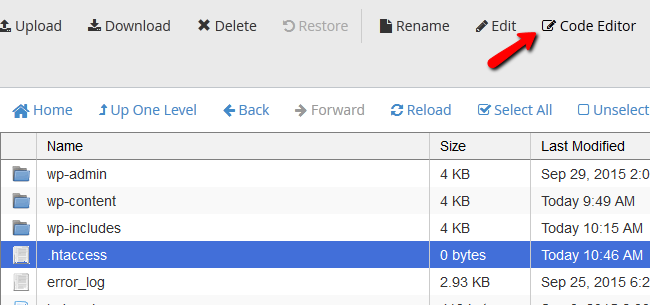
Now open the file with the Code Editor tool.
You could also create a text file named .htaccess on your local computer, fill the required lines of code and then upload the file with your favorite FTP client to the server on which your WordPress website is hosted.
More advanced users with SSH access can use this command to create a new .htaccess file in the directory they are.
vim .htaccess
Note that you can use a main .htaccess for the whole website or local .htaccess in the directory you want to change depending on what method you choose. For a local .htaccess file in the directory you don’t want the PHP files to be executed nor accessed copy the following lines in the .htaccess:
<Files *.php>
deny from all
</Files>
A similar setup but for the main .htaccess file will look like this:
<Directory /directorypath/>
   <FilesMatch "(?i)\.(php|php3?|phtml)$">
            order deny,allow
            deny from all
   </FilesMatch>
</Directory>
The following code cannot be used in an .htaccess file as it will lead to an Internal Server Error message. You can copy this to your php.ini file (the php.ini file operates on a local level and won’t affect any other directories except the one he is in):
<Directory /directorypath/>
     php_admin_value engine Off
</Directory>
Any directive type set with php_admin_value can not be overridden by .htaccess or ini_set(). To clear a previously set value use none as the value.
If you have control over the Apache configuration file (located in /usr/local/apache/conf/httpd.conf) you can use the following code to disable the handler and turn off PHP globally RemoveHandler .php
If the PHP is enabled by AddType you will need to write RemoveType .php
Note that if you want to use php_flag engine off you will have to make sure the hosting environment is suitable and you will also not be able to turn it back on by using php_flag engine on
You will need to write php_flag engine 1 to represent a positive value.
Our servers run PHP as a CGI script, so you won’t be able to use the php_flag commands in .htaccess files. If you try to do so, you'll see an internal server error message.
If you are still concerned about yourWordPress website’s security, we suggest you check our hosting service which comes with a custom build Firewall and other security layers specifically set up with one purpose – to protect your content hosted on our servers.
Protect Account Registration and Contact Forms
Since we have mentioned malicious file upload, this can be achieved if your users have the option to upload files on your website. If you are convinced that they should be allowed to you will then need to secure all of the forms on your website not only for preventing malicious files to be uploaded but also to make sure that no spam bots will use your website as a spam script and they will launch massive outgoing spam emails campaign.
This can be easily achieved by adding a reCaptcha to your WordPress based website so all of the forms such as registration or contact us forms will require from the user to enter a code displayed as an image on the page where the concrete form is located.
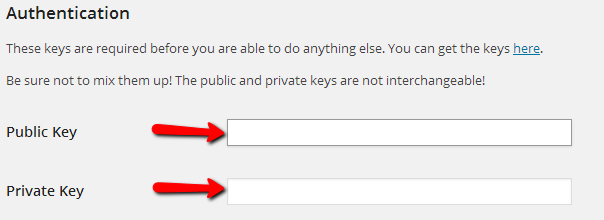
In order to activate this feature you will need to generate a pair of keys called “Public Key” and also “Private Key”. This can be easily achieved if you access the reCaptcha official page.
Then by using the Signup Now button and filling the required information you will be promptly provided with the above mentioned keys.
Now that you have the required keys you will need of course to add a plugin which will enable the feature on your website. This can be easily done if you navigate to your WordPress admin area → Plugins → Add new and search for a plugin called wp-recaptcha.
Once you install and activate the plugin you should configure its settings via your WordPress admin area → Settings → WP-reCAPTCHA.
At that page you will need of course to add the Public and Private Keys you have received when you were signing up for the reCaptcha service.
By default the reCaptcha will be enabled for the Comments and the Registration features of your website and you should keep it that way so you will not need to change any other settings on this page. Therefore simply navigate to the bottom of the page and use the Save reCAPTCHA Changes button to save the changes so the plugin can be working properly.
Activate Akismet Plugin
Akismet is plugin provided with the default WordPress setup and it serves for filtering the spam comments/posts on your website. In order to activate the plugin since it is already installed on your WordPress based website you will need to login into your WordPress admin area and navigate to Plugins → Installed Plugins. Once there you should simply use the Activate link bellow the name of the Akismet plugin.

Once the plugin is activated you will notice a large banner appearing at the top of your admin area. If you click on the button “Activate your Akismet account” you will be redirected to a page where you should choose between the options to “Create a new Akismet Key” or you can choose the option “I already have a key”. If you choose the create a new key you will be redirected to the Akismet home page where you will be able to register an account and to receive a key for your plugin. Once you have the key return to the same page in your admin area where you have just chosen to create a new key and click on the other option – “I already have a key” so you can input the Akismet API key on the next page.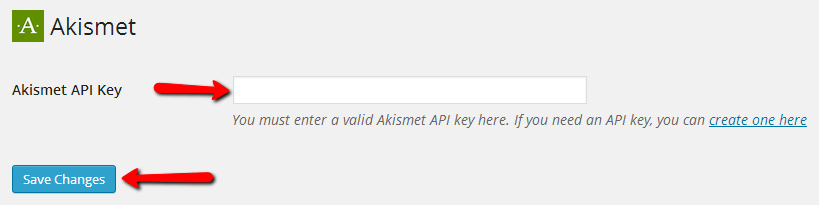
Once you save the changes you are done configuring the plugin and your Akismet guardian will be activated and it will guard your website from spam comments or posts.
With the security methods discussed in this tutorial you will be able to increase the security of your WordPress website!

WordPress Hosting
- Free WordPress Installation
- 24/7 WordPress Support
- Free Domain Transfer
- Hack-free Protection
- Fast SSD Storage
- Free WordPress Transfer
- Free CloudFlare CDN
- Immediate Activation