How to Create a Gallery Using NextGEN Gallery Plugin
Updated on Dec 6, 2022
The NextGEN Gallery plugin is a simple WordPress plugin that will allow you to create a stunning web gallery with just a few clicks. You can use the additional button added to the editor of these components to include the created galleries in pages or posts, and you can also create galleries on the fly without the need for predefined galleries.
This tutorial will teach you how to create your first gallery page as well as how to manage the actual gallery.
How to Install the NextGEN Gallery plugin
First, we will begin with the installation process of the NextGEN Gallery plugin. The process is fairly simple. However, if you are not quite sure how it should be handled, you should check another tutorial from our WordPress series related to the management of your Plugins.
Once you access the plugin installation page, you will need to:
- Find the plugin using the search tool by entering the name of the plugin – NextGEN Gallery.
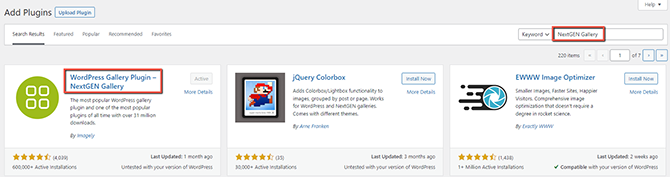
- Install and activate the plugin.
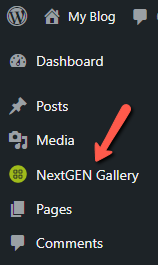
- You should be able to notice the additional menu item called NextGEN Gallery appearing in the navigation menu of your admin area.
How to Create a New Gallery with NextGEN Gallery
Once you have installed the NextGEN Gallery plugin, you can create your first gallery. To do this, follow these steps:
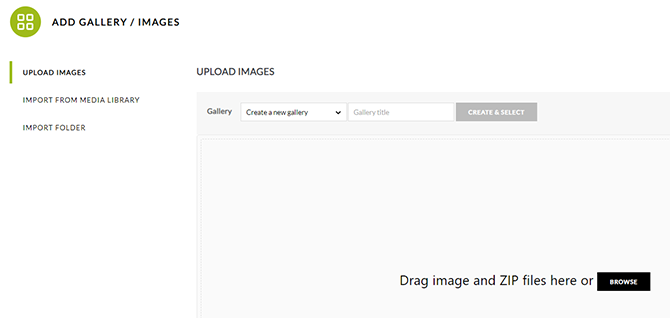
- Go to the NextGEN Gallery settings in your admin panel;
- Expand the settings tab and click on Add/Gallery Images;
- In the next screen, input your Gallery Name and click on Create and Select.
How to Upload & Add Images to NextGEN Gallery
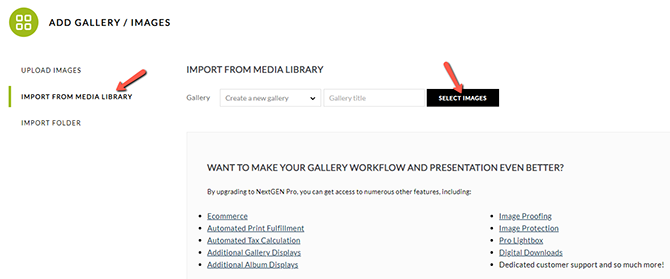
Adding images to your galleries is easy, as all you need to do is add them using various upload options. You can choose between:
- Uploading individual images/pictures or .zip files via drag-and-drop:
- Choose images from your WordPress Media Library;
- Import a Folder of Images;
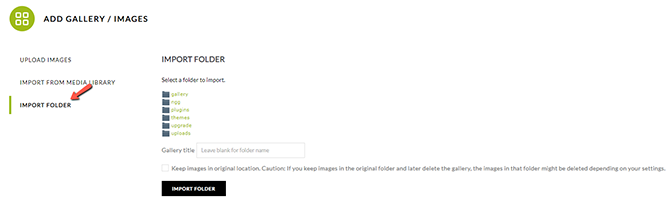
NextGEN Gallery will also create thumbnails for each image according to the settings you have configured in the Gallery Options screen.
How To Add NextGEN Gallery To Pages & Posts
After you have installed the NextGEN Gallery plugin, you’ll find a small icon when you click on the + in your Block Editor:
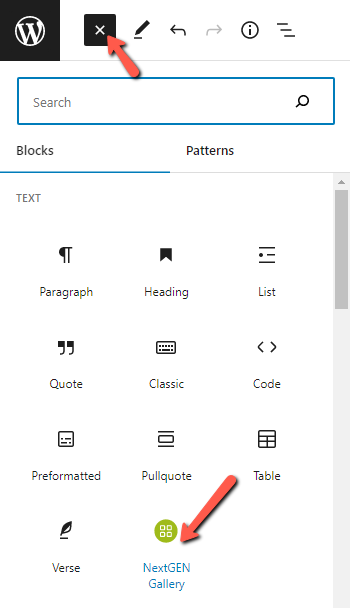
Click on the icon to add a NextGEN Gallery block to your posts/pages. Simple as that!
Congratulations! Now you know how to install, activate, and use the NextGEN Gallery plugin on your WordPress website. Take advantage of all the options it provides for you.

WordPress Hosting
- Free WordPress Installation
- 24/7 WordPress Support
- Free Domain Transfer
- Hack-free Protection
- Fast SSD Storage
- Free WordPress Transfer
- Free CloudFlare CDN
- Immediate Activation