Toolkit Additional Features
Updated on Apr 27, 2023
The WP Toolkit has many great things going for it, and they can be summed up in a few large categories. However, there are a few more minor, individual features that are also excellent but don't really fit in any of those more significant categories. That is why we will elaborate on them here. Please follow along to find out about all the various features that the WP Toolkit has to offer.
This post includes:
Scan For Existing WordPress Websites
The WP Toolkit will automatically add any WordPress websites installed through it to its dashboard. If a website was added to your hosting plan differently, though – such as manually installing WordPress or moving the website, then the WP Toolkit will not automatically detect it and add it to its list. That is why the Scan button exists.
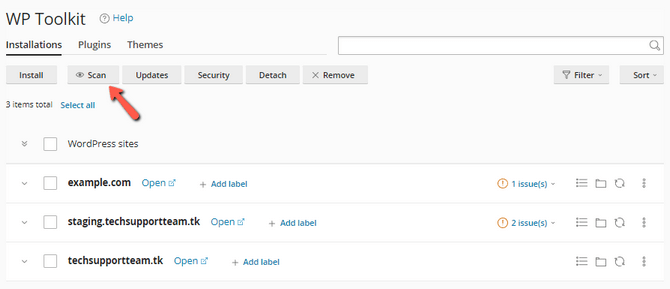
Using it will initiate a scan that will review your entire hosting plan and look for any WordPress websites that still need to be added to the WP Toolkit. Once the scan is complete, any WordPress installations that aren't added to the Toolkit will appear in the list of websites.
However, if scanning is not adding any websites to your list, please check the websites' directories. If there is a .wp-toolkit-ignore file, then you should delete it. What this file does – as the name suggests – is it tells the WP Toolkit to ignore this website and not add it to the list. After removing the file, please run another scan; your website should appear without issues.
Detach a Website
If at any point you do not wish your WordPress website to be managed by the WP Toolkit, then you can use the Detach button to remove it.
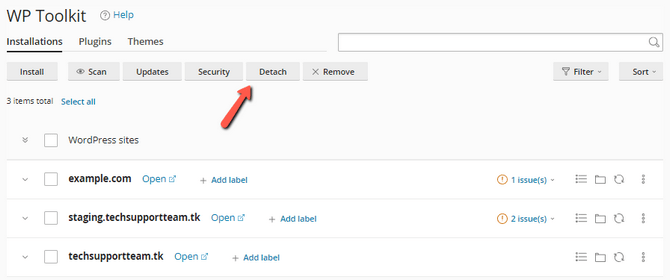
That will not delete the website itself, though. The website will remain intact and will only be removed from the WP Toolkit's dashboard. It will no longer appear on the website list but will still be fully accessible over the Internet. Something to note here is that if you detach your website, the system will create a file in the website's directory. This file is called .wp-toolkit-ignore and will do as the name suggests: when scanning for websites with the WP Toolkit, this website, in particular, will be ignored. That is useful if you want only specific websites managed by the Toolkit while others remain disconnected from it.
Change Admin Password and Email
Sometimes we forget what a website's administrative password is. It happens to all of us, and we are all familiar with that feeling of helplessness from being unable to log into the website. The WP Toolkit is here to help! It is possible to generate a new administrative password for your admin user (and change the admin email) via the Setup button.
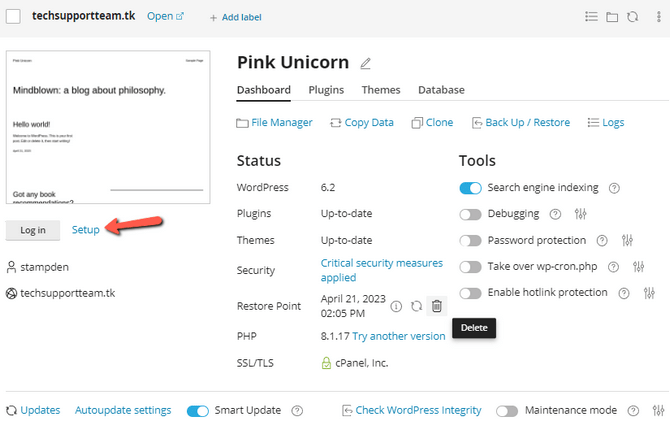
Clicking it will open a new page from the left, and in it, you will see the following options.
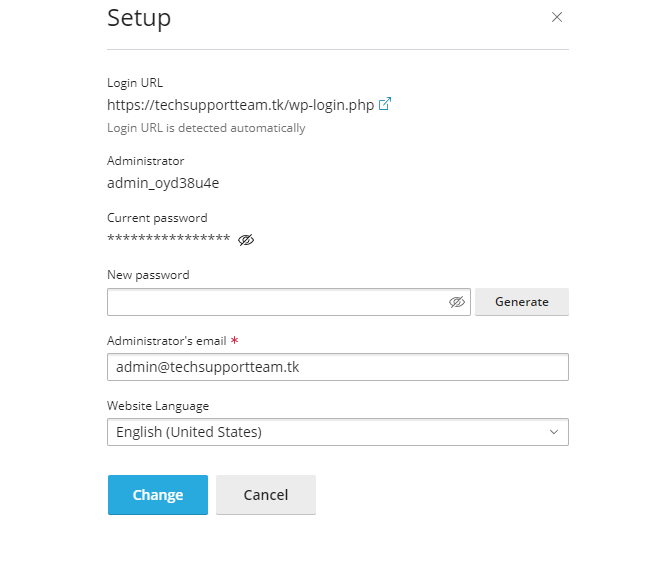
You will see your website’s URL and admin user, and you can click on the eye icon next to the password to reveal it. That is a straightforward way to recover your administrative password. If you would like to change it, you can also do that from this screen. Type in the new password you wish to use (or use the generator) and click Change. The same goes for the admin email and the website's language. The WP Toolkit can put an end to forgotten passwords with ease!
Disable Search Engine Indexing
Suppose your website is not ready for the public, and you would prefer it if people can't access it for now. You have already turned on the Maintenance mode, just to be safe. However, your website is still getting traffic for some reason, even though you haven't told anyone about it. What is likely happening here is that search engines are indexing your website, and users are opening it at random because it appears in search results. Fortunately for you, the WP Toolkit comes with the option to discourage search engine bots from indexing your website. This way, your website will not appear in search results, therefore users won't find it randomly. You can find the switch to turn indexing on or off in the WP Toolkit dashboard for your respective site.
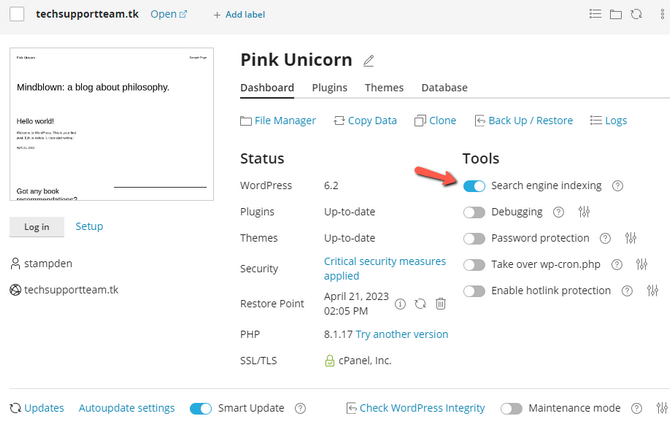
Indexing is enabled in our screenshot, but if you want to turn it off, flick the switch, and search engine bots will be discouraged from accessing and indexing your website. Additionally, you can click on the i symbol next to the switch, where you will find a short description of what exactly happens when you use it.
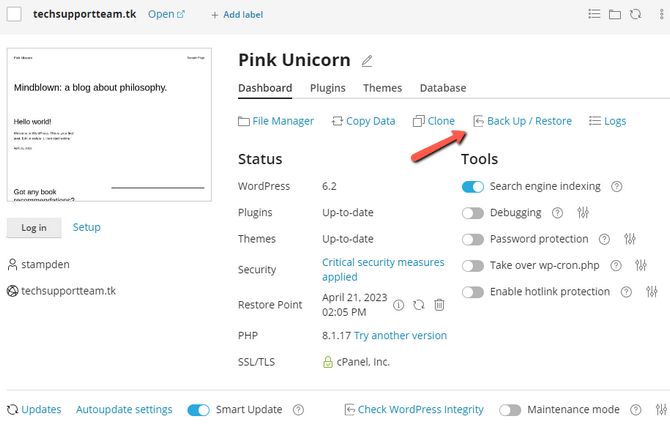
Backup and Restore
The WP Toolkit comes with the option to create backups of your website and restore it from those backups. Of course, our hosting services also come with automated daily backups. Still, the WP Toolkit allows you to create backups on the spot.
Note
Having backups of your website is always a good thing. You never know when a plugin or a theme will update and break everything; or anything else out of a thousand different things that can happen to damage your website. Even if something does happen, a backup can very quickly and painlessly resolve such issues. It is not just that you can restore your website to how it was before the issues arose, but a backup will save you time and money from having to troubleshoot the issue on the spot.
The Backup/Restore button is located in your website's dashboard within the WP Toolkit.
You will see the directory where the backups are stored. Click on Back Up, and the generation process will begin. Depending on your website's size, it might take a few minutes. When completed, you will see the newly generated backup. You also have three options on what to do with it: restore your website, download the backup, or delete the backup.
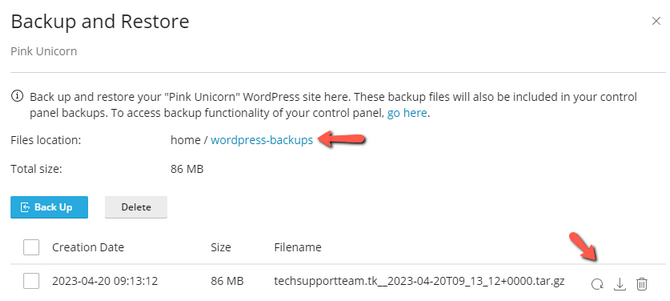
If you click Download you will be taken to the File Manager, in the directory where the backup is, and you can right-click it to begin the download process. You will download a .TAR.GZ file containing all of your website's files and directories, as well as its database as an .SQL file.
The Backup/Restore is best suited if you want to change your website and need a backup of it immediately. Using it will provide you with a safety net, so you can revert to your old website if something doesn't quite work with your changes.
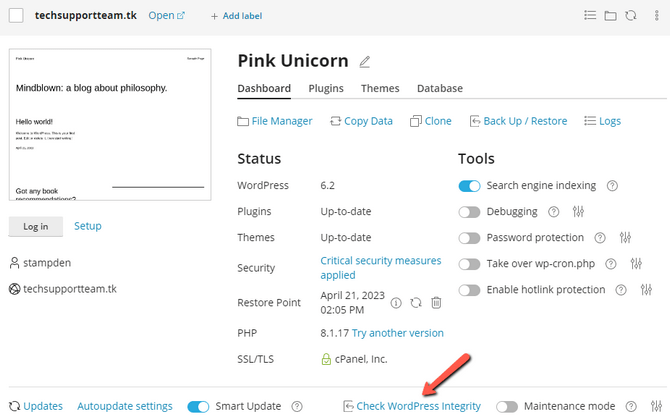
Verify Integrity
The WP Toolkit can check the integrity of the WordPress core files. That is a handy feature if you suspect something is not quite right with your website's core files. You can start the verification from the Check WordPress Integrity button.
A window with two main options will appear: Verify Checksums or Reinstall WordPress Core. The one that will check the integrity of the files is the first one: Verify Checksums. The other one will reinstall WordPress' core files, as the name suggests. The verification can help you with any harmful code in your website's core files or if any of them are corrupted. The WP Toolkit will detect them and then generate a report for you. If any files need replacing, you can use the Reinstall WordPress Core button to fix the broken files.
It is important to note that reinstalling the core files will affect only them: the system will not touch any content you have created or uploaded in any way. Your website's content will be unaffected by this.
Update Website URL
That is a tool within the WP Toolkit, which is available from the three dots next to your selected website.
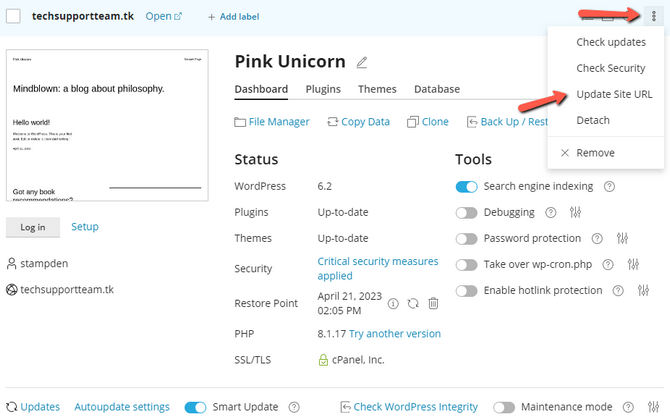
That can update the website's URL within the WP Toolkit. It is crucial to make this distinction here. It will not change the URL the website is currently using. It will only change the URL which appears in the WP Toolkit. Several methods exist to change a website's URL, all done outside of the WP Toolkit.

WordPress Hosting
- Free WordPress Installation
- 24/7 WordPress Support
- Free Domain Transfer
- Hack-free Protection
- Fast SSD Storage
- Free WordPress Transfer
- Free CloudFlare CDN
- Immediate Activation