WordPress Tools
Updated on Jul 10, 2025
The Tools section of the WordPress dashboard contains several valuable functions that will make your life as an administrator easier. These revolve around moving content from one website to another, showing invaluable site health information, managing user data, setting up a multisite, and directly editing theme or plugin code.
This post includes:
Import and Export
Sometimes, you will need to move your website’s content to a different website. Of course, re-creating that content from scratch is often out of the question and would take simply too much time to accomplish. Fortunately, WordPress has the tools to make those operations incredibly easy.
Firstly, administrators can export posts, pages, and media files directly from their websites to a file. That is done via the Export page in the Tools section.
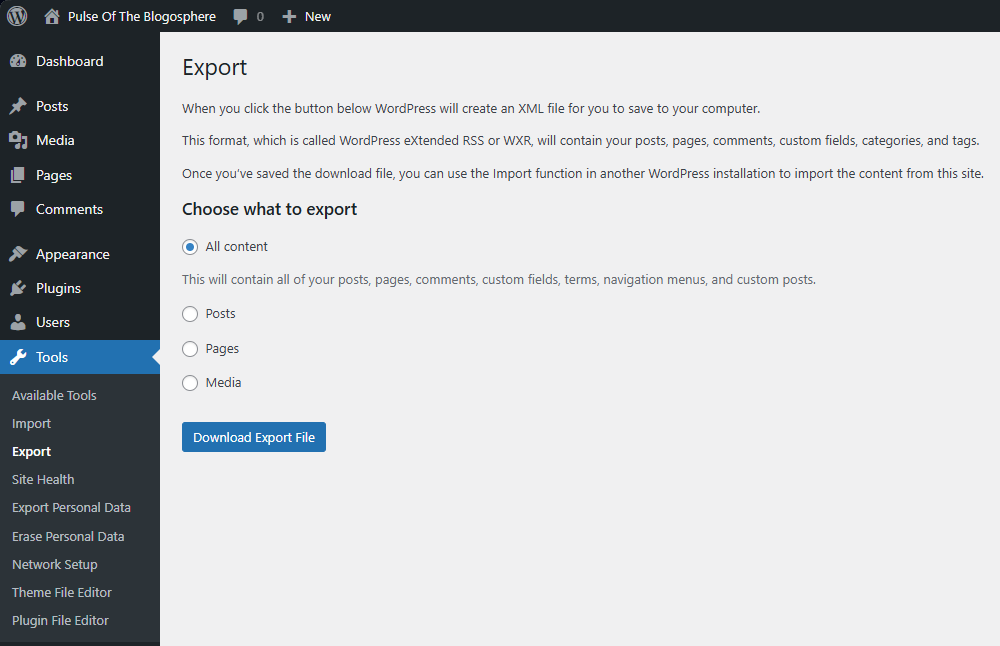
Clicking on Download Export File (after choosing what you want to export) will, as the button suggests, download a file that you can then use on another website once you have the file, head to the Import page in Tools.
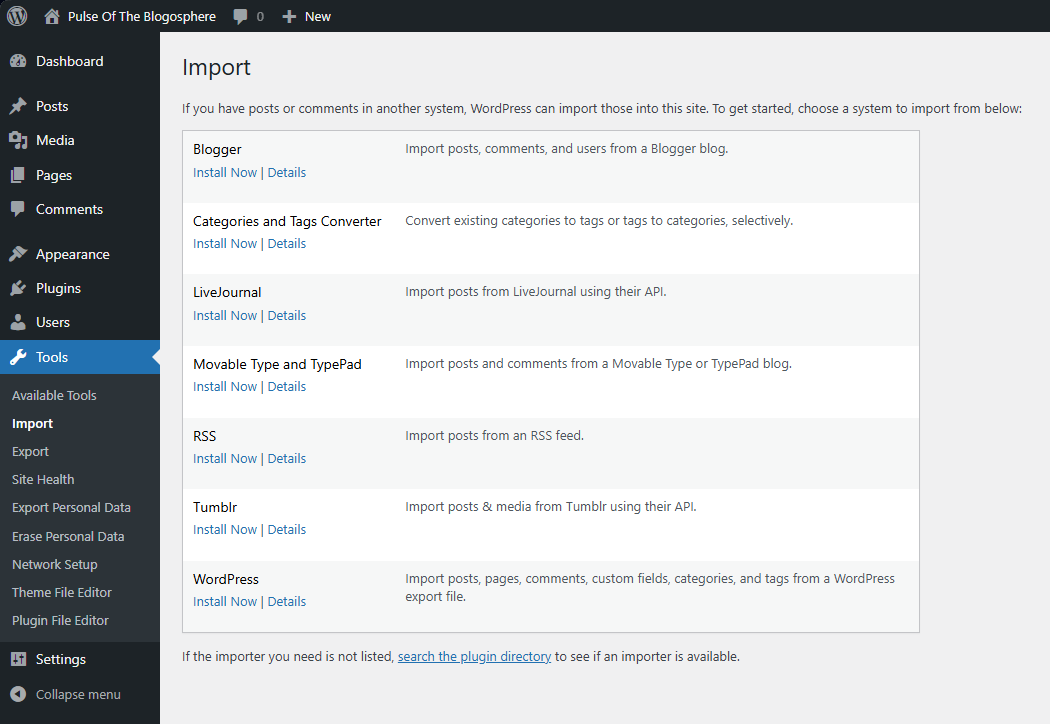
As you can see from the screenshot above, there are several “importers” you can use, depending on where you are importing from or what. As the disclaimer at the bottom says, you can check the plugin store for a different importer if the one you are looking for is not available.
Since we exported a WordPress file, we will install the WordPress importer. You can click Details next to each to learn more about them. After installation, the Install Now button will change to Run Importer. Simply upload your file on the next page and WordPress will do the rest.
You might be prompted to assign content to a new user (if that content already has an author) or to an existing user on the website. Nonetheless, once the process is completed, you will see a message informing you what was imported or if any errors occurred.
It is that easy to move content from one website to another. However, there is one caveat: the size of the import file you are allowed to upload is determined by your host's upload limit. You can check out our guide on changing it on our services here.
Site Health
The Site Health page is one of the most vital in the WordPress dashboard. It shows invaluable information not only about the status of your website, but also about the environment it is in. The page offers a diagnosis of your site’s health and status and will show you anything that requires your attention. It is split in two tabs.
Status
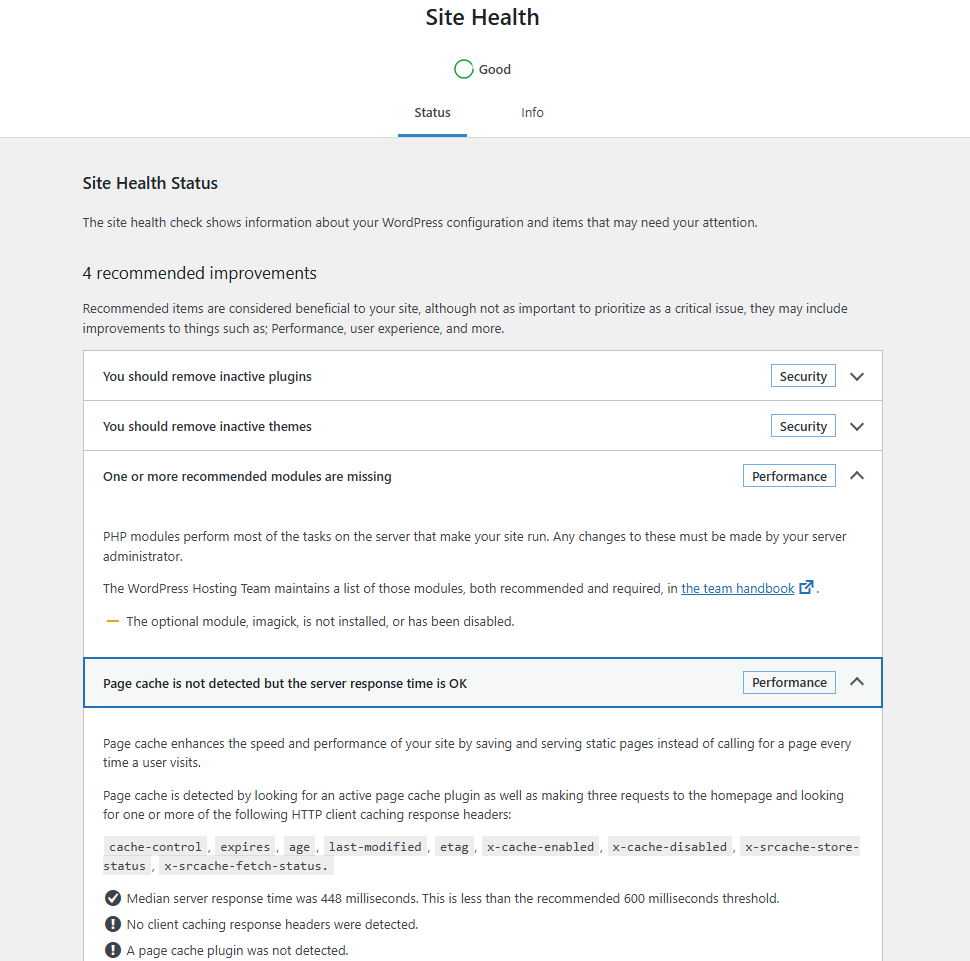
The Status tab shows critical information about the WordPress installation itself. Here, you will see various recommendations or essential issues that need resolving. For example, in the screenshot above, the system tells us that we should enable the imagick module for PHP and that we have no caching plugin. There are also suggestions for removing inactive plugins and themes for security reasons.
On the other hand, a critical issue would be that the upload limit is set to 0, meaning you cannot upload any media to your website. Another example is that the required PHP modules that WordPress must have available in order to function properly are missing.
Info
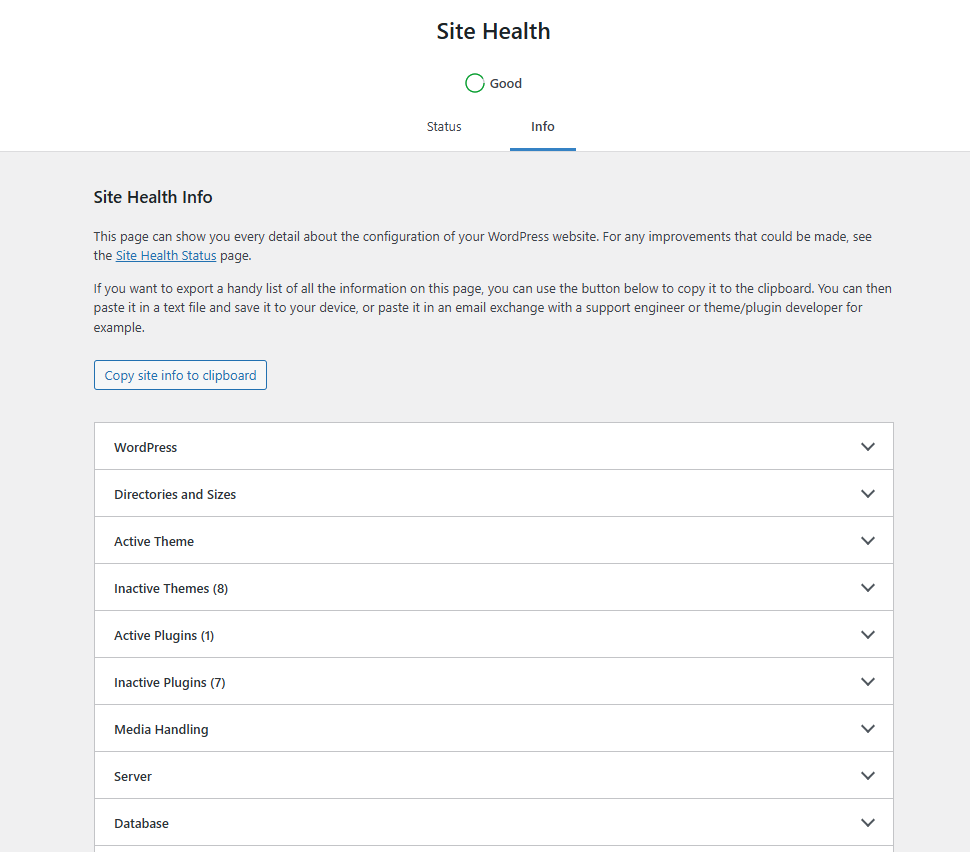
The Info tab in the Site Health section provides a detailed view of the WordPress and server configuration. You can find information about the WordPress version, server OS and configuration, PHP variables, and database details here.
In the screenshot above, you can see all the various tabs that are available. Unlike the Status tab, you will not get any alerts or suggestions on how to improve your website here, nor can you change any of the server’s configurations.
This screen is purely for information, which is immensely useful. It is a singular, consolidated place where you can look up almost anything you could ever need about your WordPress configuration and the server your site is on.
Export and Erase Personal Data

As you already know, WordPress is often used for websites that allow user registration. That in itself means that at least some personal information will be gathered on those registered users. Because of that, WordPress introduced means of exporting or erasing user data so website owners have an easier time complying with local laws or regulations.
For example, in the European Union, GDPR has Article 17, which gives users the right to control the erasure of their personal data. That means any website that wants to operate in the EU must allow its users to erase their personal data from its database.
These two options work similarly. In order to export or erase user data, administrators must first ask the account owner for permission. That will not only ensure the correct account is approached but also that the request is legitimate. If it is not, the account owner will likely disregard the email or check in with the admins to find out what is happening. Below, you can find out what each email would look like.
Howdy,
A request has been made to perform the following action on your account:
Erase Personal Data
To confirm this, please click on the following link:
https://<site_address>/wp-login.php?action=confirmaction&request_id=120&confirm_key=4Ouy5xJDptm4aLwcJIAA
You can safely ignore and delete this email if you do not want to
take this action.
This email has been sent to [email protected].
Regards,
All at <site_name>
http://<site_address>/
Howdy,
A request has been made to perform the following action on your account:
Export Personal Data
To confirm this, please click on the following link:
https://<site_address>/wp-login.php?action=confirmaction&request_id=94&confirm_key=99rqZB4CcRct8JwL55Ov
You can safely ignore and delete this email if you do not want to
take this action.
This email has been sent to [email protected].
Regards,
All at <site_name>
http://<site_address>/
As you can see, each email contains a link that users must click to continue with their request. Once they click the link, the administrator will see their confirmation in the table at the bottom of the page, as you can see in the screenshot above. That unlocks the option to either erase the user’s personal data or send it to them as a .zip file.
When that is done, the request can be safely deleted. There is an alternative option here to forcibly delete the user’s data after the request has been sent, prior to the user even clicking the link. User data can also be manually downloaded to the admin’s computer once the request has been sent. We do not recommend doing either of these actions unless they are absolutely necessary. It is better to wait for the user’s confirmation.
These two options should make complying with local laws and regulations much easier than performing actions like that manually.
Network Setup
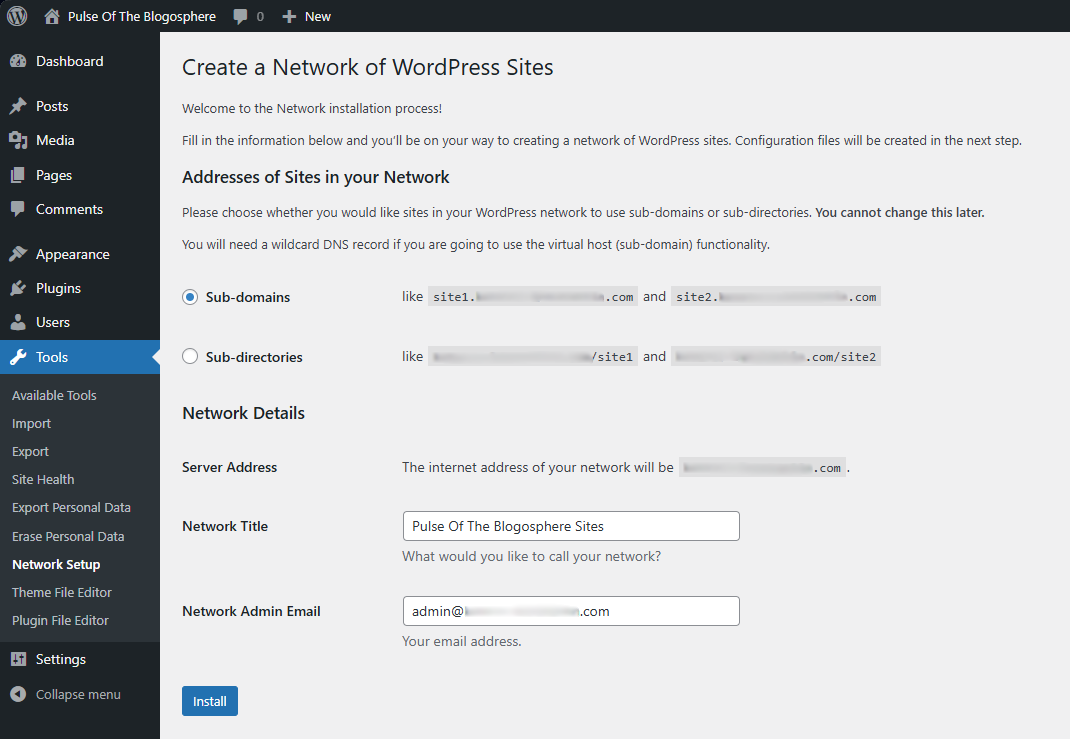
The Network Setup page of the Tools section in the WordPress dashboard is used to create a network of WordPress websites, also known as a multisite.
A multisite is a network of subsites under one central website. This feature is useful when controlling multiple websites from one dashboard. It is also convenient because the network shares the same file system, database, and variations of the same domain, making managing all of them much easier than if they were separate websites.
This page in the dashboard is where you can set up your network of websites. Before doing that, however, you must navigate to the wp-config.php file in the root WordPress directory. In it, add the following line to the bottom.
define('WP_ALLOW_MULTISITE', true);
If the line already exists, ensure that the value is set to true. Once that is done, you can go back to your WordPress dashboard, configure the multisite network, and then install it. We recommend using subdomains for a more efficient website structure.
Theme and Plugin File Editors
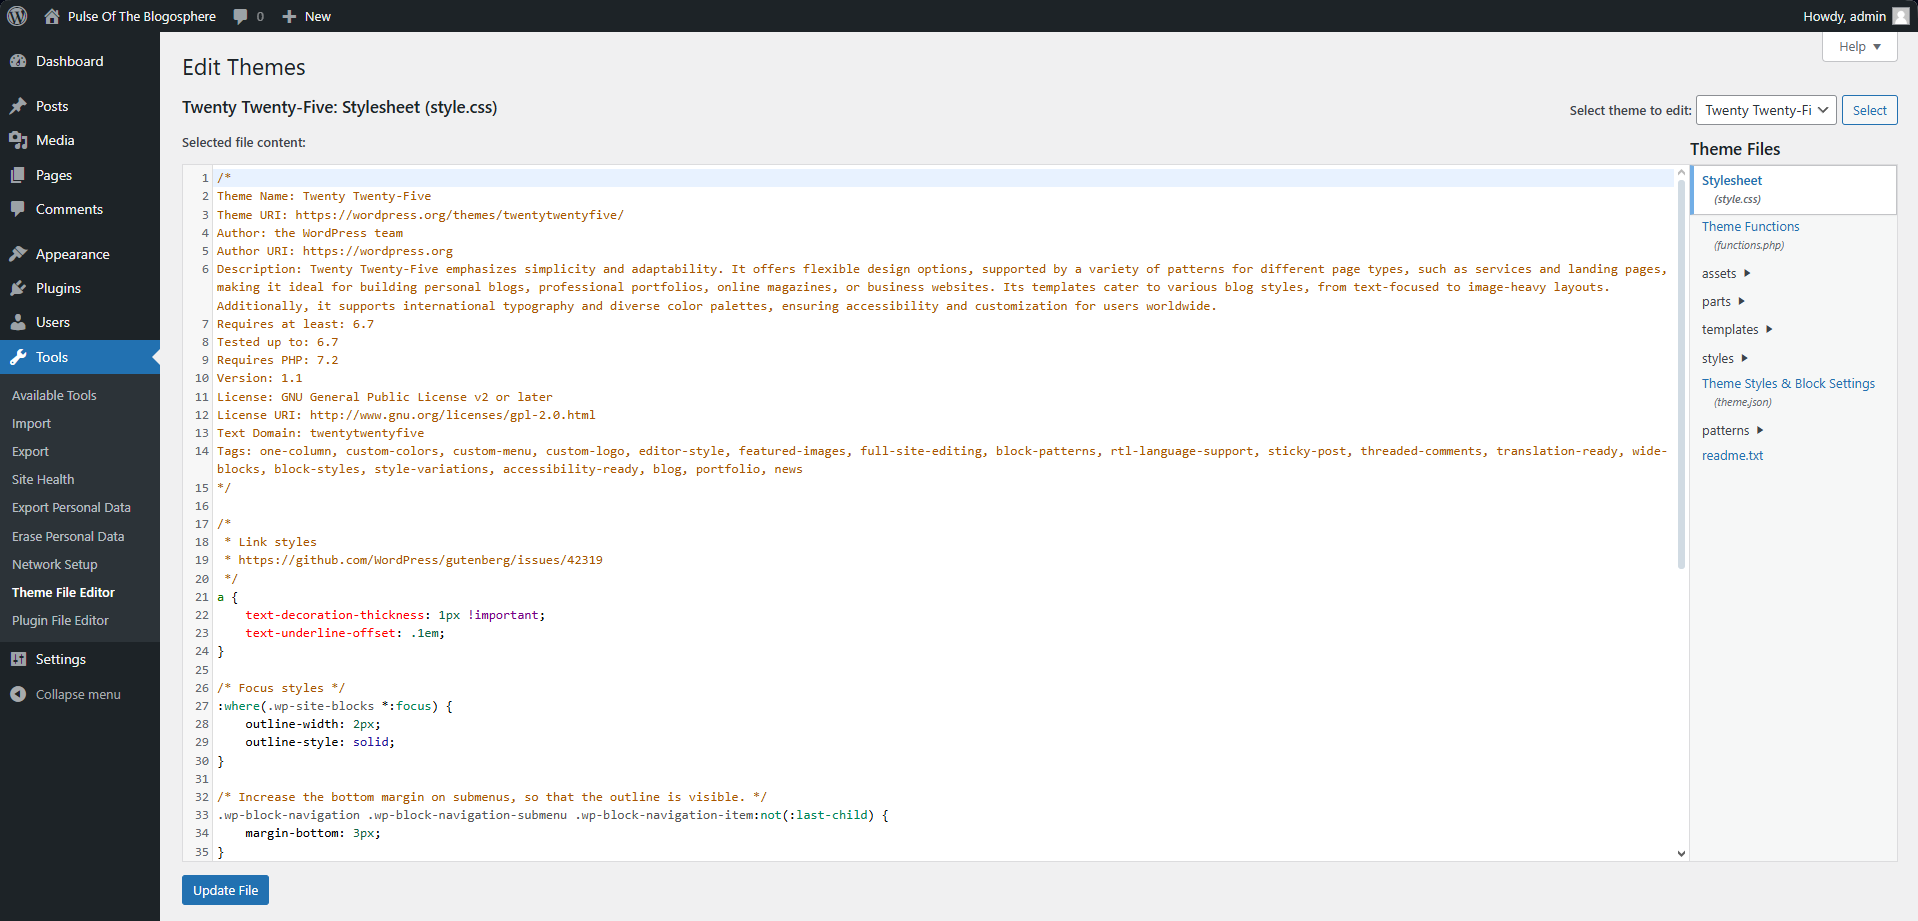
The final two pages of the Tools section in the WordPress dashboard are the Theme File Editor and Plugin File Editor.
These pages allow you to directly edit the files of your themes or plugins and change the code as you require. However, if you are not familiar with how themes or plugins are coded or are not certain how to edit the code itself, we recommend not changing anything here. Saving the wrong piece of code might break the theme or plugin, which can cause instability or issues for your website.
The interface itself is very straightforward. The code editor is in the center of the screen, and the files for the selected theme or plugin are on the right. Finally, to select a plugin or a theme, use the dropdown menu at the top right. When you have found the one you need, click on Select, and the interface will refresh to that theme or plugin.
This is a very handy feature, but only experienced users should use it. These two are also the final options in the Tools section of the WordPress dashboard. As you can see, WordPress offers many neat options and functionalities to its administrators.

WordPress Hosting
- Free WordPress Installation
- 24/7 WordPress Support
- Free Domain Transfer
- Hack-free Protection
- Fast SSD Storage
- Free WordPress Transfer
- Free CloudFlare CDN
- Immediate Activation