How to Integrate Google Maps in WordPress
Updated on Dec 6, 2022
Based on the map service offered by Google Maps, a map added to your website might serve to quickly exhibit a place to your viewers. This part of our WordPress tutorial will demonstrate both how to precisely implement the map code on your website so that the map will display and how to produce the code needed for the map to be shown.
Since we will be using widgets in this tutorial, you should consider reading our tutorial for managing the widgets on your website.
To integrate Google Maps in WordPress, you need to:
step
How to Generate a Map Code
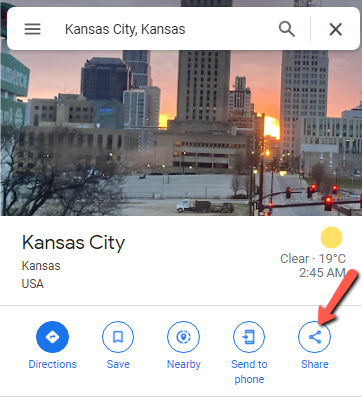
- You must find the location you want to display on your website on the official Google Maps page in order for the map code to be generated. The map of Kansas City, Kansas, USA, will be used for the purposes of this tutorial.

- Use the Share link in Google Maps:
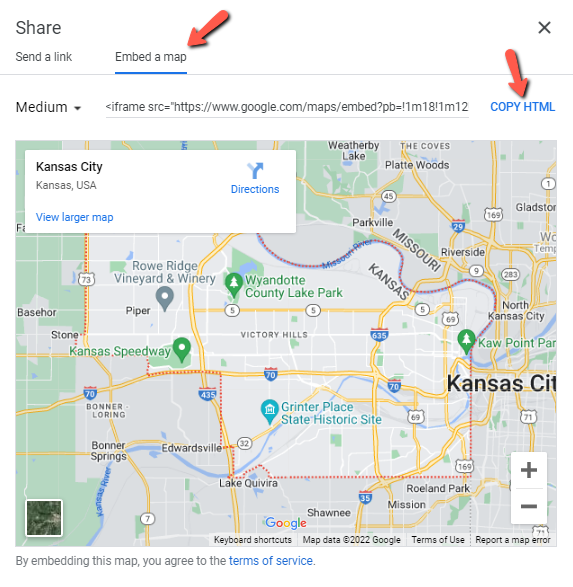
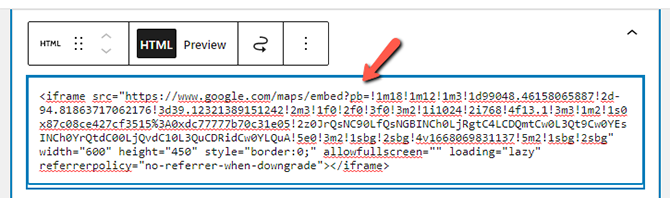
- Click on Embed a map, and then copy the HTML code of the map so you can embed it in your WordPress site:
step
How to Add the Map Code in WordPress
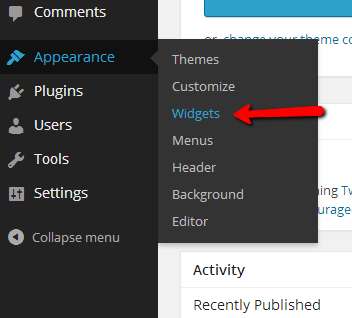
- Once you have the code, go to Appearance → Widgets in your WordPress admin area after logging in.
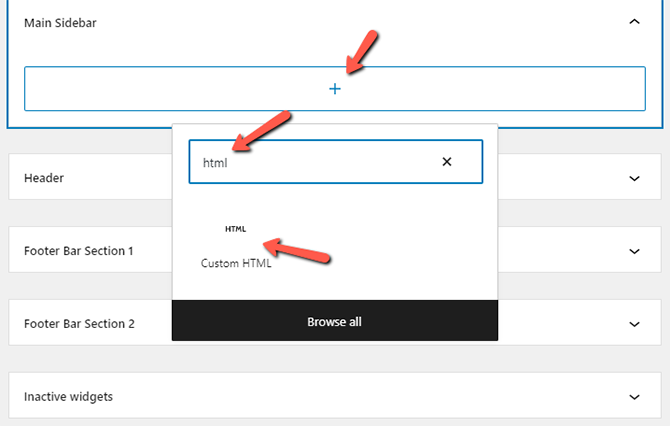
- On the widgets' home page, you must decide where you want the map to be displayed while taking into account the supported locations for your widgets. For us, the menu area that is supported is the Sidebar.
- Simply add a block widget for Custom HTML to the sidebar or other area where you want the map to appear now. Let's show the map in the Sidebar area as an example. We are introducing a Custom HTML type widget to serve this purpose.
- Paste the already copied map code (from Google Maps) into the widget's content field, as seen above, for it to become active. When you are finished, simply click the Update button, and your widget and map will be stored and displayed on your website:
Congratulations, you have successfully added the Google Map service to your website!
On this page...

WordPress Hosting
- Free WordPress Installation
- 24/7 WordPress Support
- Free Domain Transfer
- Hack-free Protection
- Fast SSD Storage
- Free WordPress Transfer
- Free CloudFlare CDN
- Immediate Activation