How to Edit the WordPress Header
Updated on Jul 8, 2025
The header of a website is one of the most important elements of its layout. It is the top section of a website (ergo the name), that will appear on every page. It is often used to display key elements such as the website’s logo, a navigation bar, contact info, etc. More often than not, it is used as an anchor for links to significant pages on the website. Here, take our header for example.

As you can see, we have a few very useful links in there: a drop-down with all our services, our plans and pricing page and about pages, a button to our login page, etc. This is what the header is typically used for and serves as an anchor of information for any user since it is a constant on the page.
Since it is a major element of any website, you may want to edit yours as soon as you have the chance. That is why this part of our WordPress tutorial will focus on exactly that task. Fortunately, WordPress is famous for how easy it is to work with, so the process of editing your website’s header is rather straightforward.
We will be using the Twenty Twenty-five theme for our examples. It is an excellent starting point for anyone who wants to learn how to work with WordPress and fully supports the block editor (another thing WordPress is famous for). The reason we will focus on a block theme is because the block editor is the future of WordPress. It has been getting updates ever since it was released. There are still some popular “classic” themes, and we will briefly show you how to edit their headers, but the block editor and its themes is what WordPress (and we) is focusing on.
This post includes:
Editing the Header
As we mentioned in the beginning, we will be using the Twenty Twenty-five theme for this tutorial. It is a minimalistic but robust theme that will be an awesome foundation for our website. It comes with plenty of patterns, styles and themes to get you started, all while being fully customizable. However, the steps we will outline should apply to most, if not all, block themes.
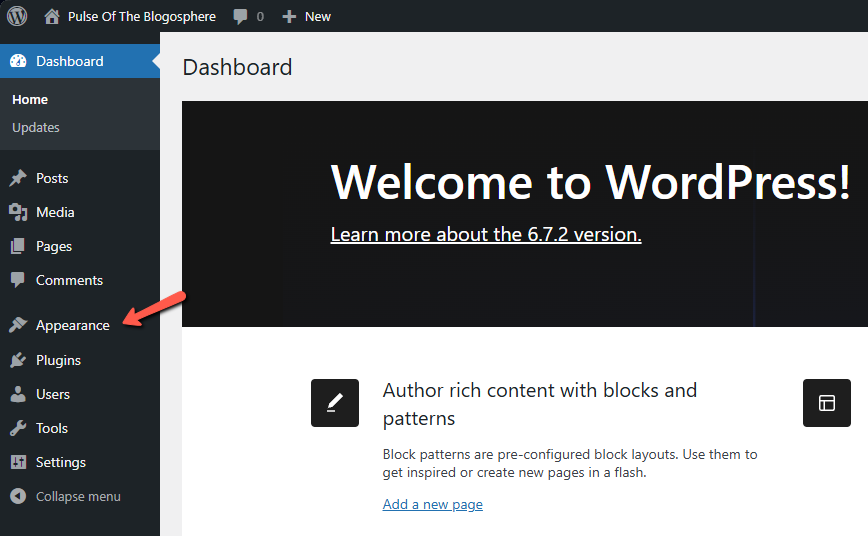
The reason for that is because we will be primarily working with the Editor located in the WordPress dashboard. Through it we can customize the header pattern that came with our theme, or create a brand new header pattern. That is the first step: locate the Editor. Log into your WordPress dashboard and look for the Appearance link in the menu on the left.
Locating the Patterns
You can read more about what the options in the Appearance section do in the previous part of our tutorial. In it we explain each option in the two subsections (Themes and Editor) in a brief and concise manner. For now, though, click on Editor. That will take you to your website’s theme editor.
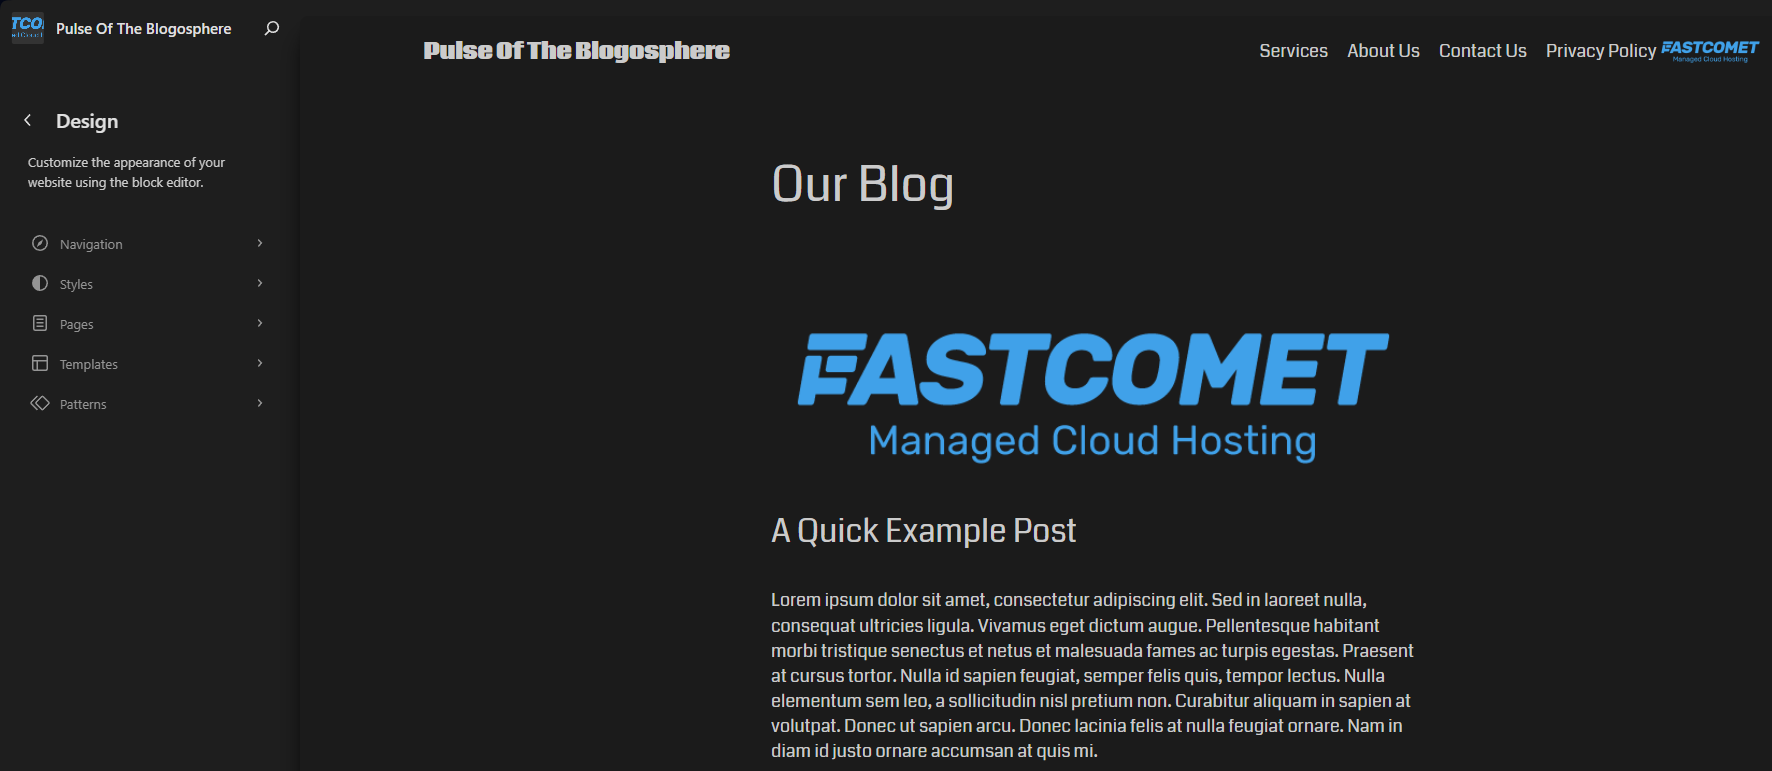
On the left you can see all the elements that you can customize in your theme. You can refer to the tutorial section we linked at the beginning of this part to learn what each of them does. For right now, we are only interested in the Patterns.
Patterns became a huge part of the full site editing experience when WordPress 5.8 came out. It gave users the ability to create block patterns allowing them to have reusable groups of blocks they can slot into their websites with just a few clicks. That saves the trouble of making them layout every time you need it from scratch.
Many modern block themes come with a ton of patterns for various elements of a website: headers, footers, homepage, about us and contact us pages, etc. Here, let us take a look at the patterns that come with the Twenty Twenty-five theme.
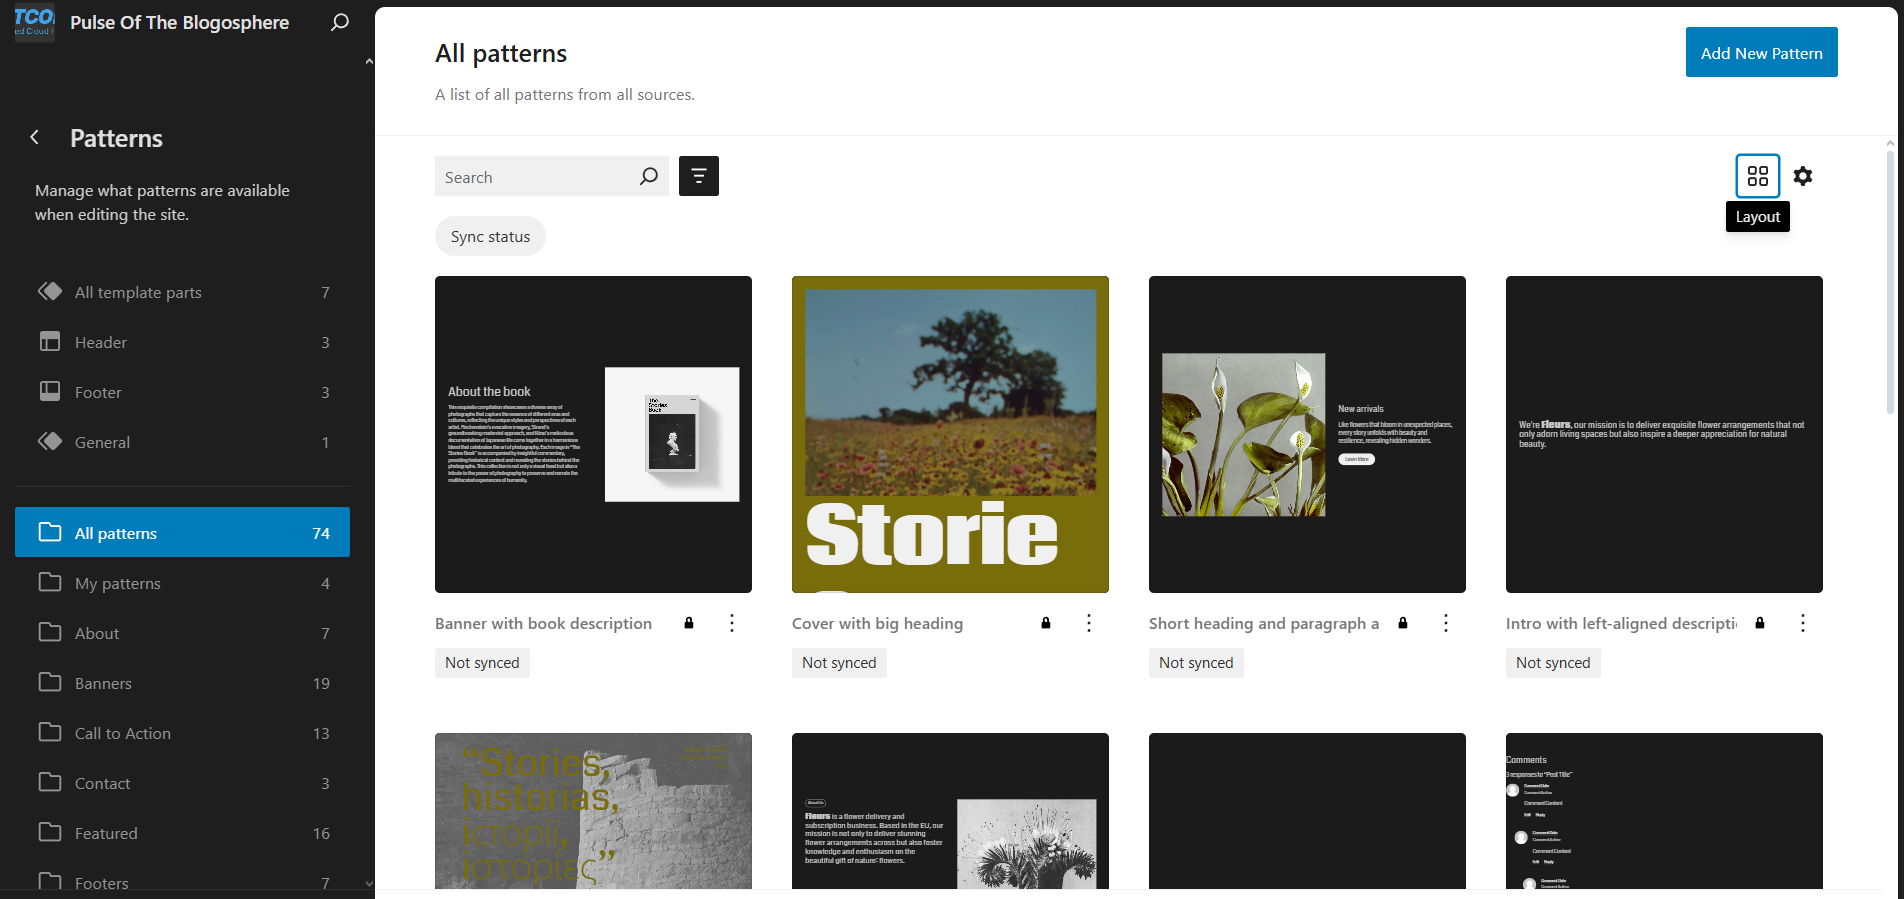
You can see on the left that the theme has a total of 74 patterns, split up among various categories. For example, there are patterns for the About section of a website, or Contact Us, and so on. Each of these patterns is a collection of blocks that can be applied directly to the entire website or to a specific page. And, of course, there are patterns for the header.
At this point, you have two options: edit an already existing header pattern or create a brand new one. Let us start with the first option.
Editing the Pattern
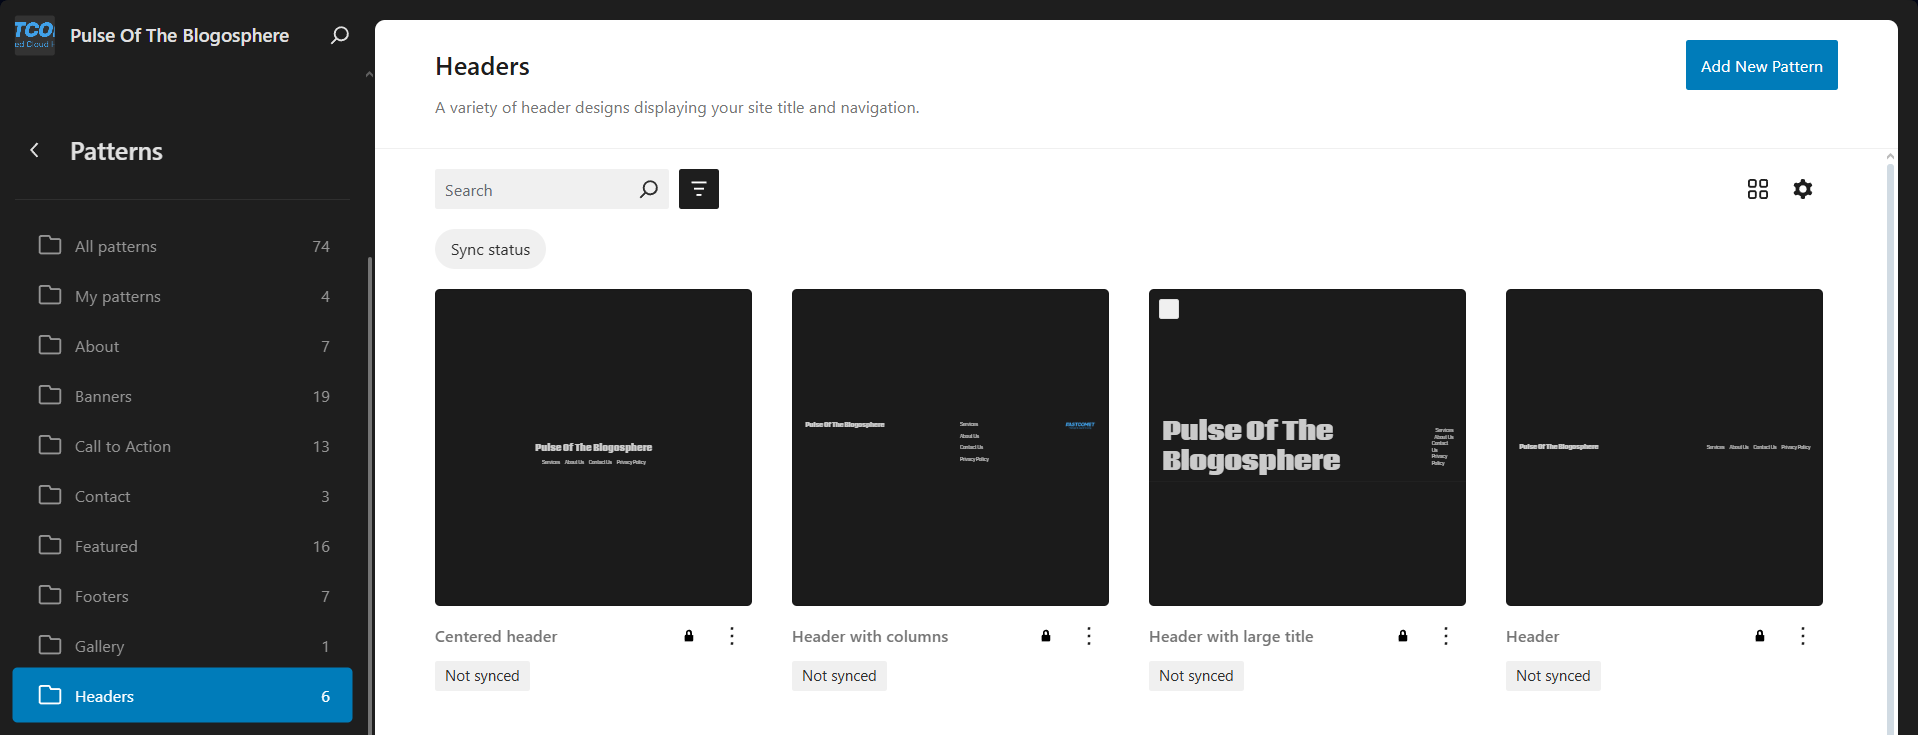
As you might have noticed after you installed WordPress and opened your website, it does have a header already. That is why the default theme comes with a bunch of them, as we showed above, and one of them is selected. In the case of the Twenty Twenty-five theme, it is the one simply called Header.
The easiest way to edit your website’s header is to simply open the pattern you like and edit it directly, instead of creating a brand new one. However, you might have noticed a little padlock under the patterns. Hovering over it tells us that the pattern cannot be edited. That is a simple safety measure to ensure that users cannot overwrite the theme’s default patterns, potentially ruining the theme.
To begin, click on the three dots next to the pattern and select Duplicate. That will open a window prompting you to name your pattern and assign it a category. There is also a Synced switch.
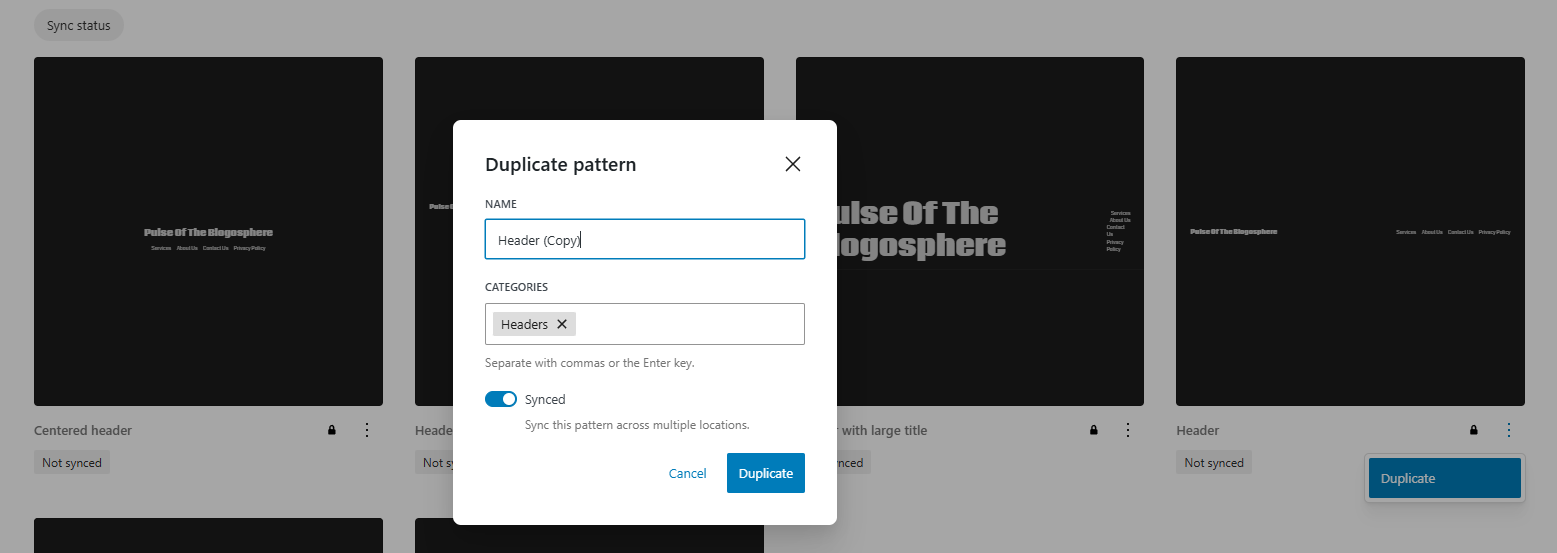
We recommend leaving the category as Headers, as that is what we are working on. Also, turn on Synced. That will make it so that when you make changes to this pattern on any page, they will apply to all other pages. Since this is a header, we want it to be identical across the website. Click Duplicate and then we can start editing our pattern.
Locate it in the grid (or list, depending on the layout you have chosen), click the dots again and select Edit. Alternatively, you can click directly on the pattern and that will also open the editor. And here we are, we can see exactly what blocks this pattern has and how they are arranged.
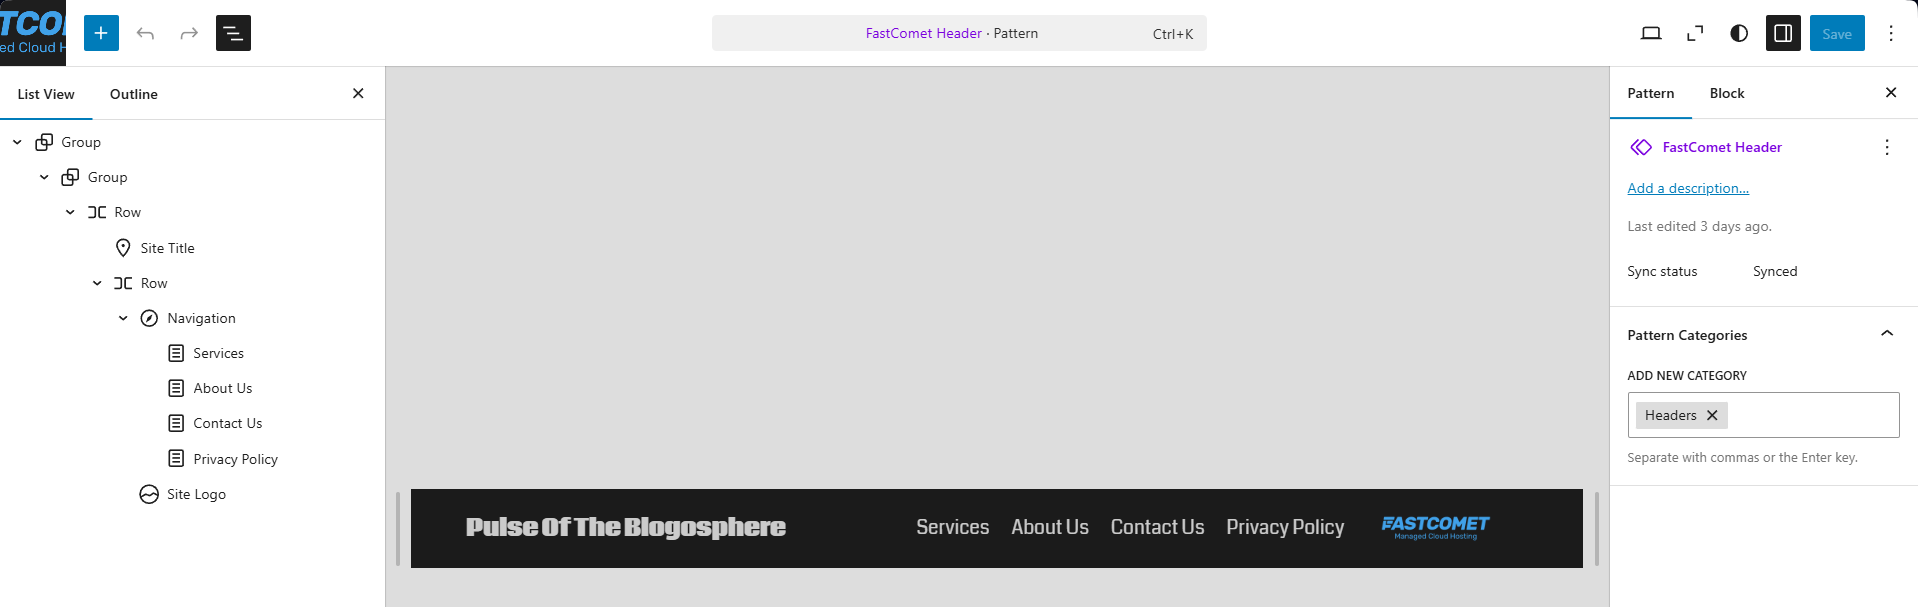
Let us break down this interface and explain everything you are seeing.
- On the far left side you will see your block list. These are all the blocks the pattern has. In our case, there is one overarching Group block that contains all the other blocks. Then, since this is a mostly horizontal block, we have a Row block. Within it is our Site Title block, then another Row with Navigation and Pages within it. Finally, we have the Site Logo;
- The middle of the screen is the live preview of what the blocks and their arrangement look like;
On the far right are the block controls. You can edit each block’s options and design (appearance) individually.
These three elements will be your best friends when creating or editing patterns, templates, pages or posts. The best part is, this interface is almost identical for all those things so when you get used to one of them, you will be practically used to all of them!
As for how to edit the header itself, here is a quick example. Let us say we want to add a login button to the header. To begin, click the blue + symbol (turns to an X when clicked) in the top left and find the Buttons block.
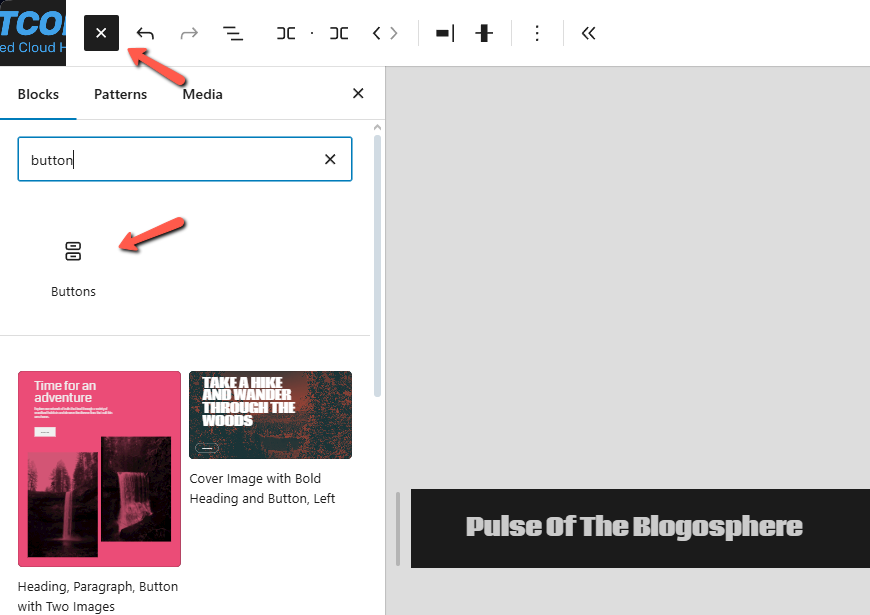
Click it and that will add the block to the blocks list. It will appear at the end of the list, therefore at the far right of the header. Do not worry, you can move it anywhere on the pattern. Next, click the stair-like symbol to go back to the blocks list. We want this particular button to be before our website’s logo so we can literally grab it in the list and move it to our desired position.

As you can see, we put it between the last page and the site logo in the Navigation block. You can also see we had to change some of the block dimensions (the site name is now on two lines) to ensure everything fit nicely. We wanted the page names to all be on a single line and everything to be spaced comfortably. To accomplish that, we used the tools on the right side of the screen to change some of the padding and width of the navigation block.
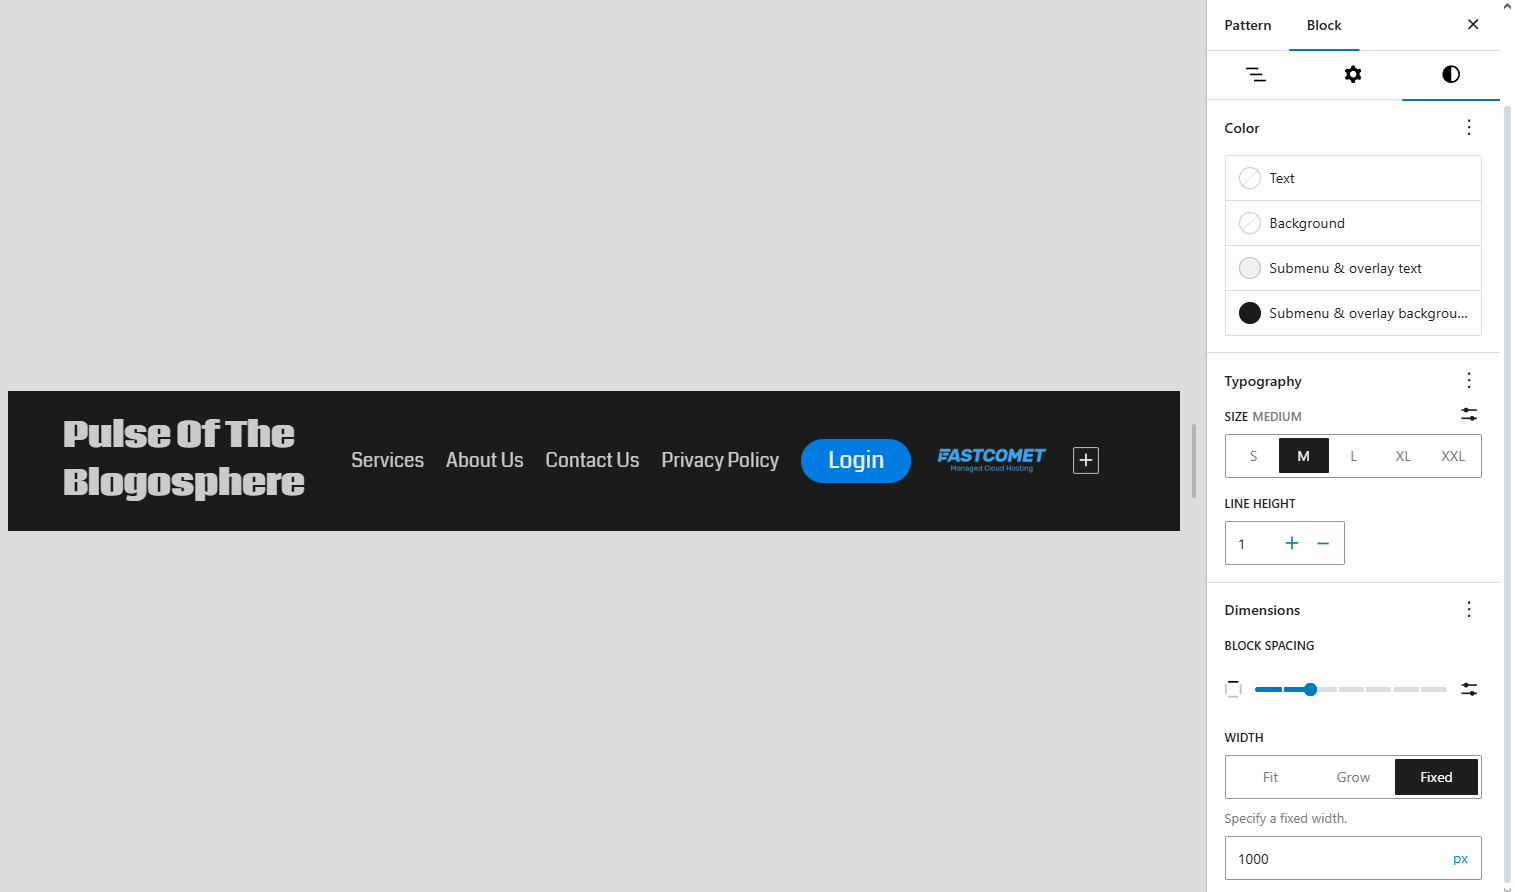
The last step is to add the log-in link to the button. To do so, simply click on the Link button in the top menu where you can find the text editor controls for the block you have currently selected.
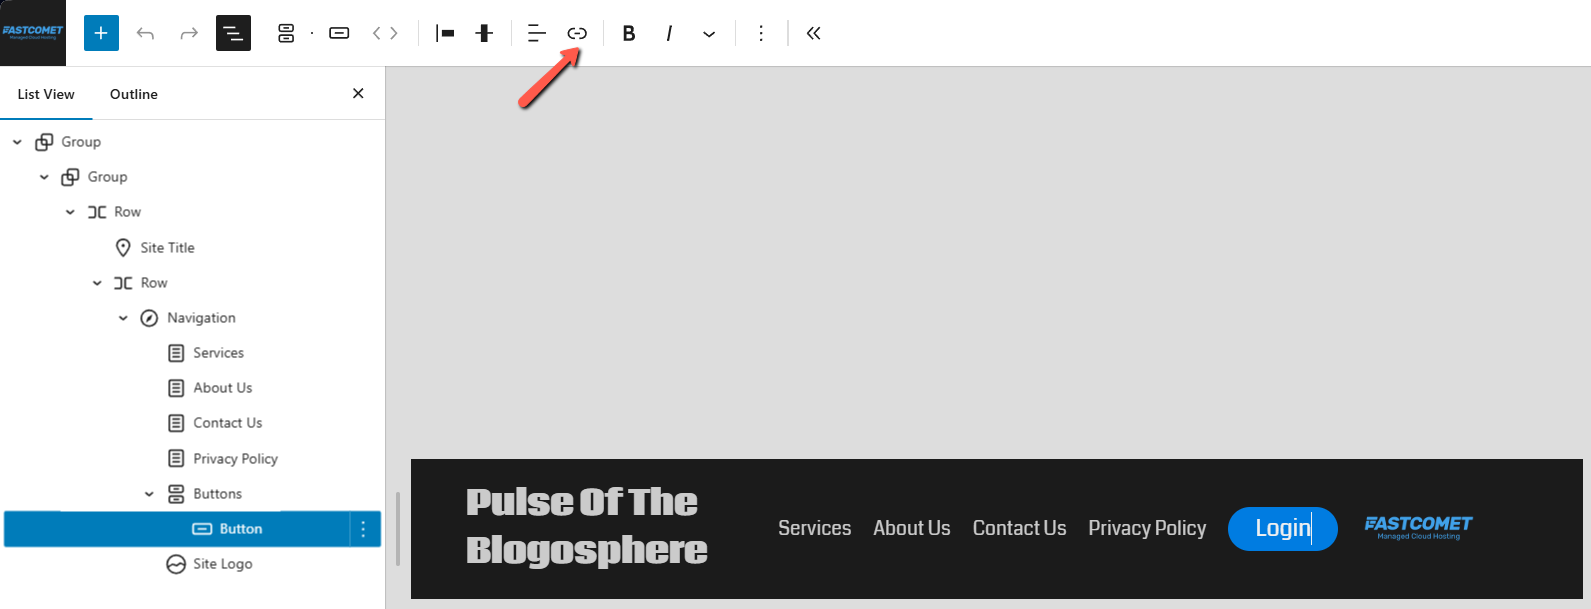
And that is it! Once the link is in we can save our changes. You can spend as much time here as you wish, learning about all the blocks that you have available, and creating the best header for your website! There is only one more thing left to do after that.
Assigning the Header
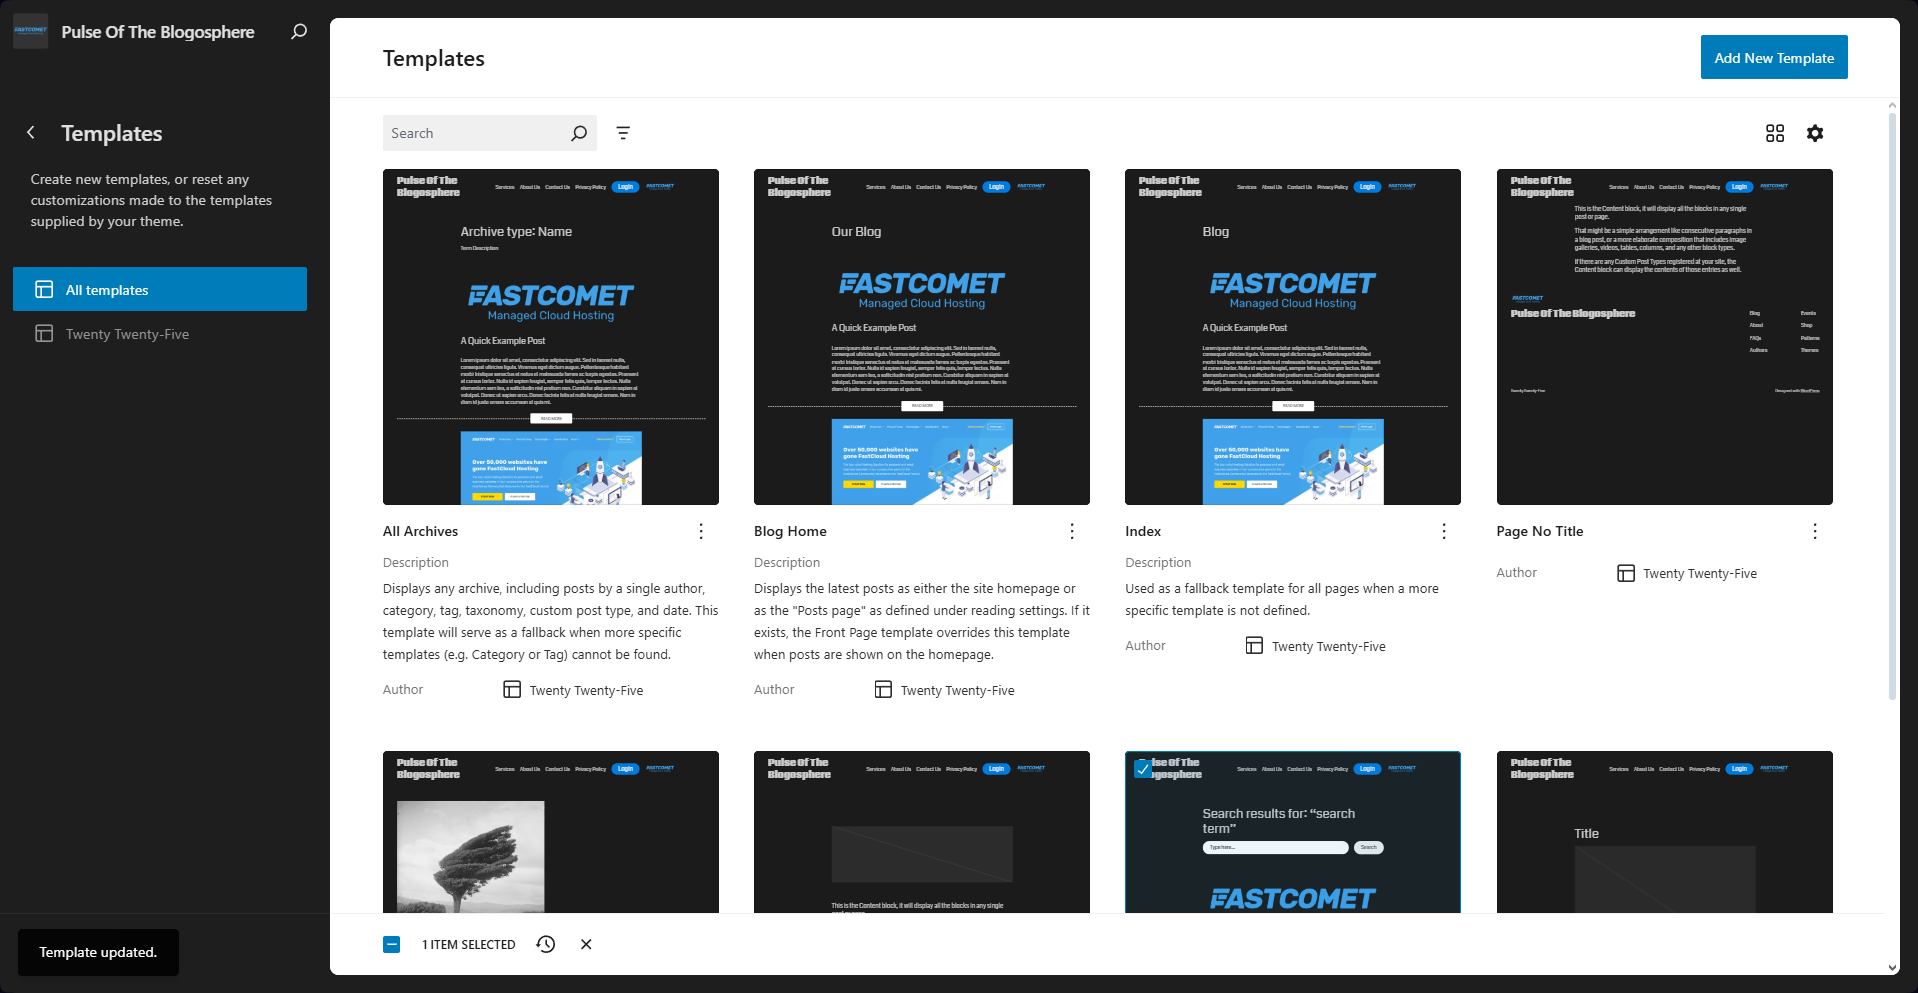
The last step to editing the header of your WordPress website is to assign it to your templates. In WordPress, templates are similar to patterns. However, instead of being single pre-built elements you can slot anywhere on a page, a template is a whole page layout that you can then fill with content. It is the outline of your website’s pages that you then slot content in. Much like how it is with patterns, many modern block themes come with premade templates for all sorts of pages. The Twenty Twenty-five theme has a few itself. To find them, head to the WordPress admin dashboard then go to Appearance > Editor. Then click on Templates and you will see everything your theme has to offer.
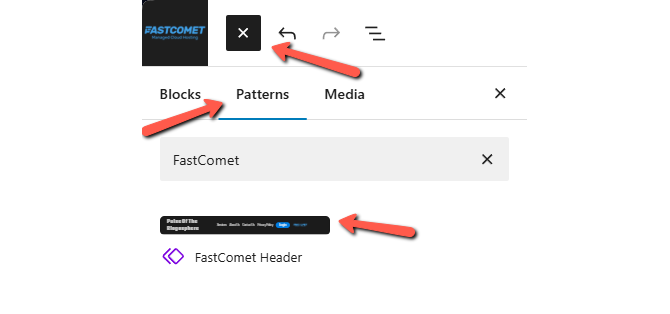
Clicking on any of them (or adding a new one via the button in the top right) will open the editor where we can assign our brand-new header! Click on the blue + symbol like how we did when adding the Buttons block. However, this time click on the Patterns tab and find the header you just created.
Click it and that will add it to the end of the page. Click the staircase symbol to go back to the list of blocks (and patterns), and simply drag the header to the top.
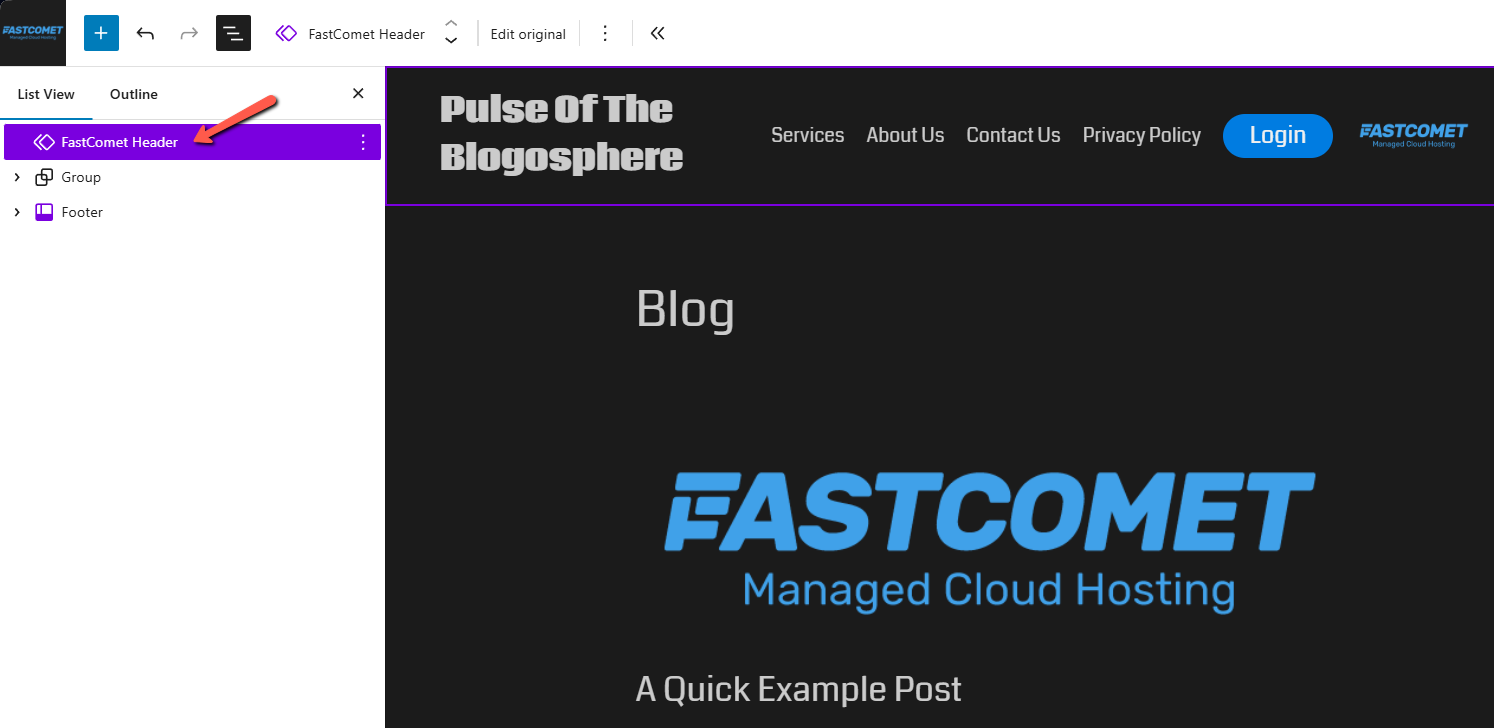
And there you have it! You successfully added the header to your page template. Now all the pages on your website that use this template will have this new header. Simply add the header to your remaining templates and you will be all set!
As you can see, editing and assigning a header is extremely easy with WordPress’ patterns and templates, and the block editor in general! Add a few blocks, move them around a bit, configure their dimensions and appearance a bit, and you are done! You can make the header as complex or simple as you want it to be.
But what if you are not using a block theme?
Editing a Non-block Theme Header
When it comes to “classic” (non-block) themes, editing their appearance depends a lot on the theme itself. For the most part the steps are similar, however, since there is no singular unifying system (the block builder), the way classic themes work can differ from one to the next. For this example we will use one of the most popular non-block themes: Astra.
If you prefer to work with non-block themes then Astra is a safe bet. It is a veteran when it comes to WordPress themes, has an active and engaged community, and is easy to work with. You can check our tutorial on how to install themes here to get started with Astra. Just remember to activate it as well!
When you have the theme downloaded and active, editing the header is pretty straightforward. Head to the Appearance > Customize section, which will open the Astra theme editor.
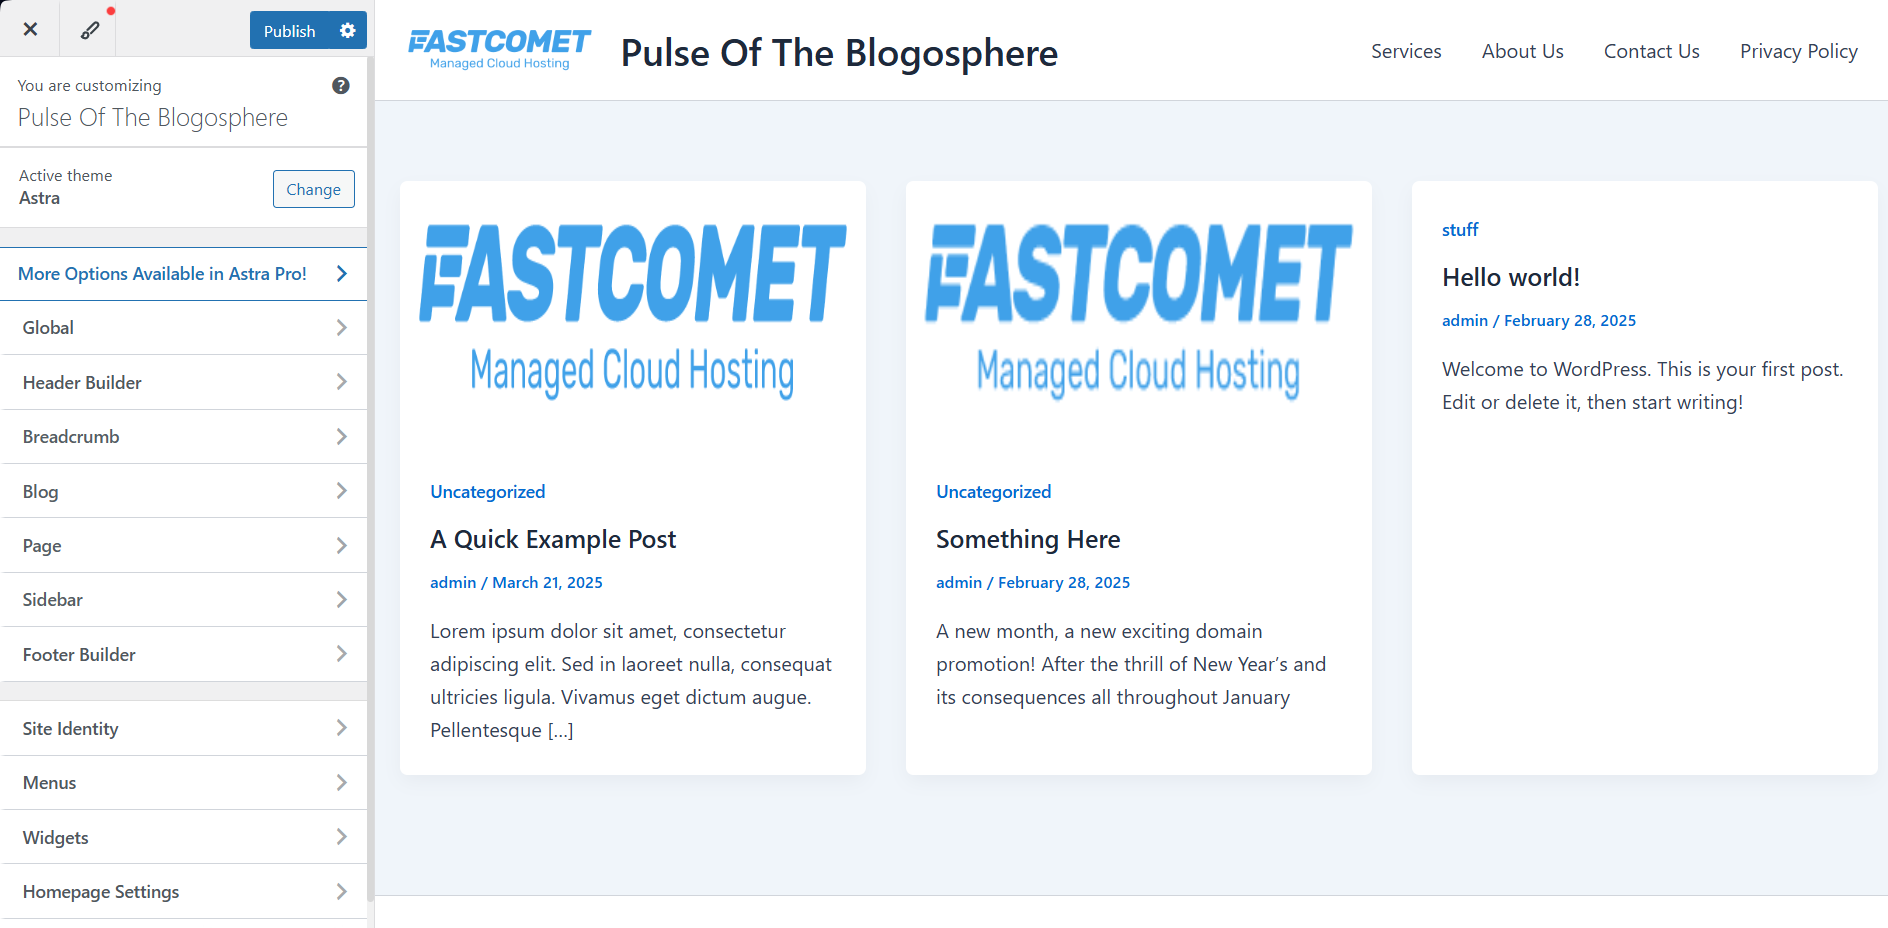
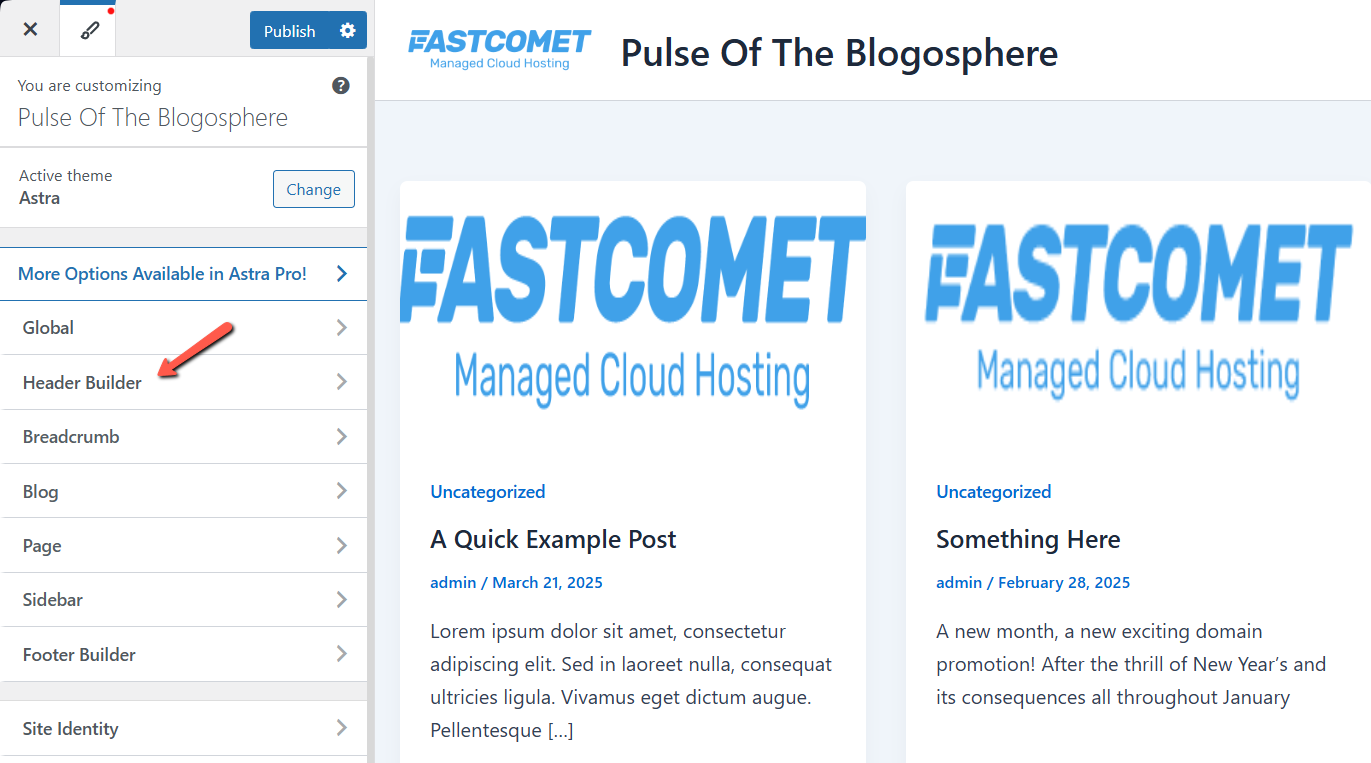
Now, there are a ton of things you can do here to customize the way your website looks. Colors, layout, and so on. We will focus on the header, as it is the topic of this tutorial. To begin, click on Header Builder.
This will take you directly to the–as the name suggests–header builder where you can customize it wholly. Let us take a look at what the interface looks like.
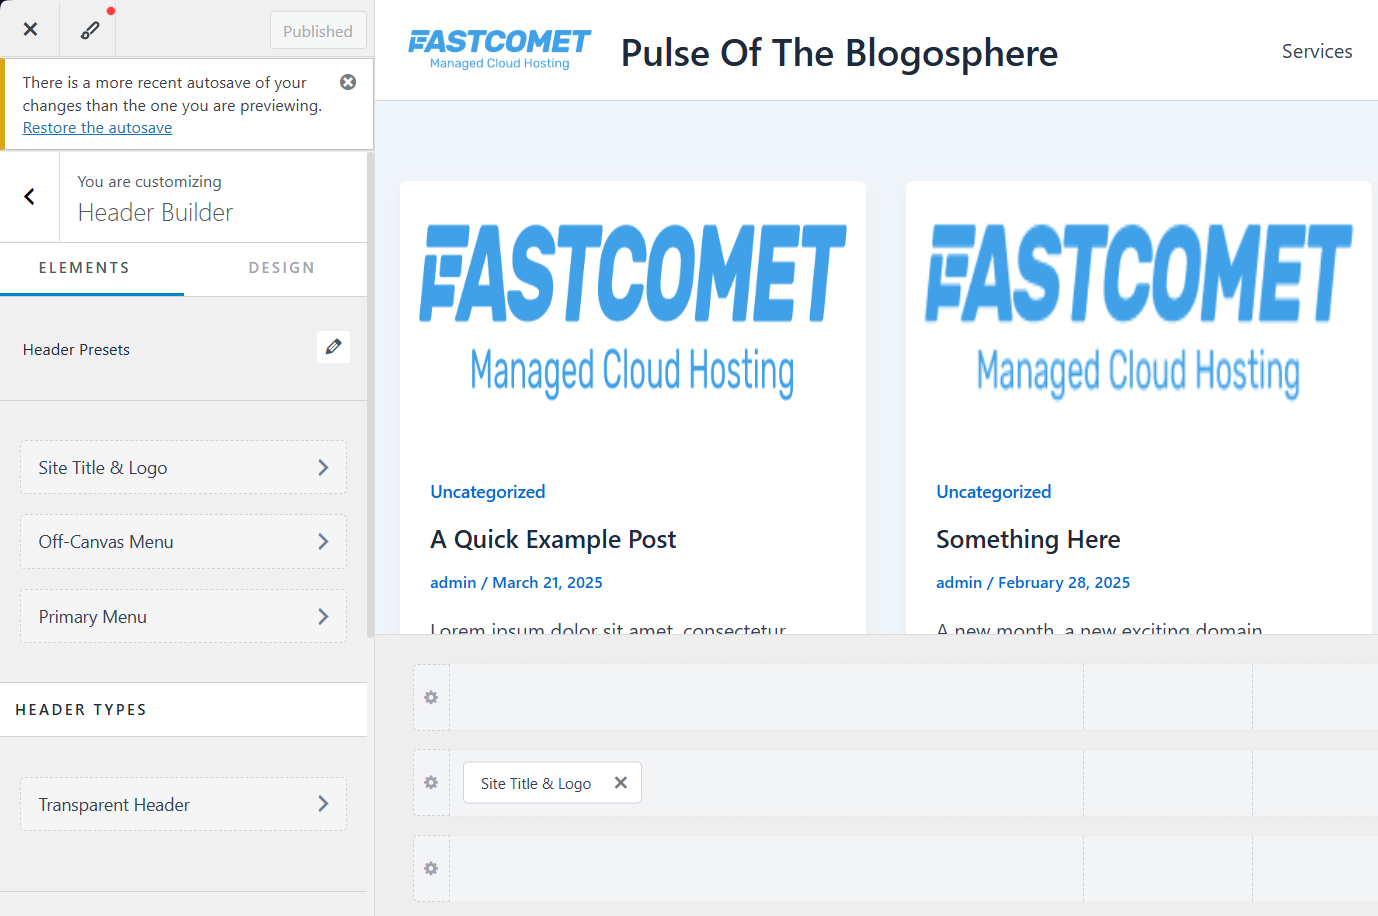
You will see two tabs: Elements and Design. The Elements tab will help you create the overall structure of the header, whereas the Design tab will let you change how it looks. For the moment, let us focus on the former. The good news is that the theme automatically assembles and applies a simple but very effective header the moment you activate it.

As you can see, it has our site’s logo, its name, and then a few links to important pages. That is, in itself, an excellent foundation to build up from. However, if you do not want to use that particular style of header, you can choose from a few header presets for a different look and functionality.
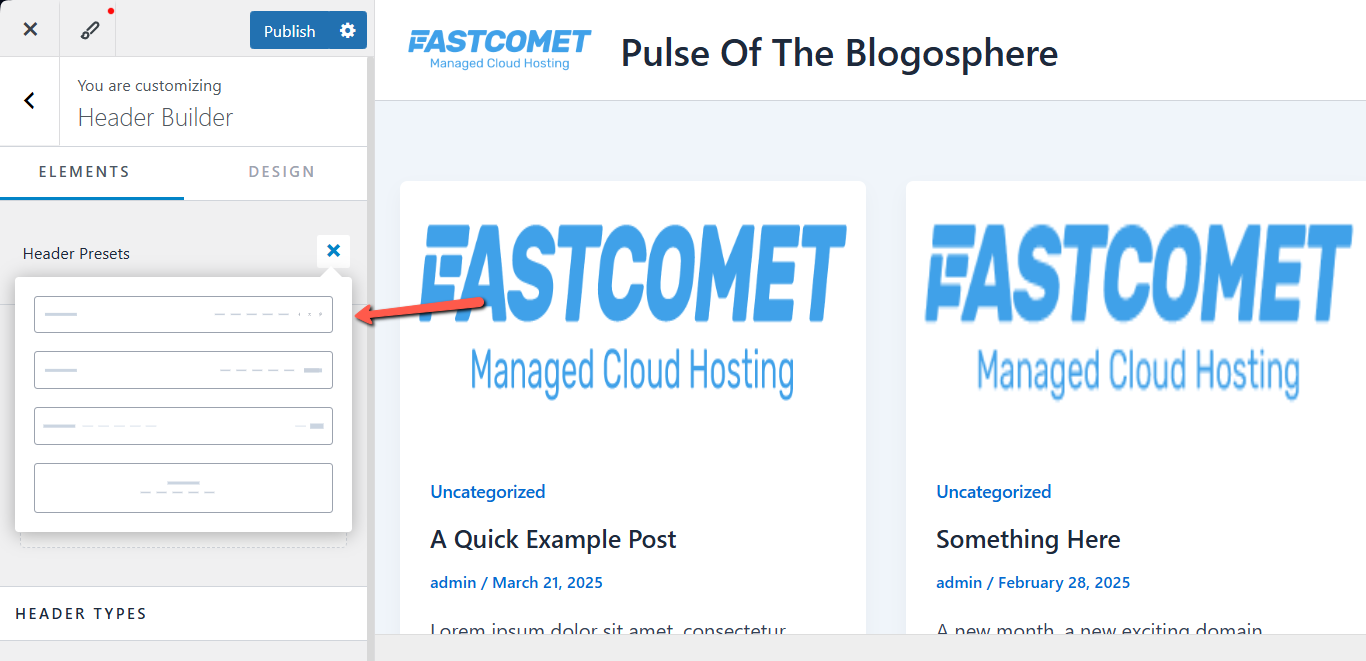
Here is a quick breakdown of what these lines and pale squares actually mean. We will go from top to bottom.
- The first choice will have these elements, from left to right: site logo, site name, links to specific pages, and then social media buttons (Facebook, Twitter (X), and Instagram by default);
- The second choice replaces the social media buttons with a Sign Up one, keeping the other elements the same;
- The third one is similar to the previous one, but it adds a Log In link to the header, alongside the Sign Up button (still no social media);
- The last choice is a two-line header, meaning your site logo and name will be above the page links, centered on the page.
But what if we want both a Log In button and social media icons? That is where the builder itself comes into play! It is super easy to use, and here is how. Choose the social media icons preset and then look at the bottom of the page.
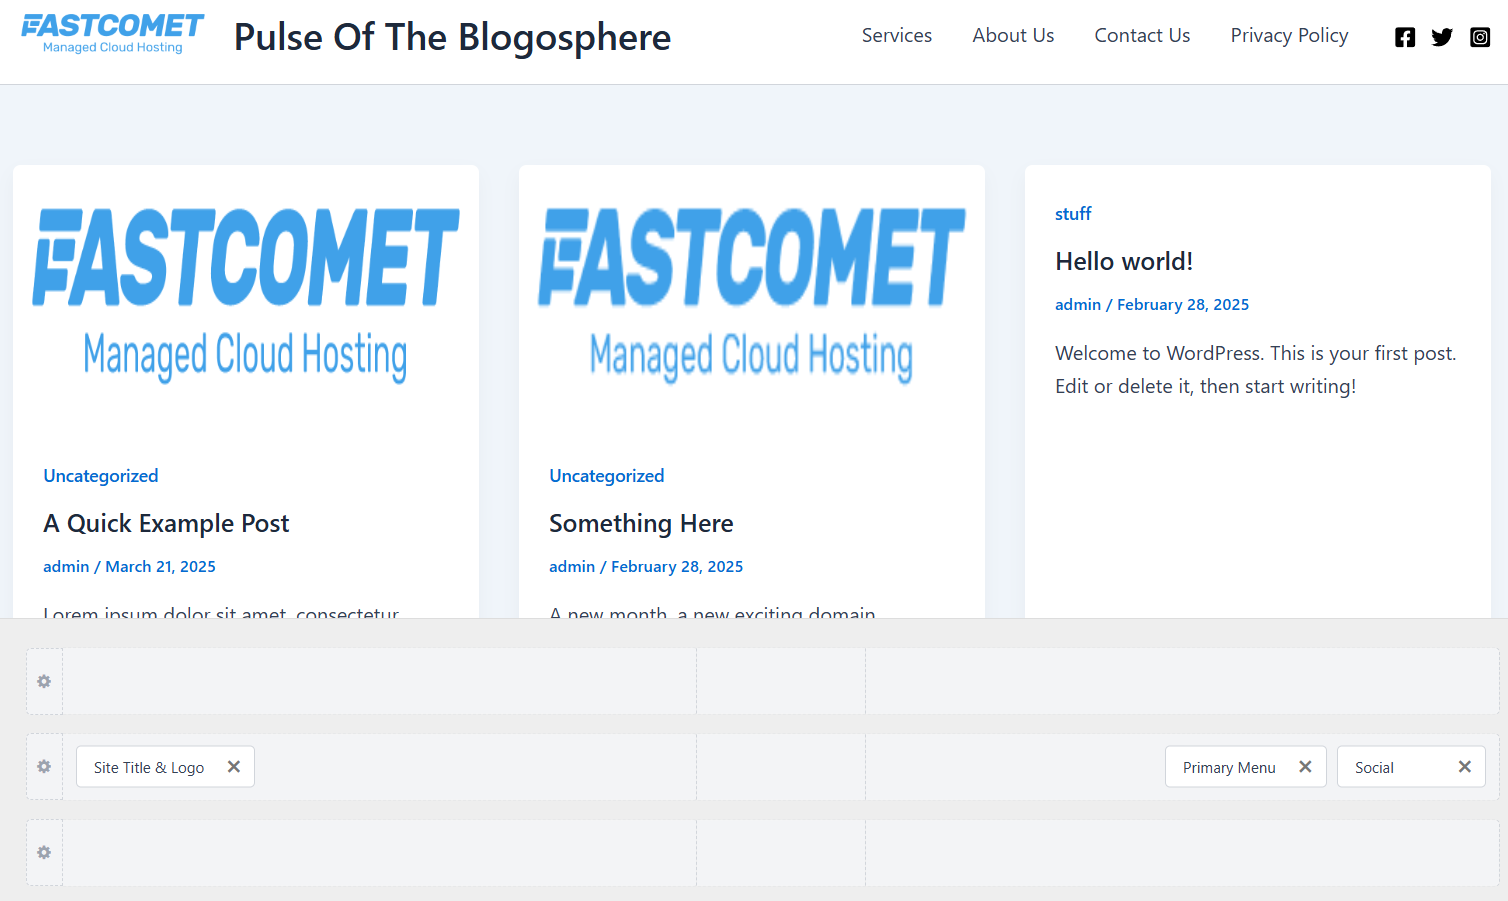
You will see three cog wheels with rows next to them. The middle one, you will notice, has some stuff in it already! Site Title & Logo, Primary Menu (the page links), and Social. Those are all elements that the preset has placed in the header. What are the other two lines above and under for, though? You can have an above and below-header, in case you need a bit more space! If you look more closely you will also notice that each row is segmented into three by a dotted line. Those are there to indicate the left, middle and right portions of the header.
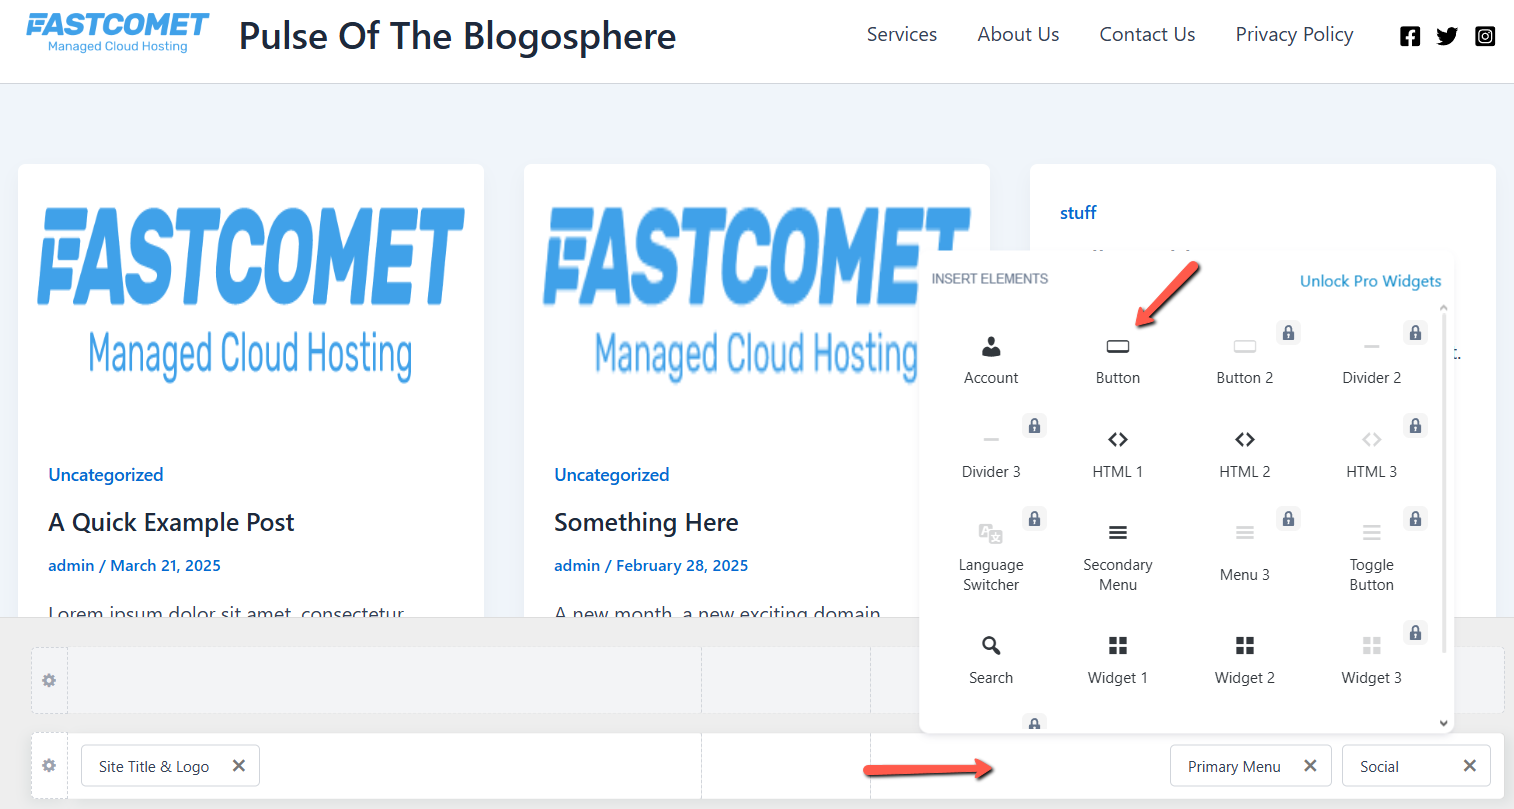
In order to add our Log In button, the first step is to click on the row in the section we want the button to be. For our example, we will put it between the page links and the social media icons. Click next to Primary Menu, and a window will pop up. Click Button.
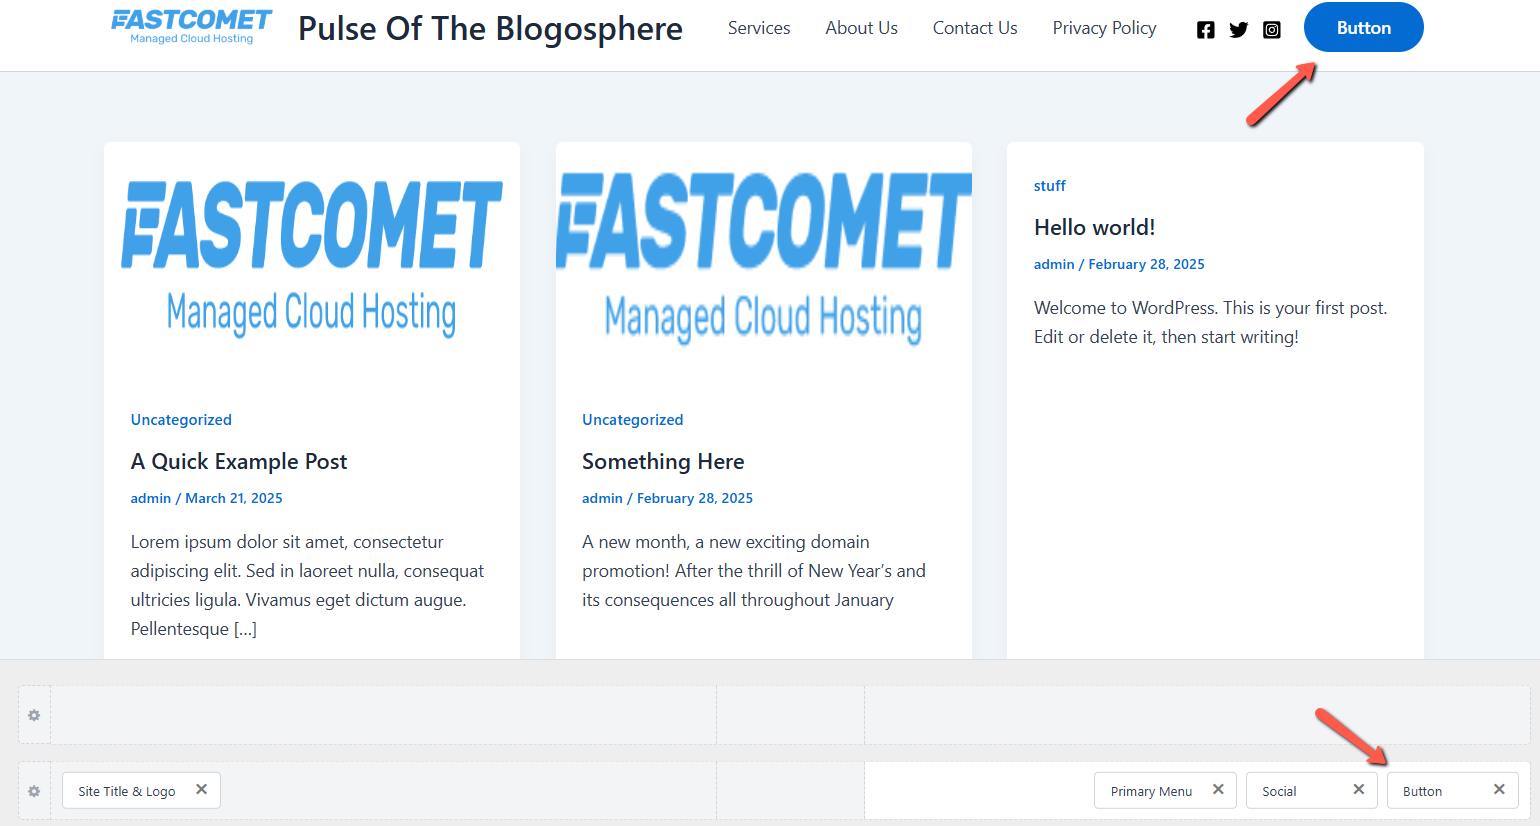
As you might have already guessed, that will add a button at the end of the row and to the header.
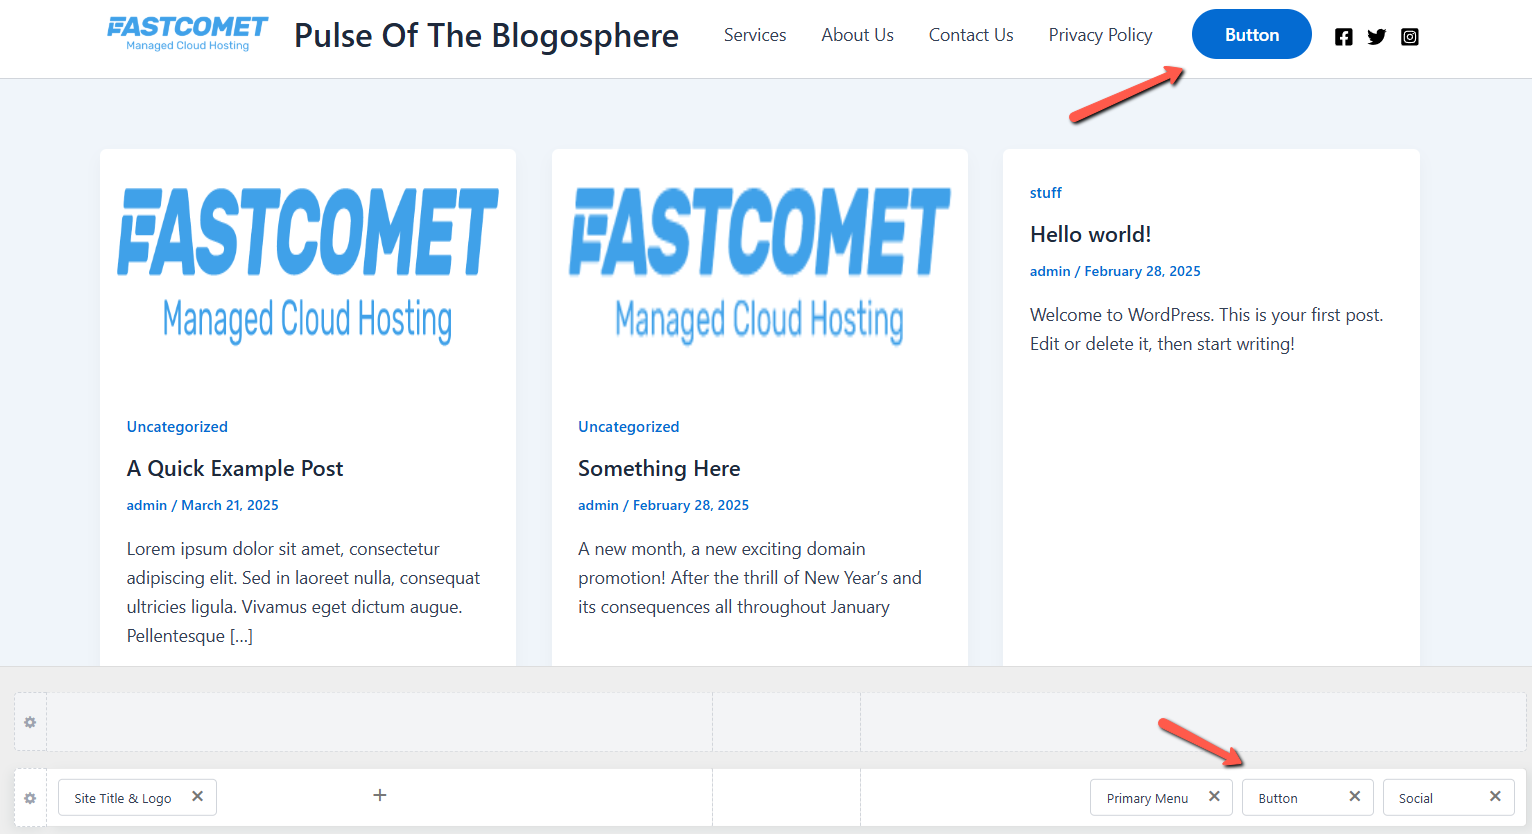
To move it into position, simply click and drag the button in the editor at the bottom of the page.
Next, let us customize the button itself. Right now it says “button” which is boring, and it also leads nowhere! So, hover over it in the header and click on the pencil that appears, or simply click on the element in the editor at the bottom. The interface on the left will change to its properties. There, we can change what the button says on it, where it leads, if it opens in a new tab, and change how it looks.

And that is how you edit an element in the Astra classic theme. These steps apply to not only the header, but to any other element or section of your website. Whether it is the rest of the header or how your pages look, the functionality is the same. Just do not forget to hit Publish at the top to save your changes.
We had a look at a few other popular classic themes (GeneratePress, Hello, and Salient), and they can all be customized following similar steps. However, as we mentioned at the beginning of this section, the steps will be slightly more different than with Astra. If you want to use a classic theme, we recommend Astra itself since it is the most straightforward in our opinion.
Whether you are using a block or a classic theme, you can see that editing your site’s header is rather straightforward. All it requires is a bit of work to get used to how the interface works, but is that not the case with everything else anyway?

WordPress Hosting
- Free WordPress Installation
- 24/7 WordPress Support
- Free Domain Transfer
- Hack-free Protection
- Fast SSD Storage
- Free WordPress Transfer
- Free CloudFlare CDN
- Immediate Activation