Crawler
Updated on Mar 7, 2024
The LiteSpeed Cache plugin for WordPress comes with its own crawler. It scans your website and refreshes any expired pages in the cache. That way, your visitors are far less likely to be served outdated content. The crawler itself must be enabled on a server or virtual host level, as it can consume considerable resources. Since it is a Shared Hosting plan, FastCloud Extra does not support this feature. Still, it can be easily enabled on any of our VPS or DS solutions where LiteSpeed has been purchased. There are several tabs, so let’s look at them quickly.
This post includes:
Summary
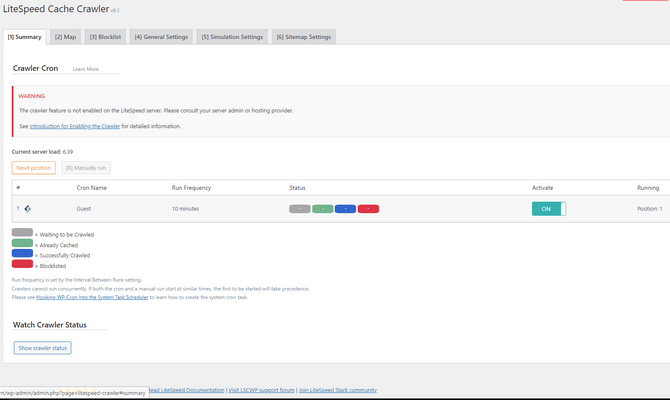
As the name suggests, the Summary tab offers a general overview of the crawler’s activities. Here, you can find the files it has cached, those waiting to be scanned, and even those you have blocked from getting cached.
Additionally, the crawler can be manually run with the Manually Run button or reset to the start position with the Reset Position button. Finally, you can even monitor its progress via the button at the bottom: Show Crawler Status.
Map
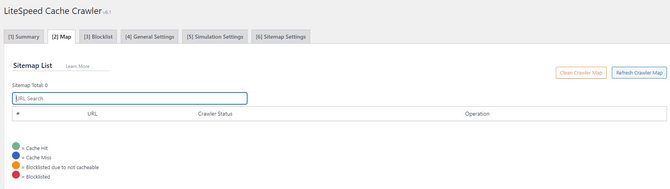
The Map tab shows which URIs are currently in the crawler map—basically, which URIs the crawler is scanning or will scan. You can click the Refresh Crawler Map button if the Sitemap List is empty or to get an updated version. There is also a search bar to see if a particular URI has been scanned or is in the queue.
Additionally, adding a URI to the blocklist is as easy as clicking the button next to it in the Sitemap List. You can also see the status of each URI via the colored dots (legend at the bottom of the page), and finally, you can clear the list with the Clear Crawler Map button.
Blocklist
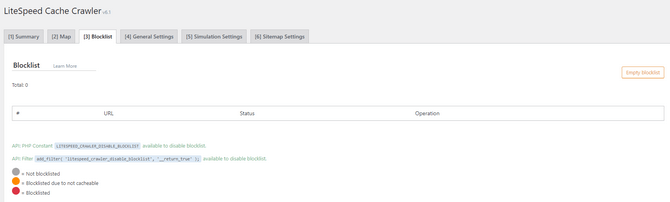
This tab will display any URIs currently blocked. Here, you can also manually remove entries from the blocklist. Once more, the status of each entry is depicted by colored dots, with a legend at the bottom of the page. Finally, the Empty Blocklist button will purge all entries from the list in case you want to start from scratch.
General Settings
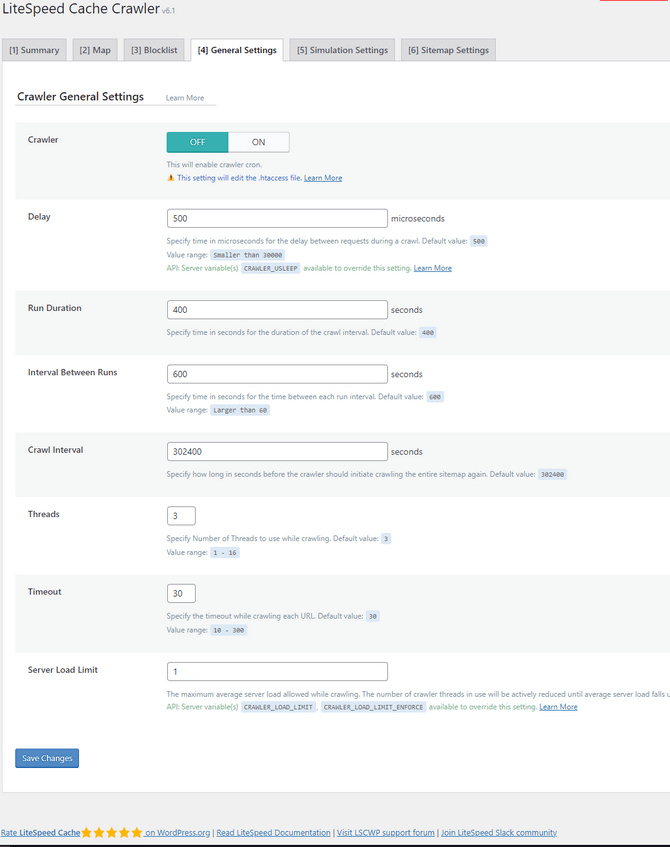
The General Settings tab has all the options for controlling the LiteSpeed Cache crawler. These options only apply if the crawler is enabled on the server or virtual host level. Even if you enable the crawler from this tab, it will not run if it is unavailable from the server. Nonetheless, let’s look at what each option does. The default values are typically good enough, but you should tweak them according to your server’s capabilities.
- Crawler - Self-explanatory. Turn the crawler on or off, depending on server configuration and needs;
- Delay - How long (in microseconds) the crawler will wait before it scans the next page on your website. Since the crawler has to send a request to the server each time it scans a page, it is a good idea to have a pause between requests like this;
- Run Duration - Each scanning run will last a specified amount of seconds. The crawler will scan for this exact amount of time, pause – the duration of which is defined below – and then resume from where it left off. Once again, it is a good idea to have such pauses so as not to overload your server;
- Interval Between Runs - As mentioned above, put the number of seconds you want the crawler to pause between runs here;
- Crawl Interval - This field controls how often the crawler will scan your website. How frequently the scanning process will be re-initiated. The default value of 302400 seconds equates to three days and a half of pause between full site scans. For websites that don’t get updated that often, you can leave it as that, but if you update it often, you can set a shorter interval;
- Threads - How many concurrent threads, or crawling processes, will occur while scanning. The more threads, the faster the scan, but also the higher the load on your server;
- Timeout - The time in seconds the crawler has to scan a page. Value can be between 10 and 300 seconds. If you have bulkier pages, you should probably give the crawler more time to finish its work;
- Server Load Limit - Depending on the number of cores your server has, you can set a load limit that will terminate the crawler if it is reached. The way it works is the number is half of your server’s cores. That means the default value of 1 will terminate the process when half the resources of a server with two cores are being consumed.
These options are great if you want to really fine-tune the amount of resources the LiteSpeed Cache crawler consumes. If your server struggles at times, give the crawler more strict timeframes.
Simulation Settings
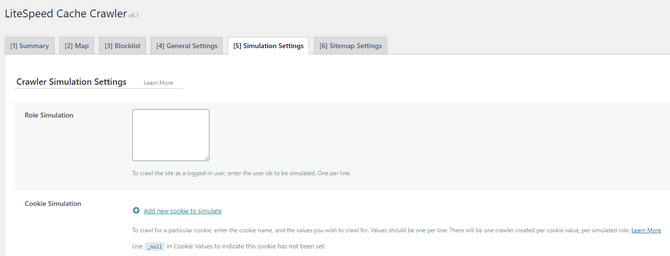
The Simulation Settings tab allows you to run the crawler from different points of view. By default, the crawler “views” the website as a non-logged Guest user. However, if you want it to run as a specific user group, you can put that user group’s ID in the field. The crawler will go down the list and pretend it is those user groups.
Additionally, LiteSpeed Cache can crawl for specific cookies. Add a new cookie to simulate and insert its name alongside the values the crawler should look for. We recommend you check out LiteSpeed’s official documentation on this section for more information and examples.
Sitemap Settings
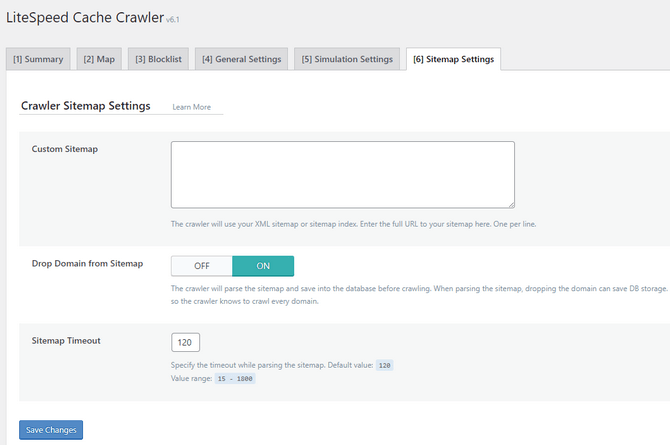
The final tab in the Crawler section is Sitemap Settings. Here, you can give the crawler a specific sitemap to scan instead of your entire website. Third-party tools can generate such sitemaps. The only requirement is that they be in Google XML Sitemap Format. A custom sitemap is useful if you want to tell the crawler to go through particular parts of your website.
Additionally, the Drop Domain from Sitemap switch will have the crawler parse the sitemap first, save it to the database, and then crawl it. Dropping the domain will reduce the sitemap’s size footprint on the database. This is always a helpful feature, but you should not use it if you use multiple domains for one site and those domains are in the sitemap.
The final option in the Crawler section, in general, is the Sitemap Timeout. It dictates how many seconds the crawler will have to scan the sitemap. That concludes our look into the Crawler section of the LiteSpeed Cache plugin for WordPress. All that is left is the Toolbox.

WordPress Hosting
- Free WordPress Installation
- 24/7 WordPress Support
- Free Domain Transfer
- Hack-free Protection
- Fast SSD Storage
- Free WordPress Transfer
- Free CloudFlare CDN
- Immediate Activation