How to Install and Configure All in One SEO
Updated on Dec 6, 2022
The All in One SEO plugin is a great way to optimize your website’s search engine results as it is easy to install and use. In this tutorial, we will show you the process of installing and configuring the plugin as well as go into detail about the capabilities at your disposal.
To use All in One SEO for your WordPress website, you need to:
Install and Activate the All in One SEO
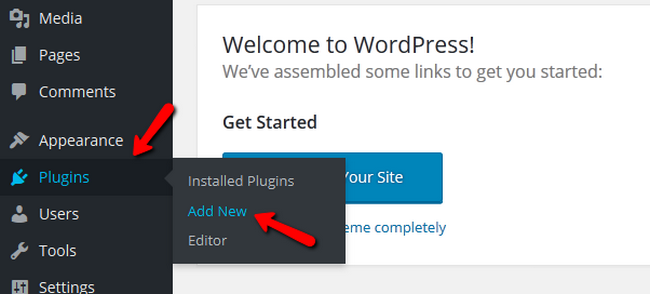
The first think you will want to do is to login into the admin dashboard of your WordPress website and navigate to the Plugins→Add New option.
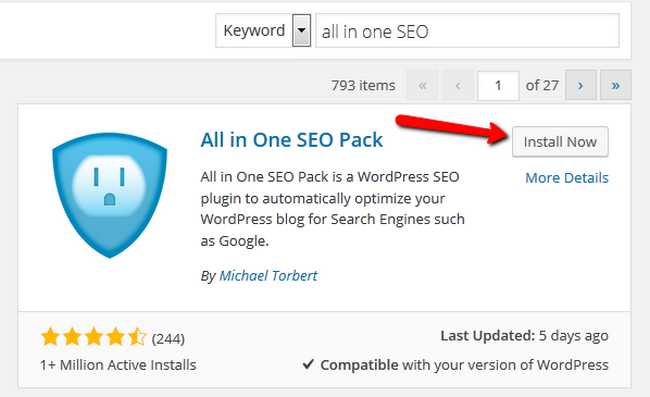
In the search bar type “all in one SEO” and after that click on the Install Now button.
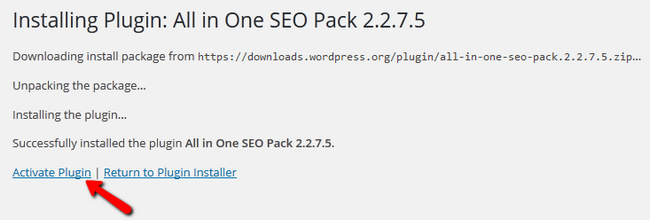
You will see the installation log showing the installation has been completed and then you will need to click on the Activate Plugin link.
Configure the All in One SEO plugin
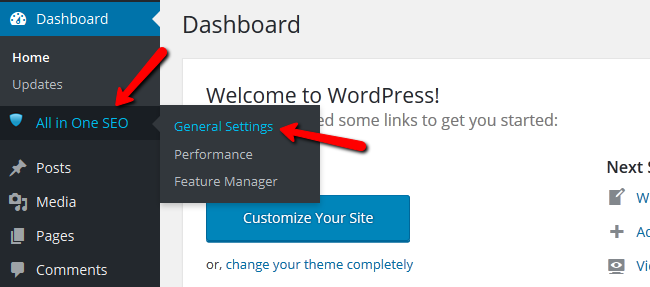
To configure the settings of the newly installed plugin, you will need to click on the All in One SEO→General Settings option.
The important settings you can modify are:
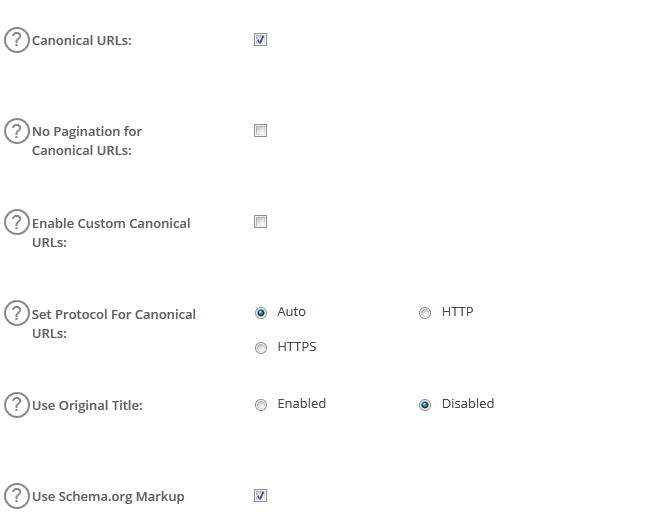
General Settings
- Canonical URLs – Enabling this will make sure your website is not being punished for any duplicate content or multiple URLs that lead to the same content
- No Pagination for Canonical URLs – Enabling this will remove any pagination for your canonical URLs
- Enable Custom Canonical URLs – If you checkmark this box, a new field will be added to the Edit post screen where you will be able to set a custom canonical URL for the post
- Set Protocol for Canonical URLs – Here you will be able to select the protocol used for the canonical URLs. Selecting the Auto option will use the protocol specified in the configuration file of your WordPress (wp-config.php)
- Use Original Title – If you are experiencing issues with your theme or other plugins interfering with the All in One SEO plugin’s title tags writing, you can enable this option
- Use Schema.org Markup – This Markup provides search engines with the information needed to display rich snippets
- Log important events – A useful setting to enable if you have to debug, this will write a log of the any plugin events
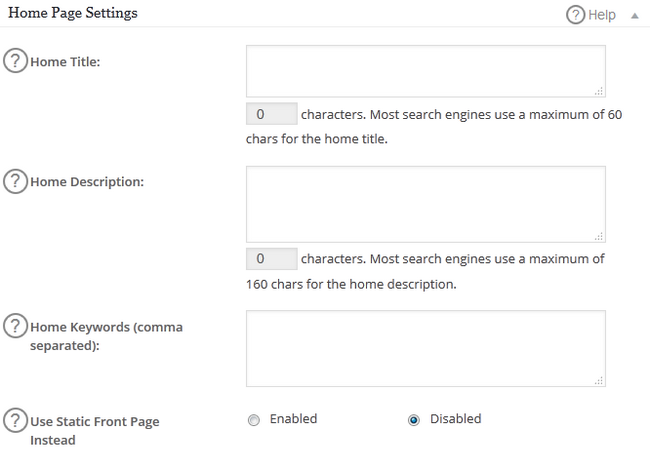
Home Page Settings
- Home Title – The SEO Meta Title for the home page. This is the title that will appear on top of the browser tab when your homepage is opened. The recommended length is up to 60 characters
- Home Description – The Meta Description for your home page. This is the description that will be displayed in search results. The recommended length is up to 160 characters
- Home Keywords (comma separated) – If you wish to use Meta Keywords, although they are not taken into consideration by most search engines, you can do so in this field by separating them with commas. Always use keywords relevant to the content in order to maximize their effect
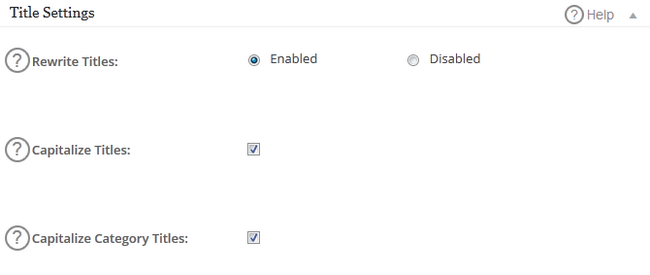
Title Settings
- Rewrite Titles – Enabled by default, this option will let you modify the titles for each type of content in the fields below
- Capitalize Titles – Enabled by default, this option is capitalizing the first letter of each word of your titles
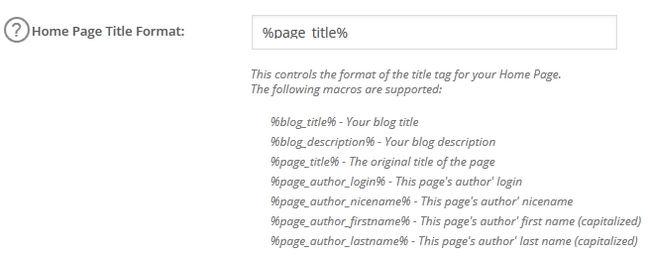
- Home Page Title Format – To change the format of your Page title and other titles below it, you will need to click on the “?”(question mark) icon for the supported formats and choose the one you see fit best
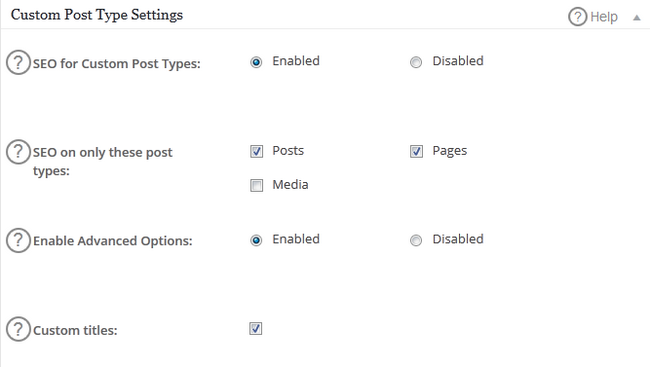
Custom Post Type Settings
- SEO for Custom Post Types – Enabled by default, this option will make the All in One SEO work with any custom post types you may have on your website
- SEO on only these post types – To only select specific post types with which the plugin will work, check the corresponding boxes
- Enable Advanced Options – Enabling the Advanced Options will add a new field to this section called Custom titles which you can check to manually configure the format for the Title tags for each of your Custom Post.
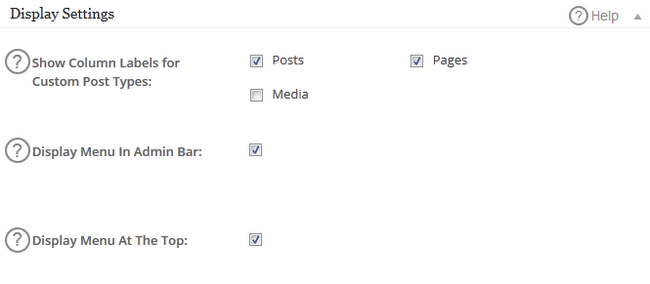
Display Settings
- Show Column Labels for Custom Post Types – To change the custom post types for which you can see the Meta data you have added, check the appropriate boxes
- Display Menu in Admin Bar – While this option is enabled, you will be able to see a button to the plugin on your admin panel in WordPress called SEO
- Display Menu at the top – If you want to display the plugin button in the top navigation menu of your dashboard, check this box
Noindex Settings
The Noindex settings can be very useful when you wish to restrict search engines from indexing content or following links on your website that lead to other websites. The NOODP option is available if you wish search engines to not use titles and descriptions about your site from the Open Directory Project. If you want to do the same thing regarding the Yahoo Directory, use the NOYDIR option. All of the options here can be overwridden for each specific post, pages, categories and tags.
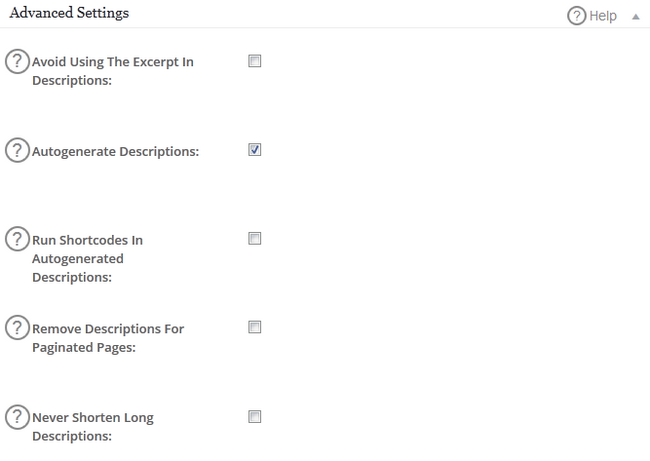
Advanced Settings
- Avoid Using the Excerpt in Descriptions – If you wish to prevent the All in One SEO plugin to use the excerpt for generating descriptions, check this box
- Autogenerate Descriptions – This feature is great when you have written a good first paragraph in your post as the plugin will autogenerate a description from it
- Run Shortcodes in Autogenerated Descriptions – If you have any shortcodes in the content that will be used to generate a description, they will be ran if you have enabled this option
- Never Shorten Long Descriptions – If you wish to have descriptions longer than 160 characters enable this option.
- Exclude Pages – If you want to exclude some pages from outputting meta information, you can list them here.
Congratulations, now you know how to use the All in One SEO plugin and its full potential to better your website’s search engine results.

WordPress Hosting
- Free WordPress Installation
- 24/7 WordPress Support
- Free Domain Transfer
- Hack-free Protection
- Fast SSD Storage
- Free WordPress Transfer
- Free CloudFlare CDN
- Immediate Activation