How to install Joomla manually
Updated on Mar 13, 2019
This tutorial reviews the process of installing the latest stable release of Joomla 3.x on your account.
Automated installation
There is an easier and quicker way of installing Joomla through the Softaculous auto-installer. For more details on this process, you can review our tutorial on How to install Joomla via Softaculous.
To install Joomla manually, you need to complete the following steps:
Download and prepare the Files
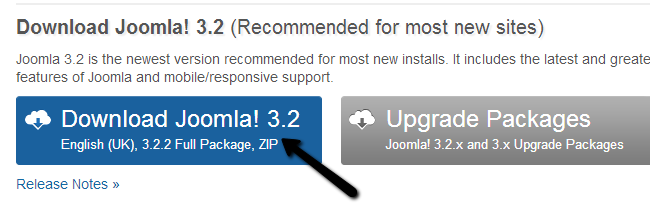
To start with, you have to download the latest stable release of Joomla on your local computer. You can do that via the official Joomla website. Simply click on the big Download button on their page and the script download will be automatically initiated.
You need to extract the archive contents on your local computer. Note that this process will not create a separate folder for all the files. Thus, it is best to create a folder, put the archive in it, and then initiate the extraction of all Joomla files. This will ensure that no files are left unseen during the process.
The third step of the process involves uploading all files to your account on the server. It is important to make sure that you upload Joomla into the exact directory, where you wish to install it. For example, if you wish to access your website via the following link:
http://www.example.com/
where example.com is the actual domain that you are using on your account,you must upload all files directly in the public_html directory of your account. On the other hand, if you wish to access your website via the following link:
http://www.example.com/joomla30/
where example.com is your domain name and “joomla30” is a subfolder on your account, you must create a folder called “joomla30” within the public_html directory of your account and then upload all files in it.
FTP Configuration
We provide a full set of text and video FTP tutorials. They will introduce you to the most popular FTP clients and how to configure/use them as per your needs.
Now you have to initiate la install on your account by accessing the location where you have uploaded Joomla. In this tutorial, we will attempt to install Joomla into a subfolder called Joomla. Thus, the actual URL that we need to access in order to initiate the installation is:
http://www.example.com/joomla/installation/
where example.com is replaced by your actual domain name.
Configure the Admin account and Database
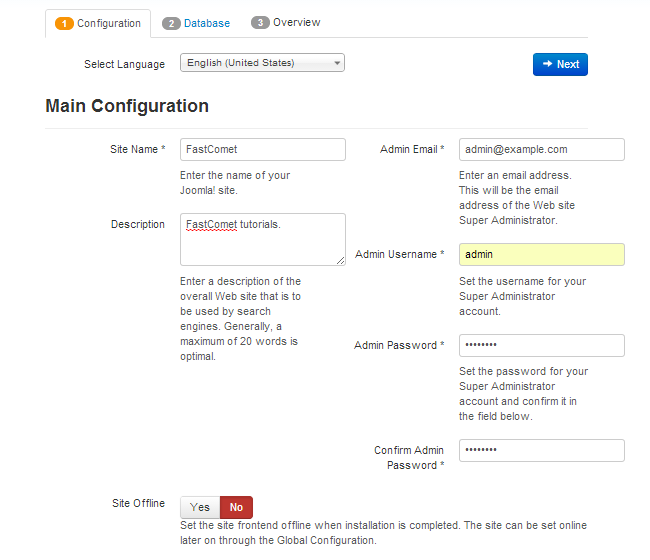
The first step of the actual installation process is to provide some basic information about your website, such as description, site name, etc. You will also asked to enter the login details for the admin user of your website. It will provide full access to all default Joomla features that you will be using for the development of your website.
- Site Name - Enter the name of your new Joomla website
- Description - Enter a short description of your new Joomla website. This is optional
- Admin email - Enter the email of the administrator on your new Joomla website
- Admin Username - Enter a username for the admin user
- Admin Password - Enter a password for the admin user
- Confirm Admin Password - Re-enter the password for verification
- Site Offline - Choose if you wish to turn your website offline until you complete it's development
Create MariaDB Database
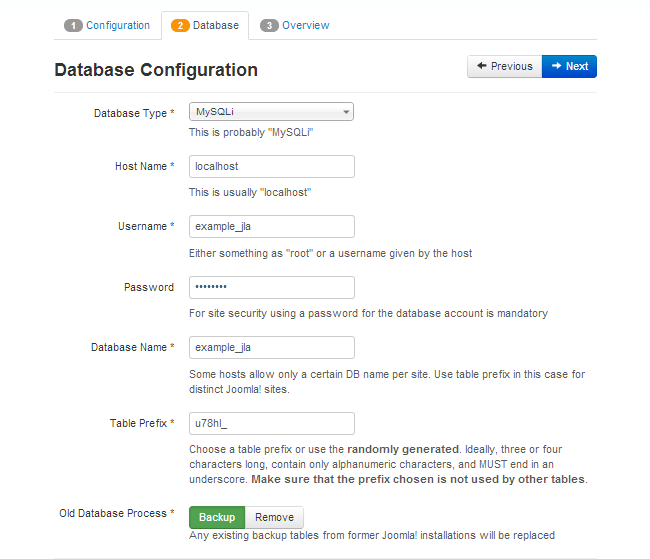
For more information on how to create a MariaDB database and username, please check our cPanel tutorial on How to create MariaDB Database. Once you are ready with the database, you can enter the following details:
- Database Type - Usually MySQLi is on our servers. The system automatically detects that so, you may leave it as it is, unless you require a different setup
- Host Name - Set this to "localhost" without quotes
- Username - The database user that you have created
- Password - Password for access to the database
- Database Name - The name of your new database to be used for the installation
- Table Prefix - Enter the prefix that you wish to set for all tables on your new Joomla database
- Old Database Process - If your database contains data, this option allows you to delete it or back it up
Overview and Complete the Install
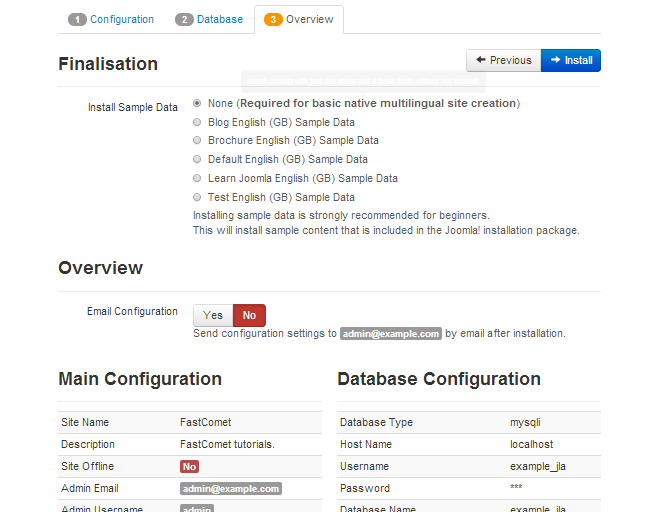
This step provides option to install sample data on your new website. It also displays an overview of the information that you have already configured for your website in the previous two steps, as well as information for the hosting environment that you will be using. As our servers are fully optimized for the latest release of Joomla, you will not have any issues on this step.
- Install Samle Data - Choose the type of data that you wish to install on your website. You also have the option to leave it as a blank Joomla installation with no demo data
- Main Configuration - The site name, description, offline mode and admin account details
- Database Configuration - The database details set for the new installation
- Pre-Installation Check - The system will attempt to check if the minimum requirements for a new Joomla installation are met on the server
- Recommended settings - This is the PHP configuration on the server. This step is optional
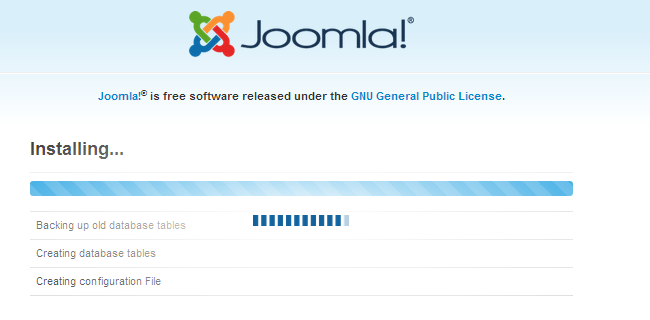
Once you click the Install button, the system completes automatically the rest of the process.
That’s it! Your new Joomla 3.x installation is now completed on the server. To start using it, you need to click on the Remove installation folder that secures your new website on the server.
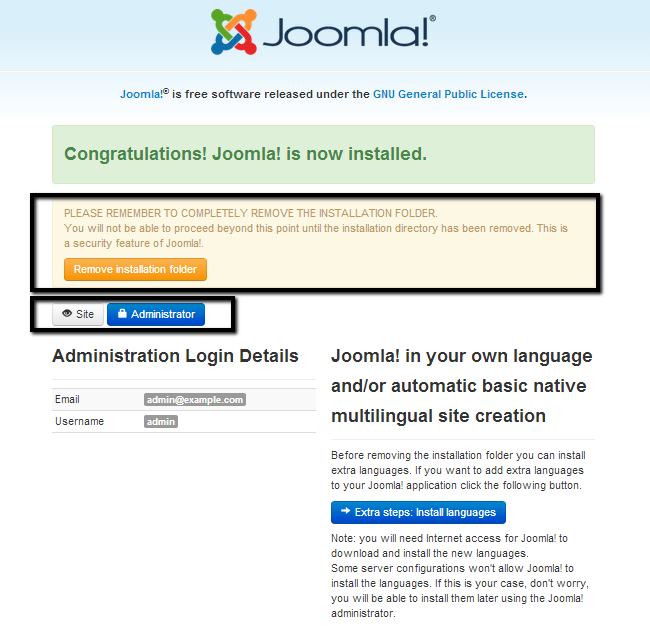
Here you will also notice the two links Site and Administrator that lead you respectively to the front and back-end of your new Joomla website.
Joomla Hosting
- Free Installation
- 24/7 Joomla Support
- Hack-free Protection
- Fast SSD Storage
- Free Domain Transfer
- Free Joomla Transfer
- Free Cloudflare CDN