How to install Joomla via Softaculous
Updated on Mar 13, 2019
This tutorial reviews the installation process of Joomla 3.x through the Softaculous auto-installer. It is a simple and straightforward process that you will complete with a few clicks.
To complete the Joomla Softaculous Installation, you need to:
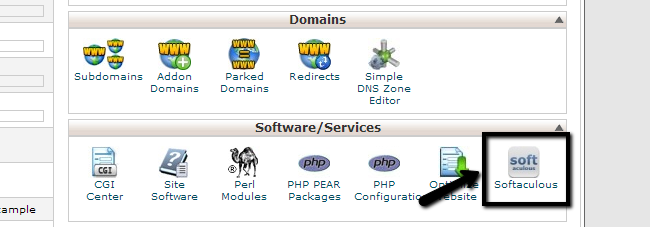
Locate the Softaculous Auto-Installer in cPanel
To access the Softaculous auto-installer, please log into your cPanel account and go to the Software/Services section. Then click on the Softaculous icon to open the application installation dashboard.
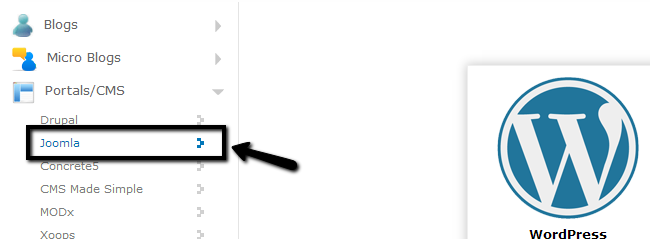
For the purpose of this tutorial, let us choose the Joomla application, which is located within the Portals/CMS section.
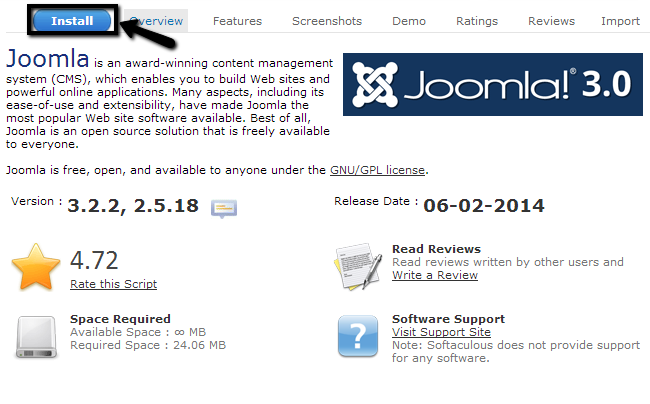
To proceed with the installation process, please click on the Install button to access the Joomla installation settings page.
Configure the Joomla Installation Settings
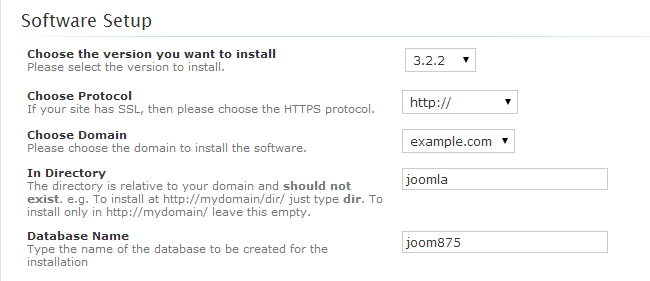
The next step is the actual configuration of Joomla on your account. Softaculous allows you to edit a list of options for the new installation and here we review them in full. The first section, named Software Setup includes the following options:
- Choose the version you want to install - Select a Joomla release that you wish to use on your website. For the purpose of this tutorial, we have used Joomla 3.2.2.
- Choose Protocol - You need to choose the protocol for your website.
- Choose Domain - The domain that you will be using for the new Joomla installation. This is usually the primary domain of your account. If you have any addon or subdomains, they will be visible via a drop-down box here.
- In Directory - If you would like to install your Joomla website into a subfolder on your account, you can specify the name of the subfolder here. If you wish to install Joomla within the ROOT directory of your domain, leave this field blank.
- Database Name - Choose the name of the database to be set for the new installation. The new database will be automatically created with its appropriate user and permissions.
HTTP vs HTTPS
Installing your Joomla application for the https:// protocol, without having a valid SSL certificate, might affect your website accessibility or result in security warnings. If you need a hosting solution with SSL certificate to secure your website, you may review our Joomla Hosting plans which include a free SSL Certificate.
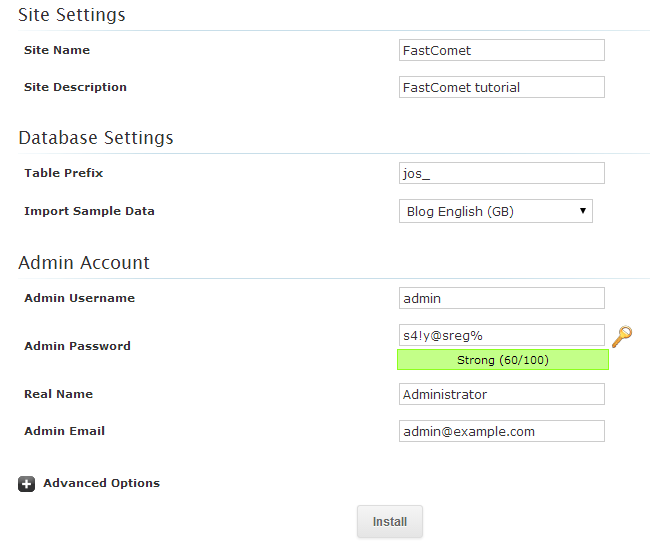
- Site Settings - Set the name and description for your new website.
- Database Settings - Set a prefix to be used for your Joomla database. Also, select whether you wish to import sample data on your new installation or not.
- Admin Account - Set the details for the admin user on your website. Make sure that you keep your details safe as you will be using them to edit and manage your new Joomla installation.
When you are ready with all options that you can edit for the new Joomla installation, you can check them again and make any corrections if necessary. Once you finish the setup, simply click the Install button below and Softaculous will complete the rest for you.
Finalize the Joomla Installation Process
The new installation of Joomla is now successfully completed. The system displays the main direct link to your website, as well as the link to the administrative area of your website.
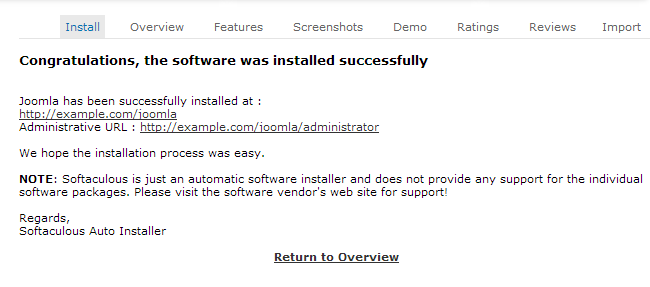
Keep those safe as you will need them in the future.
Joomla Hosting
- Free Installation
- 24/7 Joomla Support
- Hack-free Protection
- Fast SSD Storage
- Free Domain Transfer
- Free Joomla Transfer
- Free Cloudflare CDN