How to Create Email Accounts
Updated on Apr 23, 2018
Emails have been in use since 1993 and continue to be the primary method of communication on the internet, especially in the business area.
To manage the Email Accounts for your domain, you will need to:
step
Access the Email Accounts menu
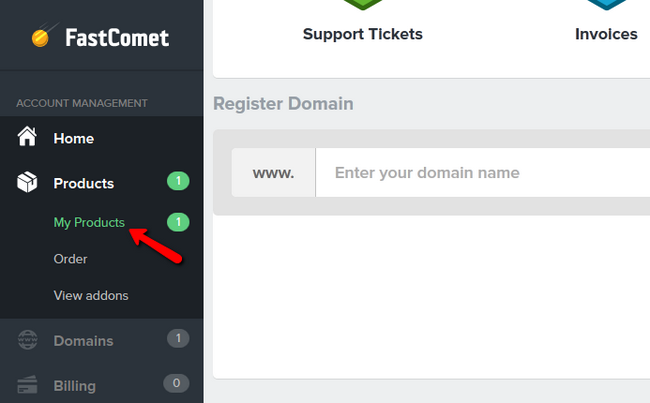
To access the Email accounts menu, you will need to login to your FastComet Client Area and navigate to the Products → My Products section from the main navigation panel.
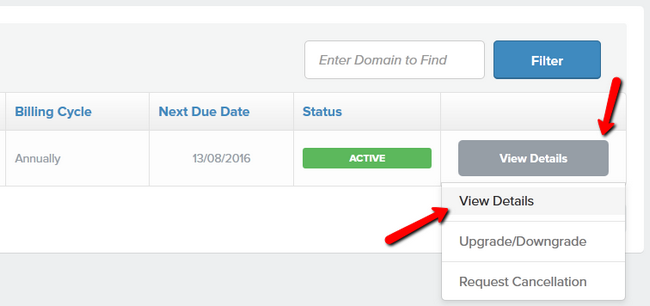
Now select the plan on which you want to create your new Email account and click on the View Details →View Details button.
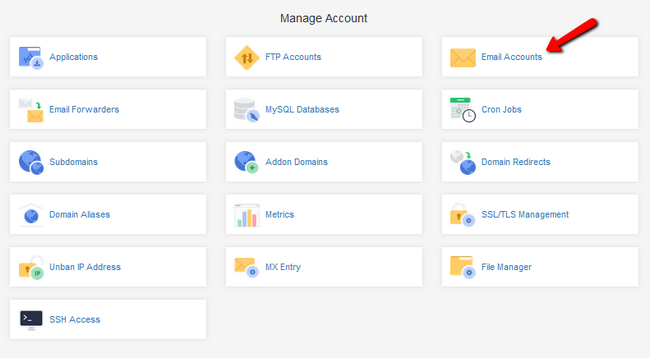
Select the Email Accounts option from the list.
step
Create a new Email Account
To create a new Email account you will need to configure its:
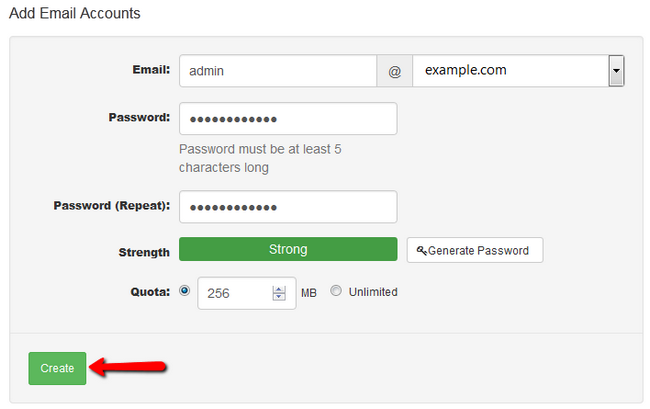
- Email - The username for this Email account (you must type the entire username when configuring mail clients ex: [email protected])
- Password - The password for this Email account
- Password (Repeat) - Repeat the password and make sure it matches with the one above
- Strength - The strength of your password (we recommend using a good/strong level password and taking advantage of the Random Password Generator)
- Quota - The amount of MB that can be stored in this email accounts if the form of emails
The management of your Email accounts is identical to the one of your FTP accounts. You can refer to Step 3 in our FTP Accounts tutorial for more information on the matter.
To find out how to configure a mail client with your new email account, we suggest you visit our IMAP Thunderbird and Outlook configuration tutorials.
Congratulations, you now know how to create and manage the Email accounts associated with your domain.
On this page...

SSD Web Hosting
- Free Domain Transfer
- 24/7 Technical Support
- Fast SSD Storage
- Hack-free Protection
- Free Script Installation
- Free Website Transfer
- Free Cloudflare CDN
- Immediate Activation
