How to connect personal email to your Gmail
Updated on Apr 23, 2018
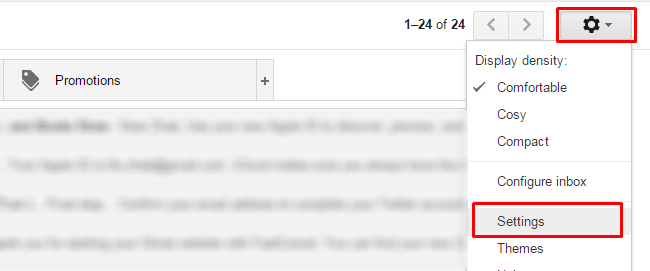
In this tutorial we will review how to connect your personal email to your Gmail account. This way all of the personal email messages will be visible in your Gmail account. First and foremost you should make sure your personal email account has POP access. If that account is also on Gmail, access it and click on the cogwheel icon located at the top right corner of the page and choose the Settings option.
Get into the Forwarding and POP/IMAP tab and select the Enable POP for all mail option. As per Google's recommendations, select keep Gmail's copy in the inbox from the drop-down menu next to "When messages are accessed with POP".
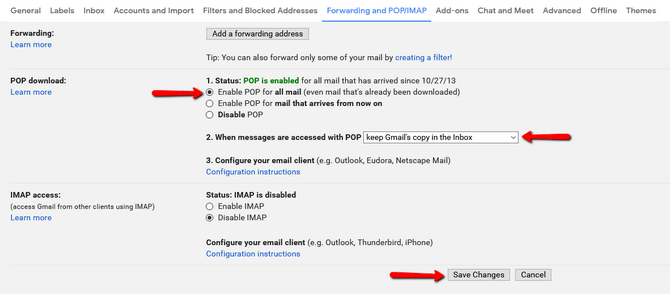
Don't forget to click Save Changes at the bottom of the page.
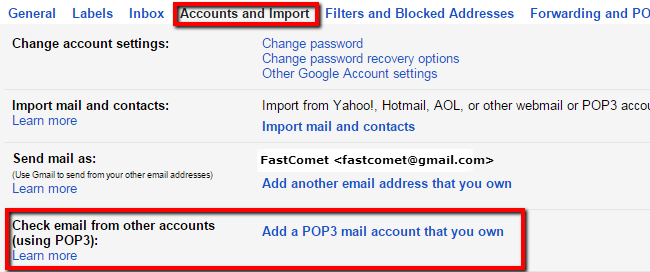
Now access the Settings of the Gmail account to which you want to import your mails. Get into the Accounts and Import tab and point your attention to the the Check email from other accounts (using POP3) section. There you will find the Add a POP3 mail account that you own link which you must use.
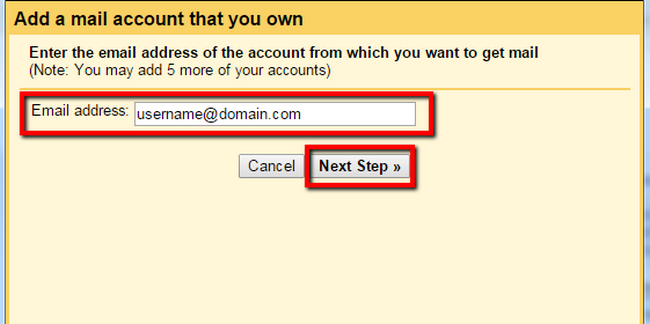
On the pop-up window you should type the full email address of the account you want to access via Gmail, for example [email protected] instead of just the username. Also notice that instead of [email protected] you should type the actual email credential. After the email field is filled, press the Next Step button.
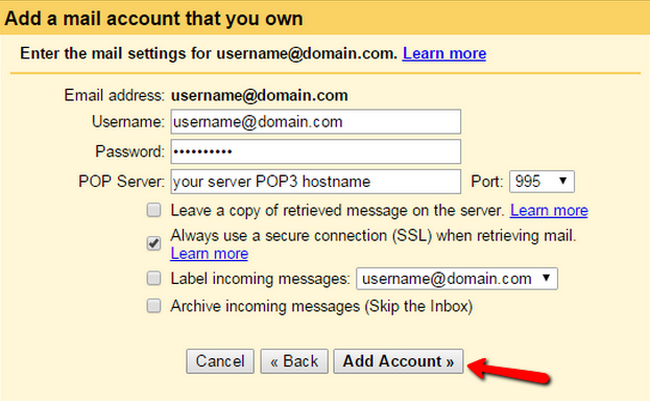
On the next step you will have to fill the following fields:
- Username - here you should enter the required username for the email
- Password - here should be typed the password for the email address you would like to setup and NOT for the Gmail account password
- POP server - your POP3 server hostname
- Port - the default ports are 995 for connectionvia SSL and 110 for non-SSL connection
The following four check boxes are self-explanatory.
After you assure all of the fields are properly filled and the check boxes are set to your requirements, press the Add Account button. At this point if you get an error message which state "Server denied POP3... ", uncheck the Always use a secure connection box and try again, if the error message persist, please double check the credential you have entered in the forms above. Note that if you receive an error message you may have to re-enter your password.
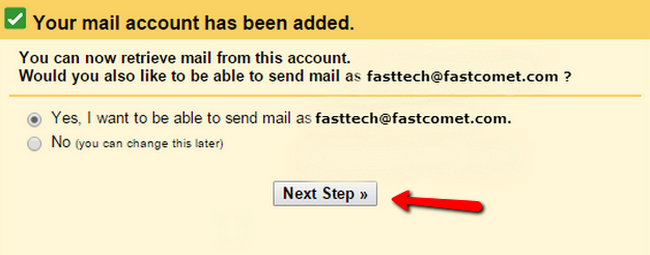
After all of the options are set correctly you will receive "Your mail account has been added" message and you will be asked if you want to be able to send email with your domain name email address, select that option and click on the Next Step button.
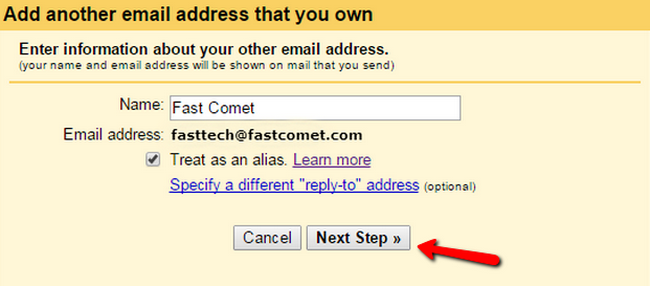
After the page in the pop-up window load, confirm the name of the email account that will appear in the "From" details and press the Next Step button. The "Treat as an alias" option can be set in order to manage "Send mail as" account behavior.
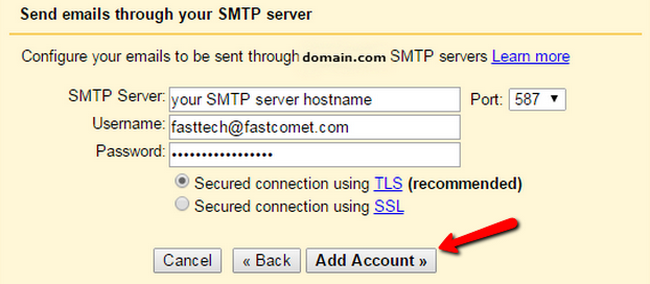
On the next step the following fields should be filled:
- SMTP Server - your SMTP server hostname
- Port - the default ports are 587 for TLS connection, 465 for connection via SSL and 25 for non-SSL connection
- Username - here you should enter the required username for the email
- Password - here should be typed the password for the email address you would like to setup and NOT for the Gmail account password
When all of the fields are properly press the Add Account button.
You have almost completed the setup! Now Gmail will send a verification email to the email account you would like to connect via the Gmail service, this is required because otherwise anyone who knew your email password could access your emails and send them "on your behalf" without your knowledge. If the connection to your POP3 email account is properly set, the verification email should arrive in your Gmail account. Click on the confirmation link in order to verify the domain or if you have not closed the pop-up window set the confirmation code from the email.

The final step after the verification is to access the cogwheel icon and select the Accounts and Import tab again. In the mentioned tab notice the "Send Mail As" section, click on the make default link next to the email address you have just set. Please notice that if you miss this step you will still be sending email from your Gmail address.

After all of the listed steps are properly applied once you access the Gmail account you will be able to check the emails labelled as your domain name email. Now the Gmail service will be checking your POP3 account every 2-3 minutes and moving the emails into Gmail for you.
Please note that if you have a lot of emails stored under WebMail and they were sorted into folders, Gmail will not import the emails that are in folders until they are moved into the main body of the inbox.
Congratulations! You have just set your personal domain email account via the Gmail service.

SSD Web Hosting
- Free Domain Transfer
- 24/7 Technical Support
- Fast SSD Storage
- Hack-free Protection
- Free Script Installation
- Free Website Transfer
- Free Cloudflare CDN
- Immediate Activation