How to use PuTTY
Updated on Jul 12, 2022
In this tutorial we will be showing you how to install and connect to the server, with a terminal emulation program. Such software can be used by Windows users to connect to their web server via SSH and pass commands through it directly to the terminal. The application, that we'll be using for the job is the PuTTY client.
In this tutorial, you will learn:
How to Install PuTTY
The first step that we will have to actually do is download the needed installation packages. That can be done by accessing the manufacturer's website, and going to the download section.
There you will likely see several releases under the Binaries section. We advise you to always download the latest stable version.
From there you could either download the installer for PuTTY, or just the PuTTY.exe. The difference between the two is that the PuTTY.exe is ready to run, and does not require any installation, but doesn't contain the other binaries that are listed.

For the purpose of the tutorial we will go with the installer. After the download finishes run the PuTTY installer. The installer itself is straight forward, first it will ask you where the install directory should be.
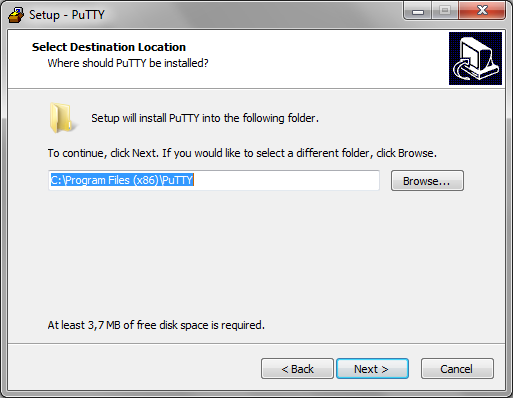
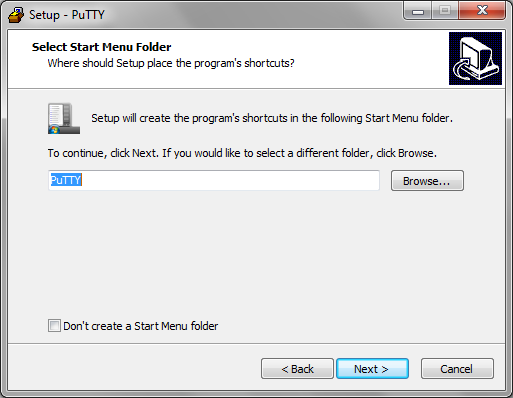
Feel free to chose whichever directory you want for the installation. Then choose the folder that will appear in the start menu and will store all the shortcuts.
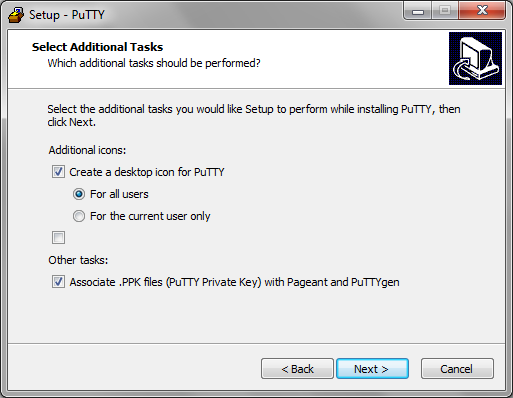
The last part of the pre-installation configurations will ask you what other additional icons should be created. For ease of use we will select "Create a desktop icon for PuTTY". After that we click Next and proceed with the installation.
Finally the installer will ask you if you choices are final, and should it proceed with installing. After confirmation PuTTY will quickly be installed.
When the installation is complete by default the installer will open the Read Me file of PuTTY which contains useful information regarding PuTTY and the other tools that come along with the installation. However we won't go into details regarding those, so feel free to review the documentation if you would like to gain more insight.
How to connect over SSH via PuTTY
In this section we'll show how to connect to one of the FastComet servers via SSH. Just follow the steps, and refer to the pictures if you get confused by the text.
For security reasons, in order to connect via SSH, you need to add your IP Address via the SHH Access tool from your FastComet client area. Keep in mind that this action is still required even if you want to use the SSH Access feature available in cPanel (which allows you to generate or import SSH keys). The SSH port will be unavailable unless your IP is already allowed via the SSH Access List.
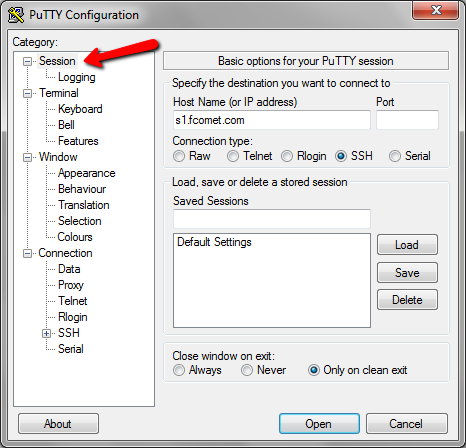
Firstly open the PuTTY.exe shortcut that has been created on your desktop. Then what you will see is this window.
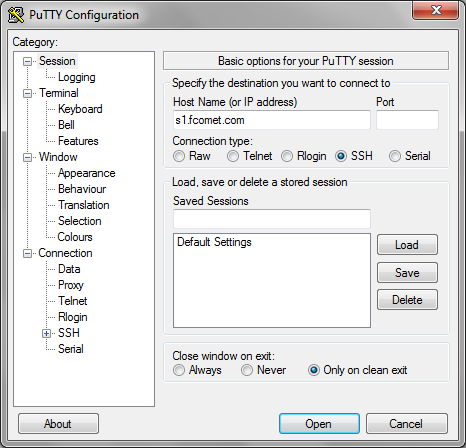
Make sure that you are on the Session tab.
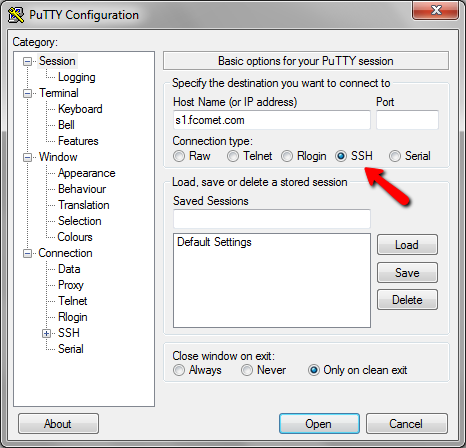
After that check the connection type is set to SSH from the radio buttons.
If the connection type is correct, proceed with entering the hostname and port.
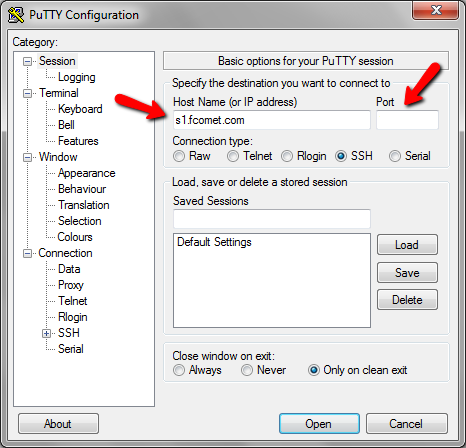
The hostname in this case is our s1.fcomet.com, or the VPS/DPS address that we have provided you with (e.g. vm752.fcomet.com or ds535.fcomet.com). If you don't know your host name you can contact your hosting provider in order to get it. The other variant is to use the host server's IP address. As to the port, the default value is 22, but most hosting companies alter that port, so you might have to contact your provider for it.
Now after we've entered the connection details. We can click on Open in the lower right-hand corner. Since you are connecting to your web server for the very first time it is very likely that you will get prompted with the following error messge:
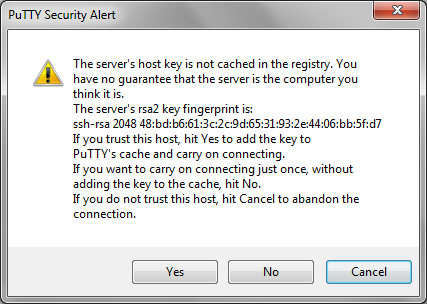
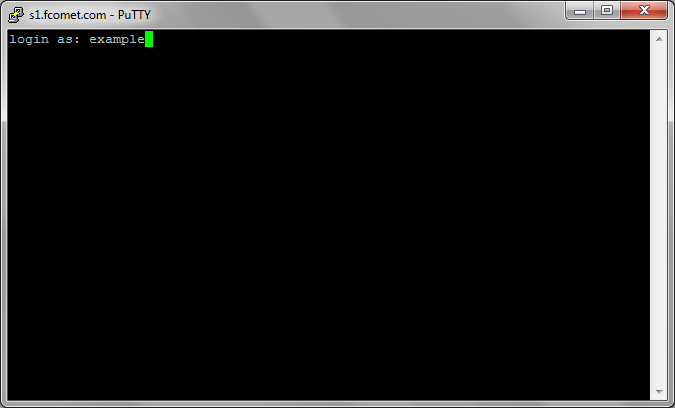
Just click Yes and advance to the next step. Now a black terminal window will open, which will prompt you for your username (this is the username that you use to login to your cPanel). In this case we are using example as a username.
Once you input the username and hit Enter, you will be requested to enter your user password ( again the password that you use to access you cPanel).

Note
As you tipe the password it will not display itself, thus make sure that you are typing the correct password, since there is no way for you to see what you've entered, or the length of the character string that you entered (there are no "*" like placeholders previewed)
If all information is correct the shell prompt will appear
example@s2 [~]#
And you will access your home directory. From there on you are free to unleash your power and reign supreme by passing shell commands to the server who is there to do your bidding.
If you are a novice who doesn't have much experience (if any) with the Linux/Unix command line interface, then you ought to consider reviewing our detailed tutorial series. It will take you from a complete novice to someone that is capable to manage around the environment via the terminal, quite well.

SSD Web Hosting
- Free Domain Transfer
- 24/7 Technical Support
- Fast SSD Storage
- Hack-free Protection
- Free Script Installation
- Free Website Transfer
- Free Cloudflare CDN
- Immediate Activation