How to Create and Manage FTP Accounts
Updated on Apr 23, 2018
FTP accounts are needed for access the server with the intention of adding or removing files to your hosting account. Often used by developers to work on your website or bulk upload images for your products or articles.
To fully use your FTP accounts with FastComet, you will need to:
step
Access the FTP Accounts menu
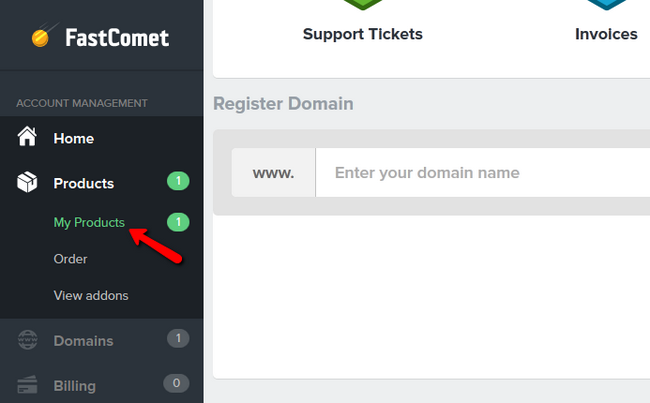
To access the FTP accounts menu, you will need to login to your FastComet Client Area and navigate to the Products→My Products section from the main navigation panel.
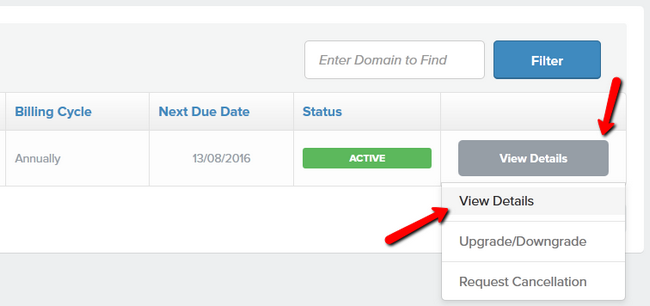
Now select the plan on which you want to create your new FTP account and click on the View Details → View Details button.
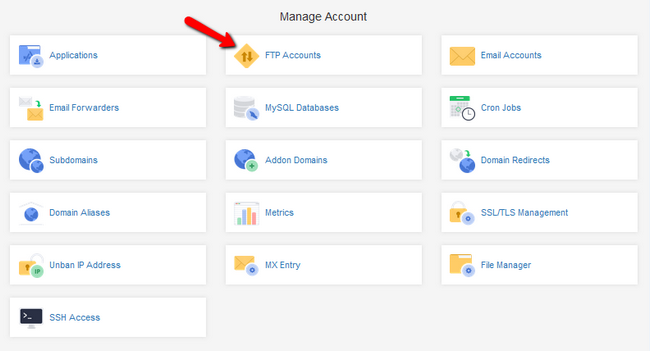
From here you will be able to see 16 options regarding the management of your account. Select the FTP Accounts section.
step
Create a new FTP Account
Now you must configure the new FTP account:
- Login - The username for this FTP account (you must type the entire username when using ftp applications ex: [email protected])
- Password - The password for this FTP account
- Password (Repeat) - Repeat the password and make sure it matches with the one above
- Strength - The strength of your password (we recommend using a good/strong level password and taking advantage of the Random Password Generator)
- Directory - The directory which will be accessible with this FTP account (if you want to delegate access to a developer only for a certain folder, you can do so by selecting the directory to it in this field)
- Quota - The amount of MB that can be uploaded/downloaded when using this account (if you want to limit the amount of data a developer can work with you can do it via the Quota field)
step
Manage your FTP Accounts
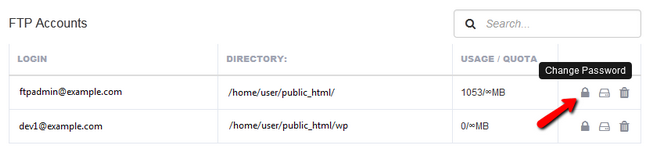
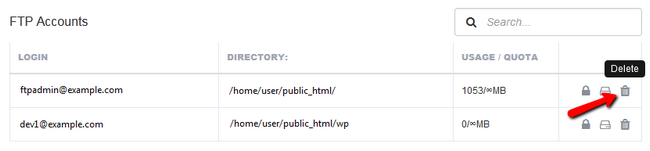
If you scroll down, you will see your already existing accounts and you will be able to manage them accordingly. To change the password of an account, click the locker icon for that account.
You will be prompted to select a new password for the account and confirm it.
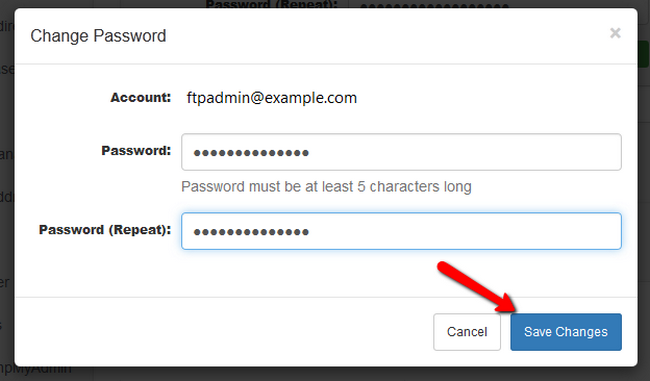
When you have done that, click on the Save Changes button.
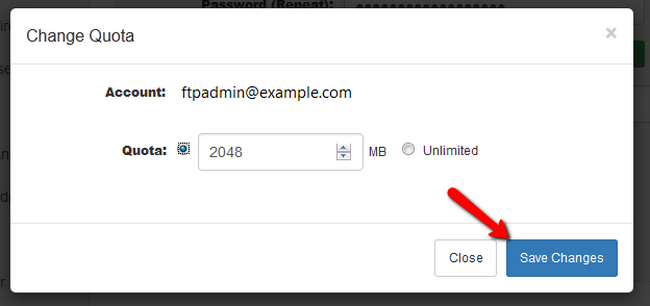
If you wish to change the Quota for an account, click on the hard disk icon for that account.
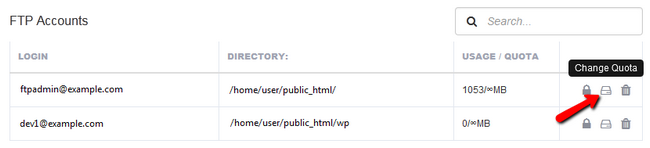
Now you will be able to change the quota to a fixed amount of your choice by clicking on the Save Changes button.
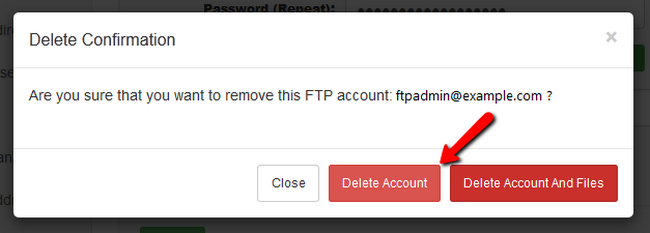
To completely remove a FTP account from your hosting account, click on the trash bin icon.
Now you can choose between deleting only the account or removing both the account and the files uploaded via it. Usually you will only remove the account.
Congratulations, you now know how to manage the FTP accounts for your hosting account with FastComet.
On this page...

SSD Web Hosting
- Free Domain Transfer
- 24/7 Technical Support
- Fast SSD Storage
- Hack-free Protection
- Free Script Installation
- Free Website Transfer
- Free Cloudflare CDN
- Immediate Activation
