Enabling Two-Factor Authentication
Updated on Oct 10, 2023
Two-factor authentication adds an additional layer of security by introducing a second step to your FastComet Client Area login. A second factor is something (usually a PIN number) that is required in addition to your standard password. Typically, this PIN is generated by something you physically have (such as your phone), and it is valid for a short period. Since both your password and PIN are required to log in, in the event an attacker obtains your password the two-factor authentication would stop them from accessing your account.
FastComet supports one of the most common and straightforward methods of two-factor authentication - time based one-time passwords. With these, in addition to your regular username & password, you also have to enter a 6-digit code that changes every 30 seconds. Only your token device (typically a smartphone) will know your secret key. Without it, even if your password is compromised, your account will be safe and secure.
To manage your security better you will need to learn:
How to activate the Two-factor Authentication
You can easily activate the two-factor authentication for your account via your Client Area. To do so, you will need to install an OATH software such as Google Authenticator, Apple's OATH Token App or one of the most popular Two-factor Authentication (2FA) App - Authy.
For this tutorial we will use Google Authenticator which you can get for free on Google Play or the App Store:
![]()
![]()
To begin, download and install the two-factor authentication app of your choosing on your mobile device and login into your FastComet Client Area with your email and password on your computer.
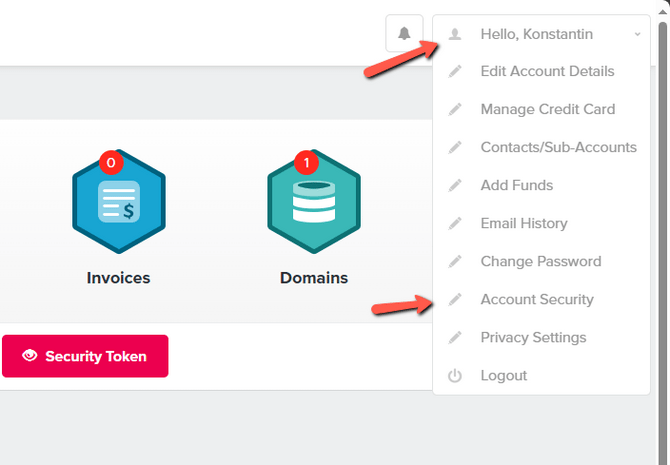
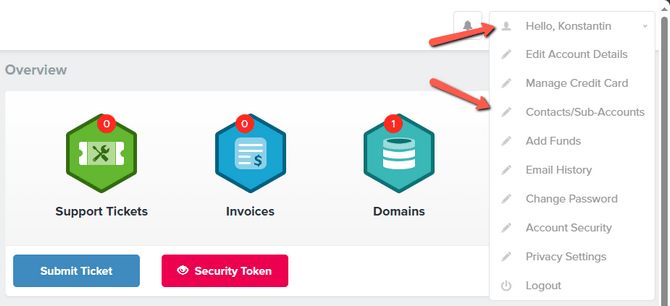
Click on the drop-down menu in the top right corner of your screen and then Account Security.
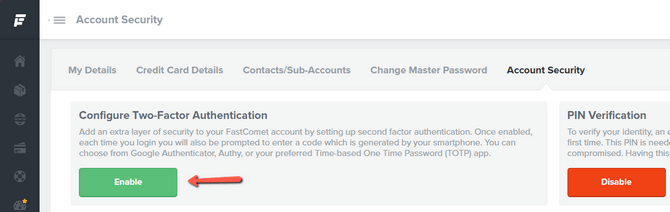
Next, Enable two-factor authentication for your account.
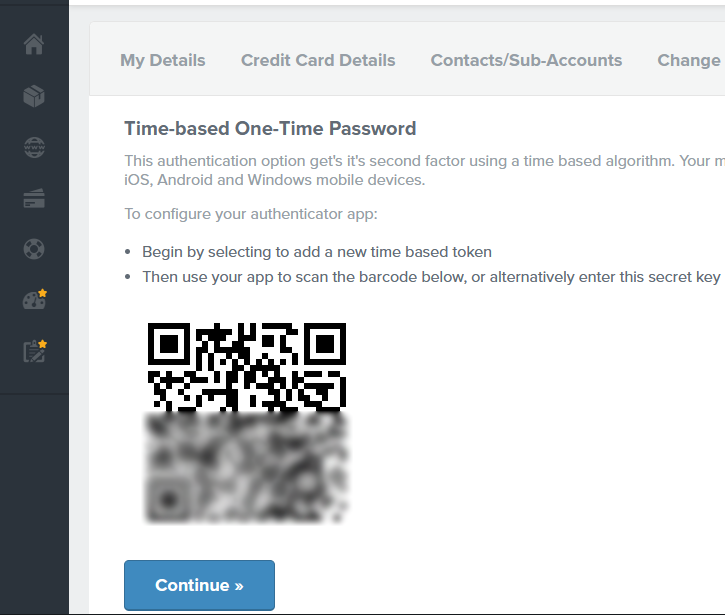
You will see some general information about two-factor authentication on the next page. To proceed, click on Get Started. The next page will have a QR code which you have to scan with your two-factor authentication app. There is also a secret key on the page that you can manually enter in your app, instead of scanning the QR code.
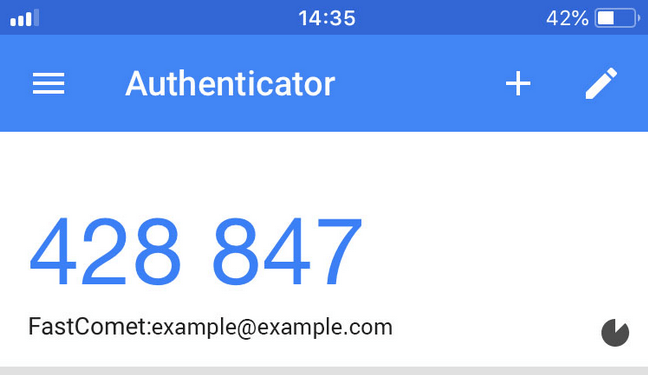
Open the authentication app you chose on your smartphone and find the option to scan a QR code. In the Google Authenticator it is a colorful + symbol in the bottom right. If this is the first time you are using the app, you should allow access to your camera. Scan the code on your monitor with your phone. That will add the FastComet two-factor authentication account on your device and generate your first PIN.
To complete the setup click on the Continue button in your Client Area where the QR code is. On the next page you will be asked to input your randomly generated temporary PIN. When you input your pin, click on Continue to complete the process. If you completed the last step successfully, you will see a message that informs you the PIN has been verified successfully. On the same page will be your backup code as well.
IMPORTANT
This 2FA PIN generated by your mobile device expires every 30 seconds. Make sure you have enough time to input your PIN before it expires or wait until it is regenerated. Additionally, your Backup code is a permanent 2-factor authentication PIN. We highly recommend writing it down and storing it securely. In case you lose your two-factor device, and you are no longer able to generate temporary PINs, this PIN can be used to access your account.
From this moment on your FastComet Client Area can be accessed only using both standard login credentials and the two-factor authentication PIN. Make sure you have your backup code written down and return to your Client Area.
How to login with Two-factor Authentication Activated
To access your Client Area after having two-factor authentication activated, please access the Client Area login page and input your email and password as usual and click Login. The form will reload and request your two-factor code as well.
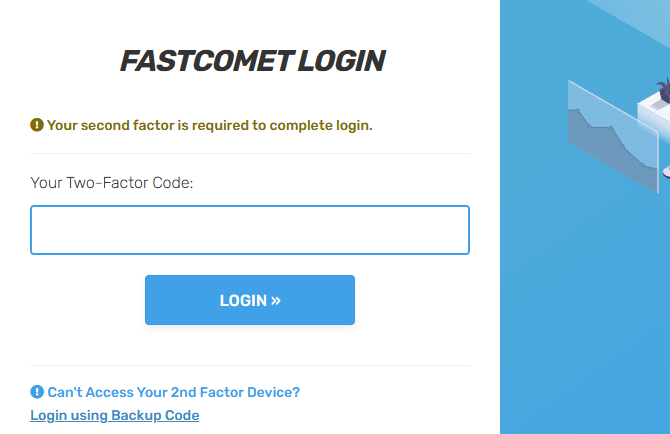
Open your two-factor authentication app to obtain your temporary PIN for your FastComet account, then enter it in the login page.
Notice
Be advised that the code expires every 30 seconds, so please make sure you have enough time to input the PIN or wait until the key is regenerated.
How to deactivate Two-factor Authentication
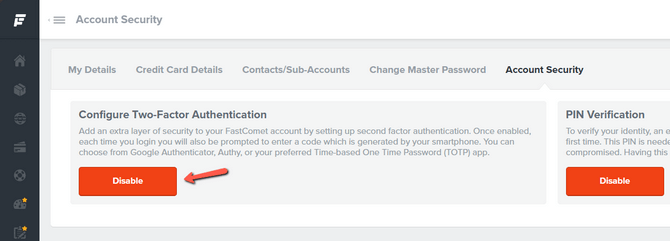
To deactivate two-factor authentication for your account, login into your Client Area and click on the drop-down menu in the top right. Then, click on Account Security.
On the next page click on the Disable button and input your Client Area master password. That is the password you use to log into your FastComet account on our website.
Afterwards you will see the confirmation message which means that the two-factor authentication is now disabled for your account.
How to allow Two-factor authentication for your subaccounts
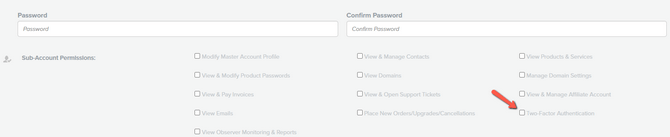
If you have added sub-accounts to your Client Area, you can enable this feature for them as well. To do so, login into your Client Area and refer to the Contacts/Sub-accounts menu.
On the next page select the subaccount you want to allow 2FA for and tick the Two-Factor Authentication box.
Now the subaccount can enable two-factor authentication by logging into their Client Area and following the activation steps from Section 1 in this tutorial.
That concludes our tutorial on enabling 2FA for your Client Area with us. We strongly recommend you turn this feature on, as it is invaluable for your account security.

SSD Web Hosting
- Free Domain Transfer
- 24/7 Technical Support
- Fast SSD Storage
- Hack-free Protection
- Free Script Installation
- Free Website Transfer
- Free Cloudflare CDN
- Immediate Activation