How to Change Default PHP Version in cPanel
Updated on Jun 29, 2023
Having the option to choose from multiple PHP versions is an absolute must. That’s why FastComet supports multiple PHP versions on every hosting package we offer.
FastComet uses AlmaLinux as the OS on our servers (except for our FastCloud - Extra plans which use CloudLinux) to improve server stability. A major feature of AlmaLinux (and CloudLinux) is that each cPanel account can select the global PHP version they want to have for their websites. You have the option to change your PHP version and enable/disable different PHP modules via the web-based interface in your cPanel.
We strive to provide the newest PHP version as quickly as we can after they release. We perform extensive testing and troubleshooting to make sure that the new PHP versions will not hinder our servers in any way.
PHP End of Life
At some point, a version of PHP will become obsolete which is referred to as the “end of life” of that version. This means that the version of PHP will no longer receive any security fixes. Unfortunately, there are many websites that still run on outdated PHP versions. All these websites are at risk. That is why we always recommend using new verions of PHP and software in general.
Use an Up-to-date PHP Version
There are several very solid reasons why you should use a more recent PHP version on your website:
- Better security - The primary reason that you should use newer PHP versions is security. Older PHP versions are no longer getting security fixes. That means any new vulnerabilities will not be fixed on that version which leaves your site open to attacks.
- Site Speed - Newer PHP versions always execute code faster and in a more optimized way which means faster page load speeds. Furthermore, faster page load speed leads to a better user experience and good SEO signals. You should know that site speed is an SEO ranking factor. So if you are aiming for page one of Google search results, site speed is quite important.
- Ongoing Support - When running the latest PHP versions, you are protected from the latest known vulnerabilities. Developers work to fix security vulnerabilities in PHP when they come to light. The same goes for known bugs.
How to Check Your PHP Information
Now you’re curious how to update your website's PHP version. First off, you have to find out what version of PHP your site is using. There are several ways to check that.
The WordPress Site Health Page
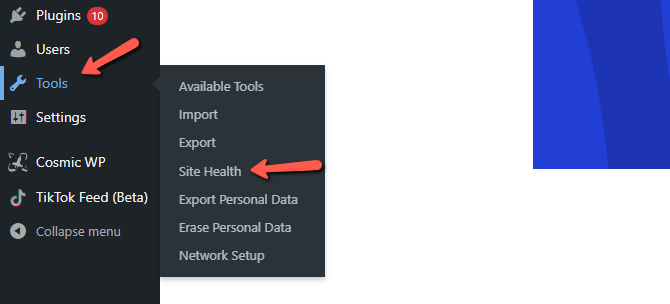
When using WordPress, you can access the Site Health page from your WordPress Dashboard and see lots of useful information that you can address to keep your site secure. You can reach it by going to Tools and then clicking on Site Health.
Another way is to just append your domain with:
/wp-admin/site-health.php
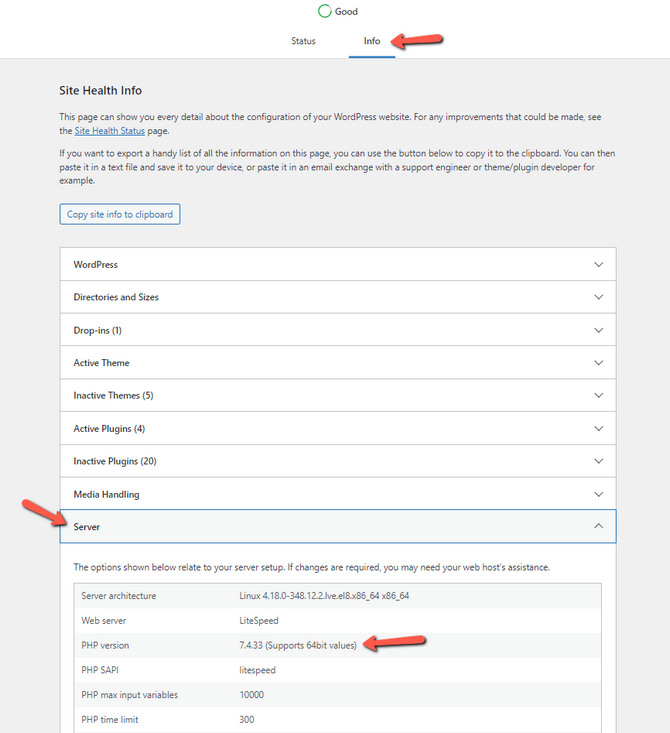
When on the page, click on Info and then on the Server tab to see the system information your website is using, including the PHP version.
How to Check PHP Information Using cPanel
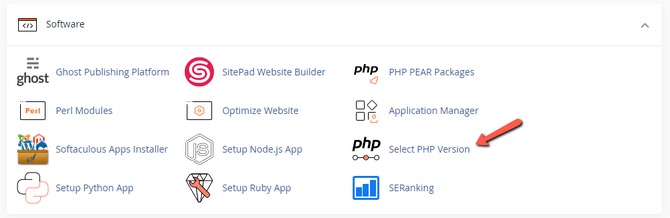
You can easily check your PHP information using the Select PHP Version cPanel tool in the Software section:
The next page will have detailed information about your current PHP version, modules, values, etc. Scroll down to browse for more.
If you wish to find data about a specific module or function, you can use the CTRL + F (CMD + F for macOS) shortcut to open the search feature within your browser.
Note
This will show you the global PHP version for your cPanel. If any of your websites are using a PHP version separate from the global one, this page will not show you that. We discuss how to change the PHP version on a per-website basis later in this tutorial.
How to Check PHP Information Via an Info File
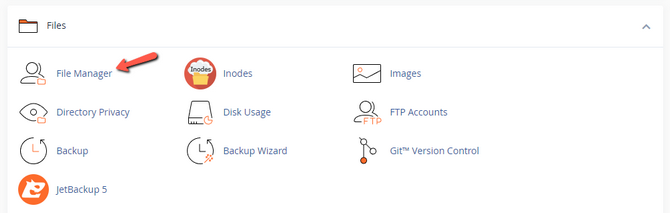
You can check what PHP version a given website (directory) is using by creating a specific file. That file is commonly known as phpinfo.php and is used to show accurate and current information about the PHP version your website is using. It is an excellent tool if you are looking for more in-depth information, and is also very easy to set up. You will need a way to access your website's files. Here we’re using the cPanel File Manager as an example.
- Navigate to File Manager under the Files section in your cPanel:
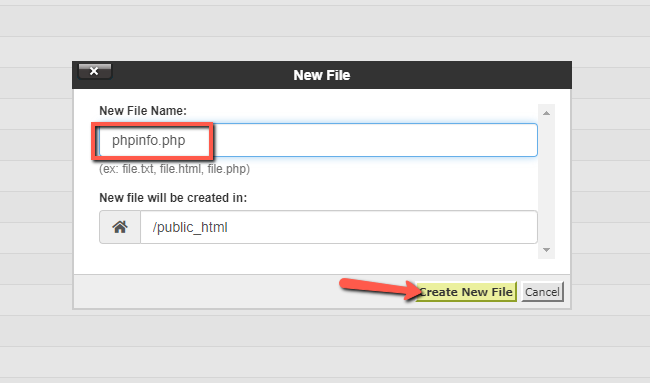
- Once you’re in the website's directory, click the New File button:

- Name your file phpinfo.php (you can name it anything you want) and press Create:
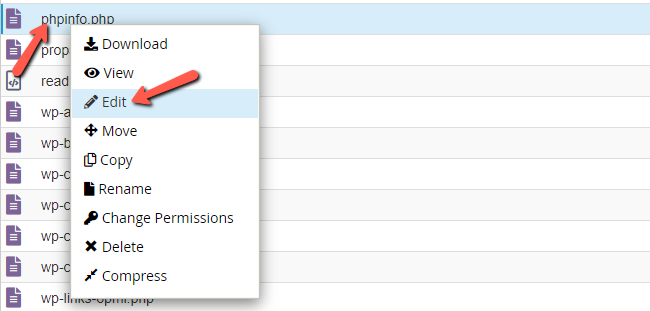
- Scroll down and locate the new file within the directory, then right-click to Edit:
- Copy and paste the following code into the text editor and press Save:
<?php
phpinfo();
?>
The same result can be achieved by using any text editor on your computer. Create the phpinfo.php file and insert the code in it. Then upload the file to your website's folder through an FTP client. If you don’t know how to configure or have never worked with an FTP client, such as FileZilla, refer to our FTP guide for more information.
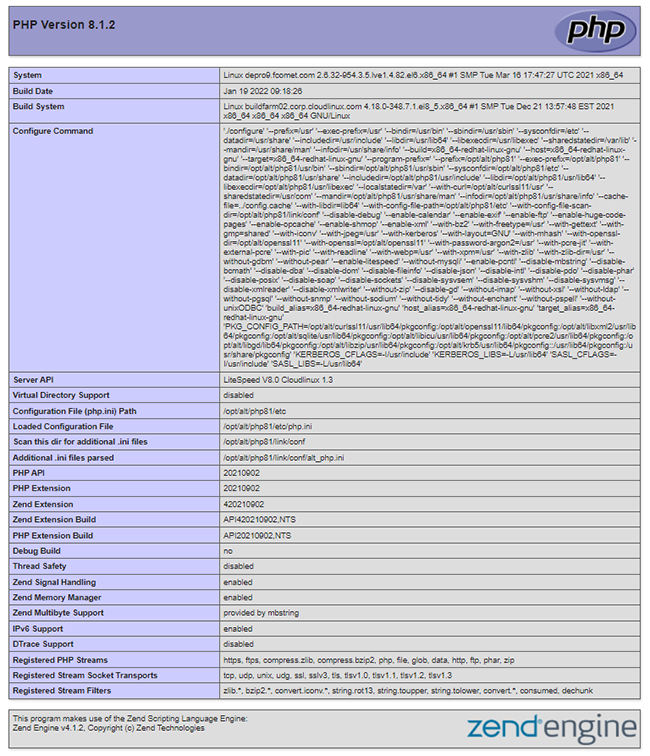
Once the file is creater or uploaded to your web site's directory all that’s left is to access it online. Add/phpinfo.php at the end of your domain name. You should see a something like the screenshot below.
Note: If you don’t want your phpinfo page to be displayed all the time, you can easily disable the file by renaming it to phpinfo.php-disabled, for instance.
How to Change Your PHP Version
To change your PHP version:
- Log into your cPanel and refer to the Software section and click on the Select PHP Version icon;
- Look for the version drop-down menu. All available PHP versions will be in it. To change the current version of your hosting account simply select the desired version and click on Apply. This will reload the page and give you the option to enable or disable different PHP modules available for the desired PHP version;
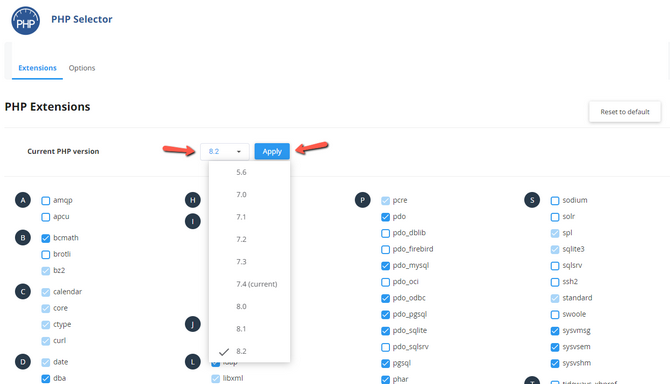
- On this page you can also enable or disable PHP modules for the selected PHP version (you don't have to actually apply the version for the module changes to reflect). Our services come with a default configuration of PHP modules. You can use the Reset to Default button to go back to it if you need to.
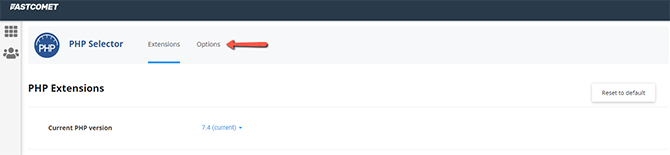
In addition to the Extensions selector, you can edit the available PHP versions' variables for your account (again, the version doesn't need to be applied for the changes you make to become active). You can perform this via the Options button.
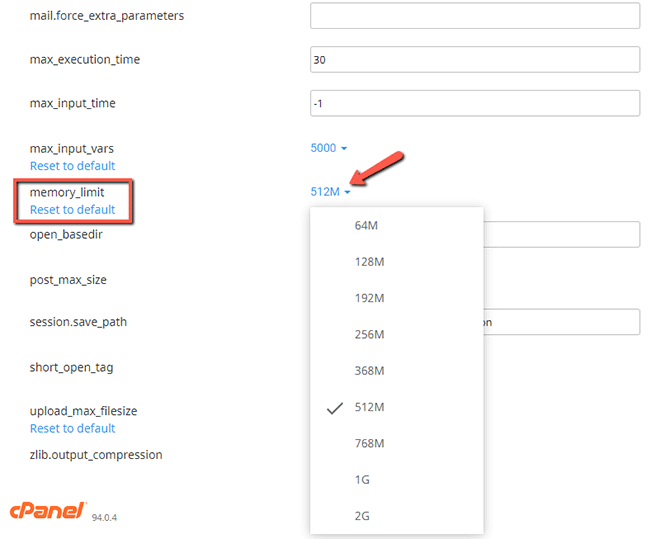
- You can modify variables such as the max_execution_time and the memory_limit for your PHP executions You can also change the memory limit for the current PHP version, or enable or disable error logging. There are more options though, so take a look yourself!
How to Change Your PHP Version for Different Websites (Directories)
If you have more than one website you may find yourself in a situation where the global PHP version of your cPanel doesn't work with one of your websites. Changing it breaks your other websites, though. Fortunately, there is a way to change the PHP for only one website without affecting the rest. We have a guide that explains everything in detail and you should have no trouble setting different PHP versions per directory.
Conclusion
Switching to one of the latest PHP versions may not seem like something that important to a lot of users, but it’s actually crucial for the security and speed of your website(s). Use this tutorial and you will have no problem changing your PHP version. Feel free to bookmark it in your browser and come back to it when you need to switch to a newer version of PHP. When a new PHP version is available we always post about it in our blog.

cPanel Hosting
- Free Domain Transfer
- 24/7 Technical Support
- Fast SSD Storage
- Hack-free Protection
- Free Script Installation
- Free Website Transfer
- Free Cloudflare CDN
- Immediate Activation