How to Manage SSH Keys
Updated on Sep 7, 2018
SSH keys are strings of encrypted symbols, used for authenticating access to accounts on a server. As they are not susceptible to brute force attacks and are not human-friendly, they are a preferred method by advanced users for securely accessing their hosting environment. In this tutorial, we will show you how to create an SSH key for your account via cPanel and then automate the login via the PuTTY client.
To manage your SSH Keys, you need to:
Find the SSH Key options
To start off, log in to your cPanel account and navigate to the Security section where you will find the SSH Access icon or simply type the latter in the search field at the top.
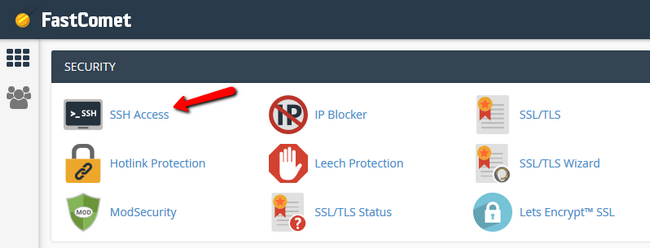
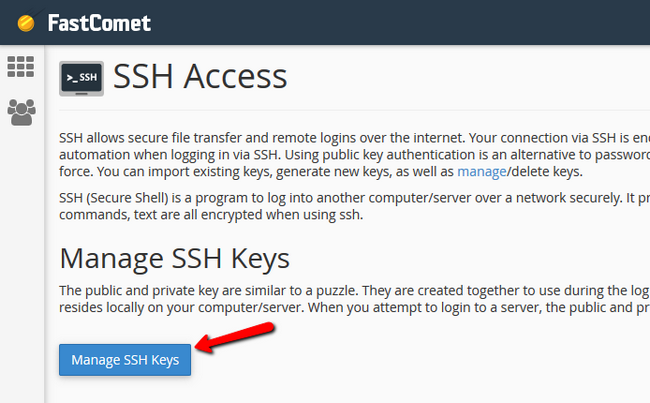
Here you will see a short description of what SSH and SSH keys are along with the Manage SSH Keys button.
Press it to continue onwards.
Create and Authorize SSH Keys
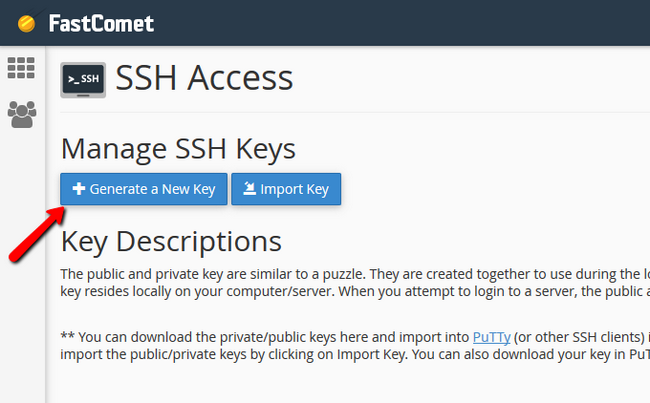
Now you will Generate a New Key, but you can also Import a Key you have already generated via another method, like from within the server itself.
The fields which you will have to populate here are:
- Key Name -The name of the key for internal recognition
- Key Password - A password to protect the key (we recommend using the Password Generator for creating a strong password). Also referred to as passphrase
- Key Type - Choose between DSA and RSA depending on your preference (we recommend RSA)
- Key Size -Choose between 1024, 2048 or 4096bit length (2048 being a default value)
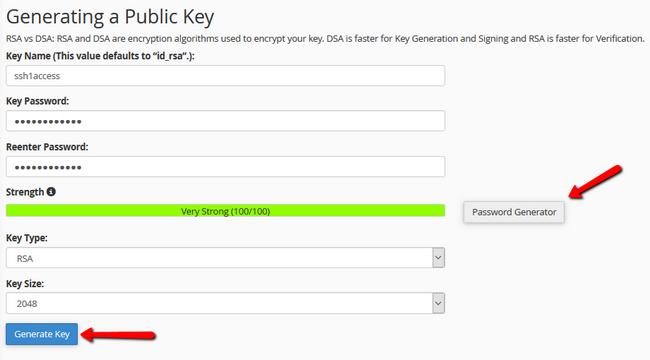
Click Generate Key, and you will see a similar confirmation.
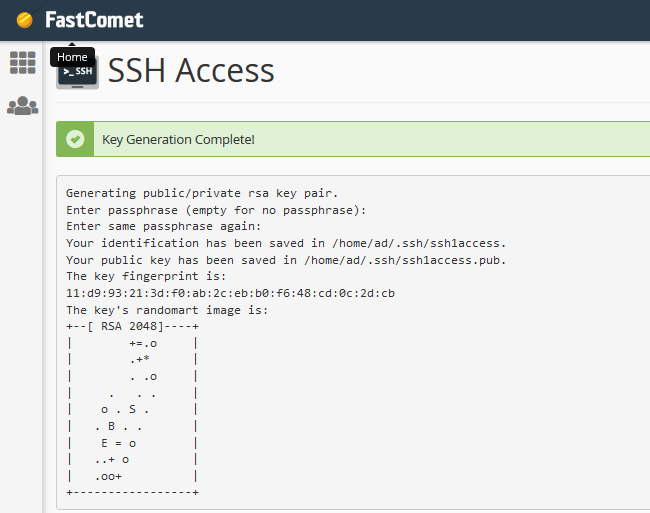
When you create the public key, a private key will be created automatically as keys need to work in pairs. However, before you can use the Public key, you will have to authorize it.
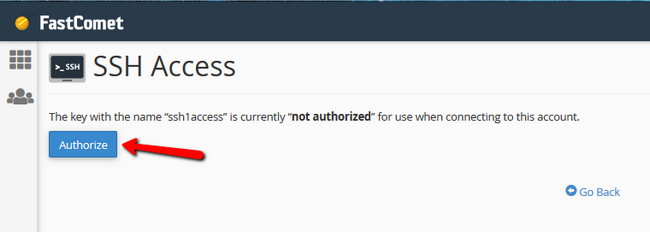
Note that you are only authorizing the Public key as it will be situated on the server. The private key will be with you, and you will configure it with the PuTTY client. To proceed, click on the Manage option.

Now click Authorize and then Go Back after the key has been authorized.
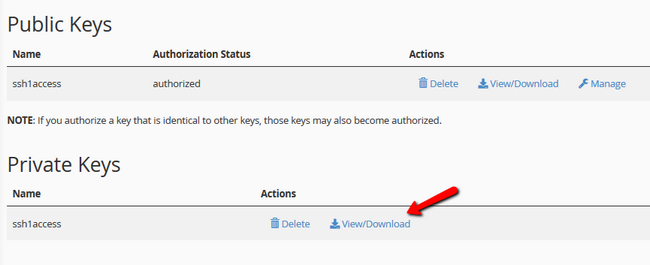
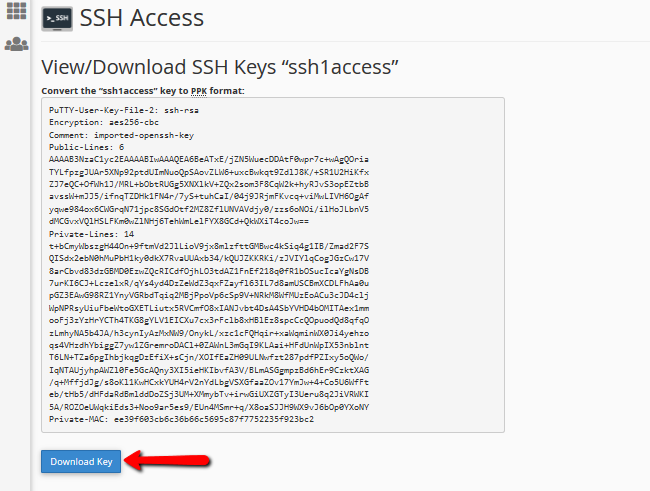
Now let's convert the Private Key to a .ppk (PuTTY Private Key) format and download it locally for use in the next step. Click on the View/Download button for your Private Key.
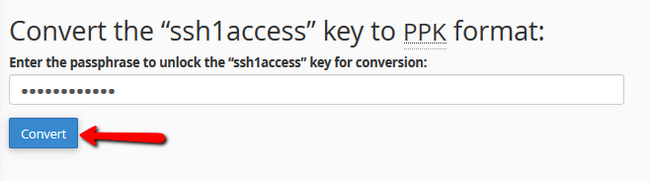
Type your passphrase to unlock the key and click Convert.
Once the key is converted, click on the Download Key button.
With this, you are ready for the next step of the tutorial.
Use SSH Keys
To use the SSH Key as described above, you will need a client like PuTTY to make the connection to the server. In our "How to Install PuTTY" tutorial we have already gone through the installation process, so if you need assistance with that, you can check the information provided there.
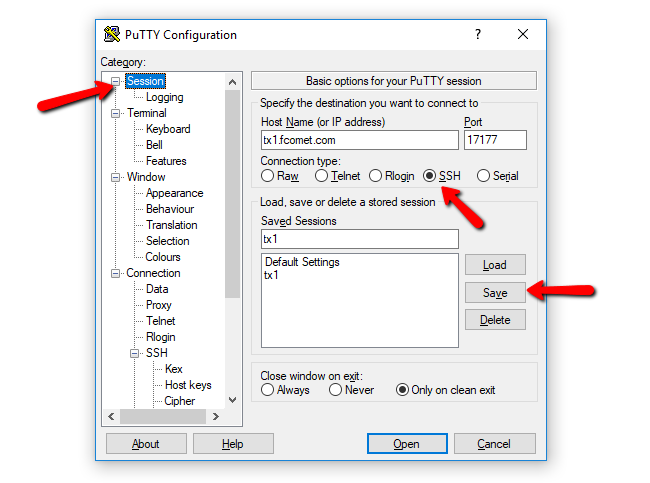
To configure PuTTY with your hosting account, start the client and navigate to the Session section:
- Host Name (IP Address) - The host name or IP address of the server on which your hosting account is located. This can be seen by going into your cPanel and reviewing the Server Information from the located on the right panel. If the Server Name specified there is tx1, your hostname would be tx1.fcomet.com
- Port - Our custom port for SSH access is 17177
- Connection type - Select the SSH option here
- Saved Session - The name of the session which you are saving or have loaded
Now you can add your cPanel's username as that will be used as a username in order to make the connection. To do that, navigate to the Connection → Data section.
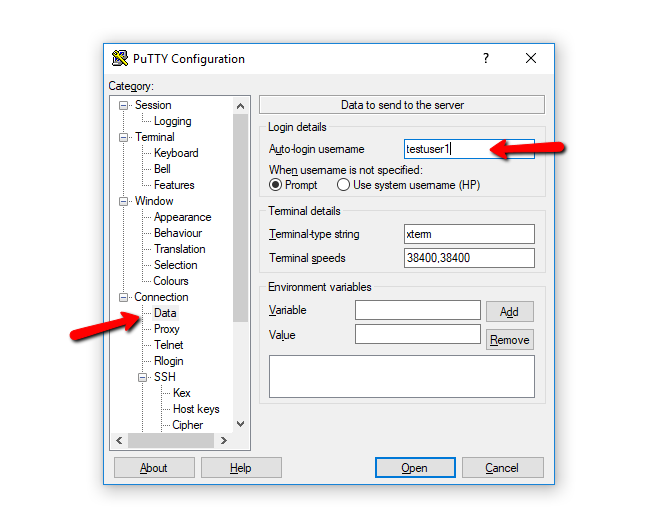
Make sure to go into the Session section again and re-save your session, so the username you added is applied to that session.
After this, you can upload the SSH Private key which we downloaded earlier. This is done by navigating to SSH → Auth, clicking on the browse button and selecting the .ppk file.
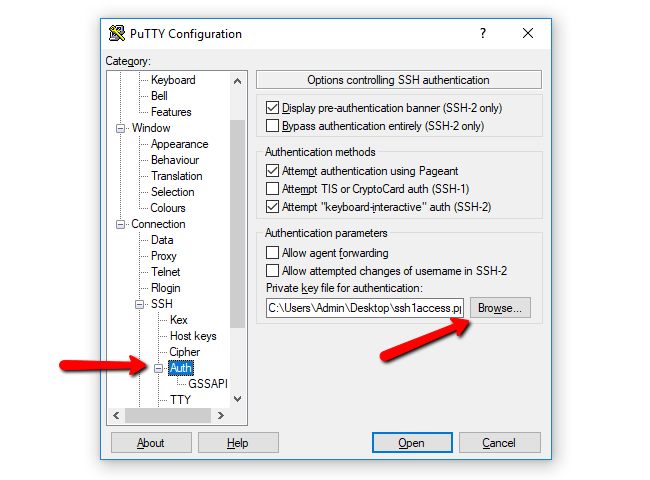
Don't forget to go to the Session section and click Save again.
Automate SSH Keys usage
Whenever you use your key-based login now, you still have to specify your key passphrase. This can be time-consuming if you are connecting via SSH server multiple times a day or if you have multiple accounts which you maintain.
Fortunately, PuTTY comes in pair with a few separate executables one of which is Pageant (an SSH authentication agent for PuTTY, PSCP, PSFTP, and Plink). If for some reason you don't have this installed with PuTTY and the rest of the executables, you can download it separately from here. Pageant can be fed a passphrase and then provide the same whenever you log in to your SSH server. However, usually when you stop Pageant, it forgets all of the keys as a security measure, so the next time you start Pageant, you must re-add them. We will prevent this by creating a shortcut on the desktop to the Pageant executable.
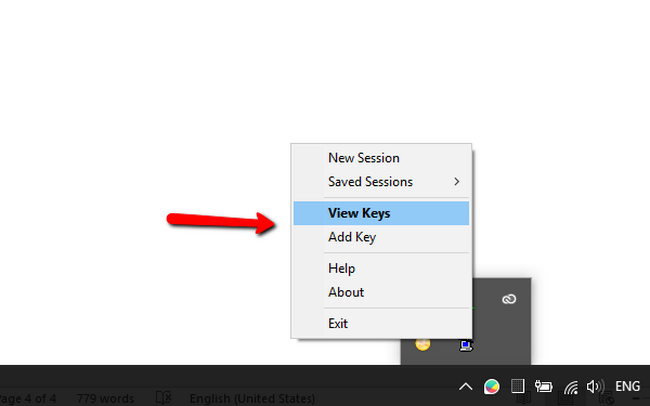
Note that after startup, Pageant will run minimized in the system tray. Double click on the icon to open the key list or right click on the icon and select either Add Key or View Keys. Both options will allow you to add a new key.
Browse for the .ppk file which you have already download in Step 2, and you will be prompted to enter the passphrase. Once you have done that, the key will be loaded in Pageant.
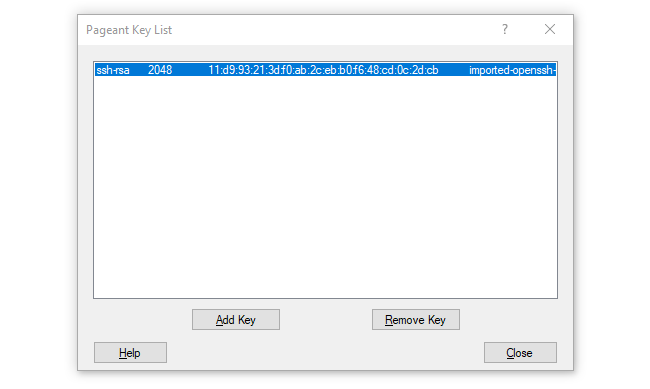
Now to make sure Pageant does not "forget" all of the keys and passphrases which are added to it. This will only prompt the passphrase for each key at the initial start of Pageant.
Go to the installation location of PuTTY and right click on the Pageant icon, then click on Properties and you will see the following screen.
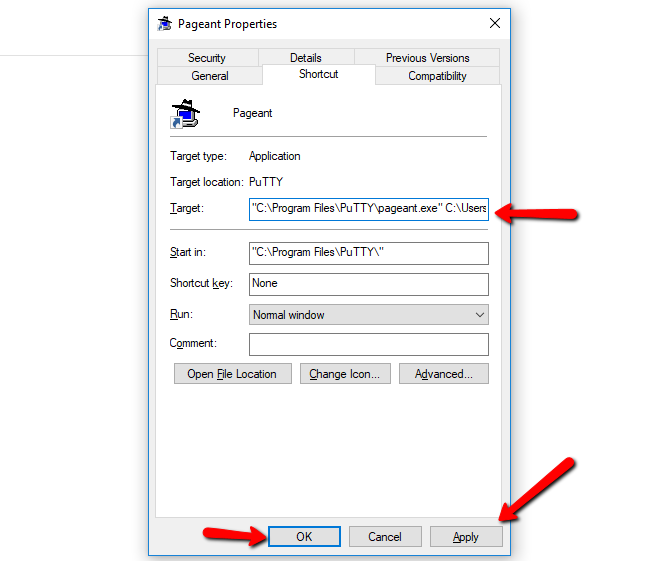
Now you will have to edit the Target field and add the key or keys location to it. As an example, if the key is on your desktop the field will look like this:
"C:\Program Files\PuTTY\pageant.exe" C:\Users\Admin\Desktop\ssh1access.ppk
Where "Admin" is the username of the windows account which you are currently using. Click on the Apply and then on the OK buttons.
To automate even further, we can exclude the manual startup of PuTTY in the beginning and just make Pageant start it when being run. To do this, you will also have to add PuTTY's system path at the end of the command in the Target field along with a -c command:
"C:\Program Files\PuTTY\pageant.exe" C:\Users\Admin\Desktop\ssh1access.ppk -c "C:\Program Files\PuTTY\putty.exe"
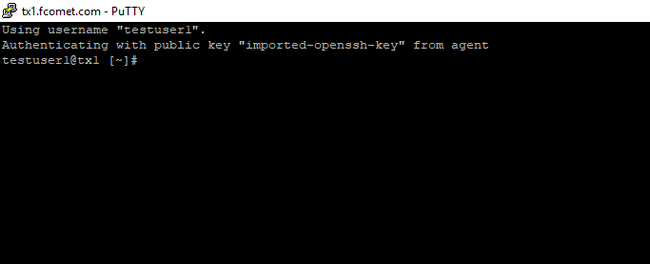
Again, hit the Apply and OK buttons and you are done. You can now access your hosting account in an SSH session or even multiple hosting accounts on different servers securely with just a few clicks.

cPanel Hosting
- Free Domain Transfer
- 24/7 Technical Support
- Fast SSD Storage
- Hack-free Protection
- Free Script Installation
- Free Website Transfer
- Free Cloudflare CDN
- Immediate Activation