How to Create Email AutoResponder in cPanel
Updated on May 28, 2021
The cPanel Auto Responder feature allows you to automatically send reply messages in response to incoming emails received on a specific email account. This is very useful when you want to notify customers with a proper response in a timely manner that you have received their email when you are on holiday or unavailable, or if you have any other generic messages to send.
This guide is to help you configure e-mail autoresponders in cPanel so your email account (mailbox) can send reply messages automatically.
We will cover:
How to Add an Autoresponder in cPanel
You can set more than one autoresponder for the same account. To add an autoresponder in cPanel, follow these steps:
Note:
It is not possible to create a general autoresponder for all email accounts under a certain domain. You will need to create a separate autoresponder per each mailbox.
- Log in to cPanel;
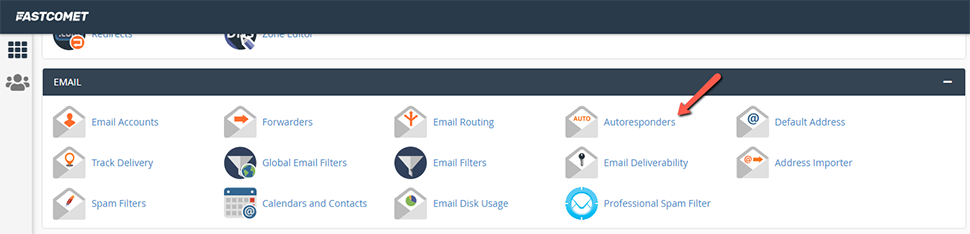
- In the Email section, click on Autoresponders:
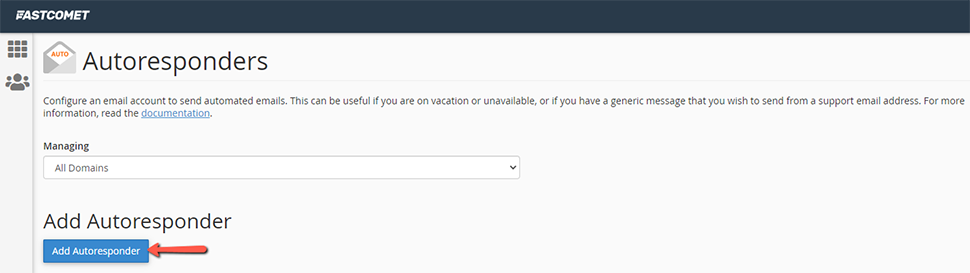
- Click on Add Autoresponder:
- Next, configure your autoresponder details:
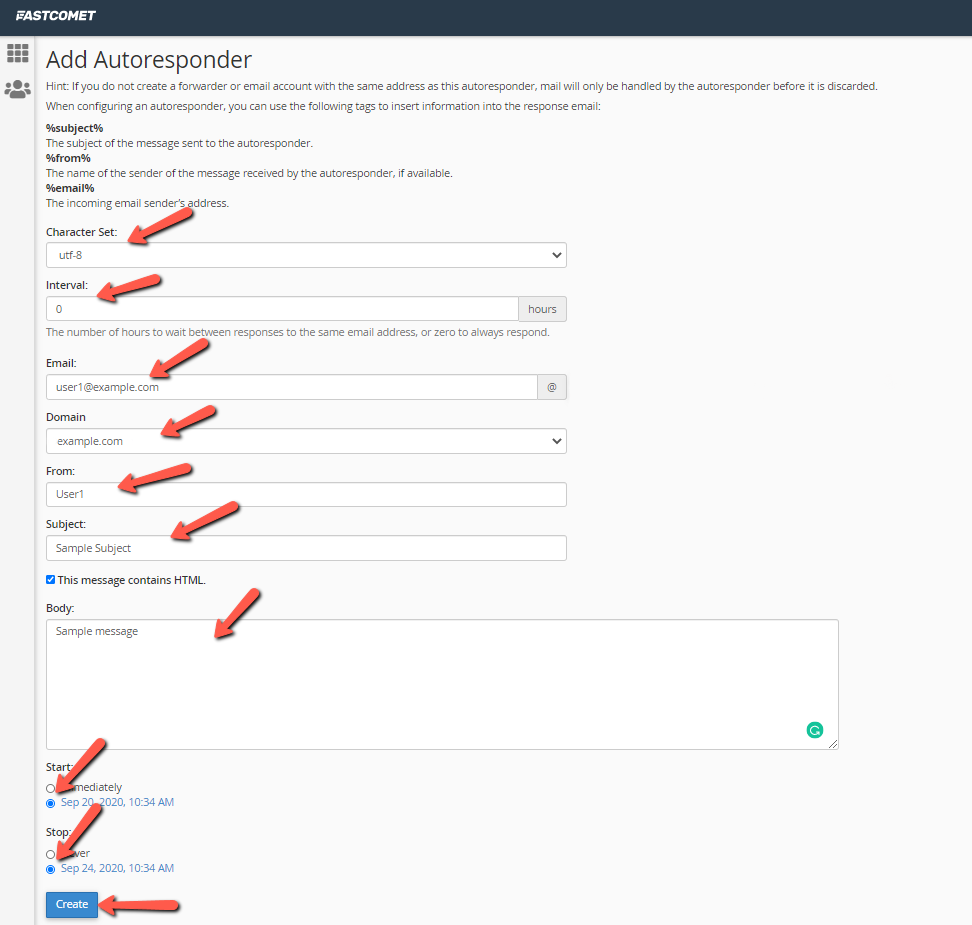
- Under Character Set, it’s best to select UTF-8 (it should be set by default).
- In the Interval text box, you should type the interval in hours for the autoresponder to wait before sending another auto-reply to the same email. Set it to 0 if you want to always send the auto-reply.
Note:
You are unable to exclude certain email addresses in the autoresponder. However, by using the Interval section, you can set the number of hours to wait between responses to the same email address.
- In the Email text box, type the email account for which the autoresponder would send messages.
- In the Domain list box, select the autoresponder domain;
- Next is the From text box, where you can add your name or your email address. You can also choose to leave this box blank;
- In the Subject text box, add the subject of your autoresponder;
- To include HTML in the message, select This message contains HTML;
- In the body text box, type your message.
- Under the Message box, you can choose whether to Start sending autoresponders immediately or schedule the process with the Custom options;
- To stop sending the autoresponder message, you can choose to never Stop it, or again, schedule the time;
- Click on Create.
How to Edit an Autoresponder in cPanel
You can edit an autoresponder if you want to modify the response contents or account details.
To edit an autoresponder in cPanel, follow the steps below:
- Log in to cPanel;
- Again, in the Email section of the cPanel home screen, click Autoresponders:
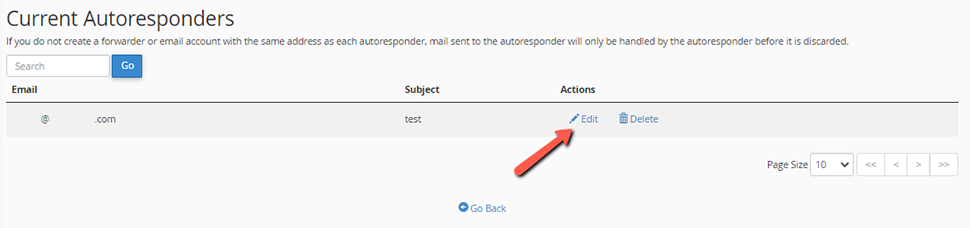
- Under Current Autoresponders, locate the autoresponder you want to edit;
- Click Edit:
- Make your changes to the autoresponder;
- Click on Modify for cPanel to update your autoresponder;
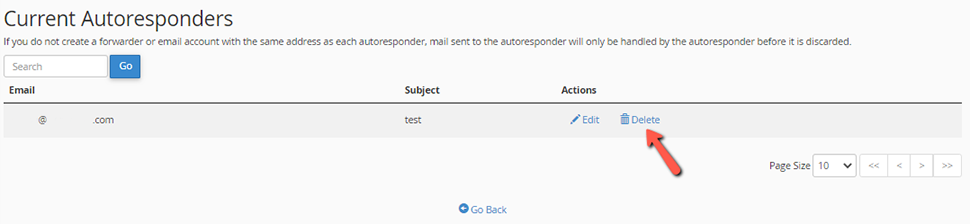
How to Delete an Autoresponder in cPanel
When you no longer need your autoresponder, you can delete it. Under Current Autoresponders, locate the autoresponder that you want to delete, and then click Delete:
Note:
If you use an autoresponder frequently (e.g., in an out-of-office message), consider modifying it to point to a nonexistent e-mail account to temporarily disable it. To activate it again, restore the correct e-mail account name.
Out of Office Message Guidance
We have a helpful blog post that provides the perfect guidance on out of office messages. You will find everything you need to know about out of office messages, as well as some templates that will assist you in crafting your own autoresponder email.
Conclusion
Autoresponders are important if you want to be as professional as possible when communicating with your business associates. We hope this post is helpful when configuring the autoresponder function for your self-hosted email.

cPanel Hosting
- Free Domain Transfer
- 24/7 Technical Support
- Fast SSD Storage
- Hack-free Protection
- Free Script Installation
- Free Website Transfer
- Free Cloudflare CDN
- Immediate Activation