How to Setup and Manage Two Factor Authentication for cPanel
Updated on Sep 20, 2019
Two-factor authentication (2FA) is in the process of adoption across the entire internet due to the increased security it provides. The name comes from the introduction of an additional verification layer which complements the traditional password authentication. The second layer can use a biometric mark like iris, face or fingerprint scan, but the majority of systems online still use one-time password (OTP). Usually, six characters in length and generated via trusted systems that deliver the codes to the user via smartphone apps. That includes the 2FA which we have implemented for hosting accounts at the beginning of 2018. Check our tutorial on how to manage 2FA for your client area for more information on that.
In this cPanel Security tutorial, we will show you:
How to Set Up Two-Factor Authentication for cPanel
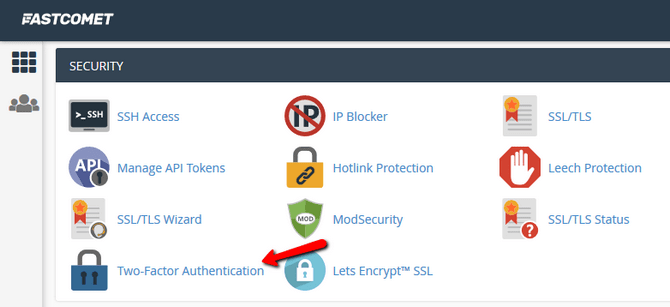
The first thing you should do is to access the 2FA cPanel feature, so navigate to Security → Two-Factor Authentication.
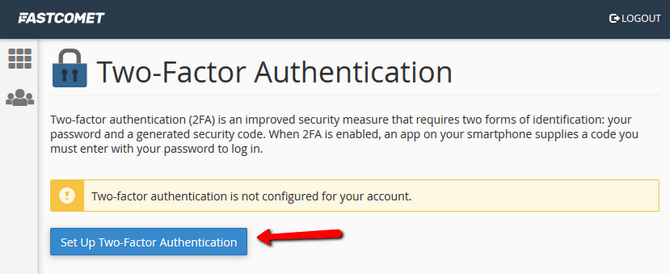
After that, you will have to link cPanel's authentication and the 2FA app on your phone by clicking on the Set Up Two-factor Authentication button.
Some of the most used 2FA apps are:
- Google Authenticator (Android, iOS, and BlackBerry)
- Authy (Android, iOS and Chrome platforms)
- Microsoft Authenticator (Android, iOS, and Windows Phone)
- Duo Mobile (Android and iOS)
Once you have selected a suitable application, you will have two options of configuring access for cPanel:
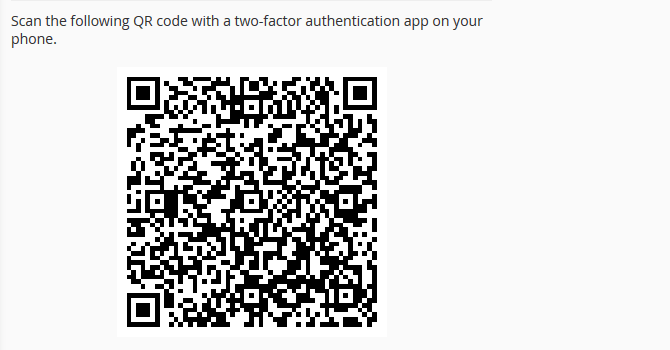
- Scan the displayed QR code with your phone.
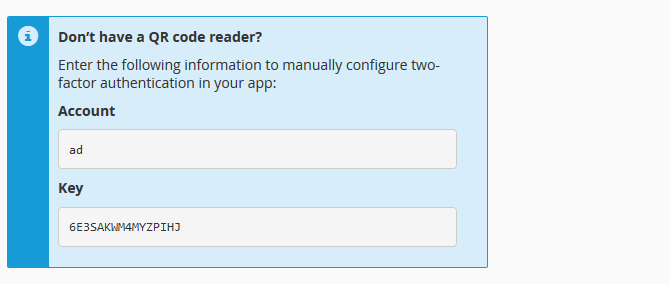
- Manually add a private Key in the app.
Both ways use the same OTP type generation behind the covers. There are three main OATH OTP types when people talk about 2FA. But the mechanism of generating an OTP is generally understood as a combination of a static random key value and some form of dynamic value such as a timer, real word local time. These are also called time-based OTPs (TOTP). That way, Authenticators can work even without internet access.
The application knows the static random key value as that was the QR code or manually added key which cPanel provides. The timer value changes, but once it has begun counting, the app itself can keep track of this value. The same goes for local time method. However, If your phone desyncs from the local server clock which is required to generate a correct OTPs, you will receive a message for invalid code.
Apps like Google Authenticator have a sync option which will sync your phone's time to that of their servers. Here is what you should do in such cases.
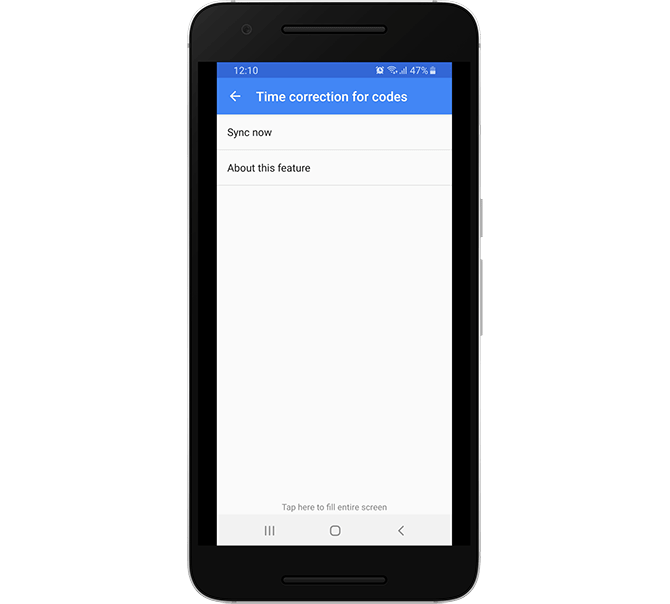
- Tap More → Settings.
- Tap Time correction for codes.
- Tap Sync now.
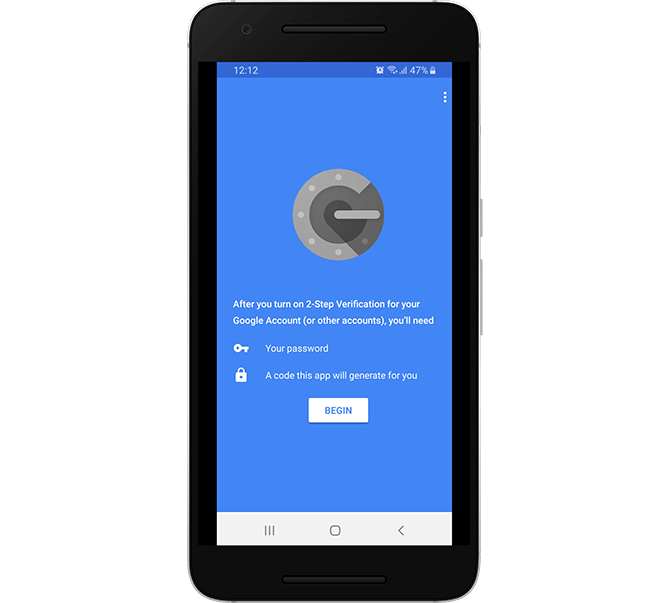
Google Authenticator
Press the "+" button to add a new entry to your Google Authenticator or tap Begin if this is your first time using the application.
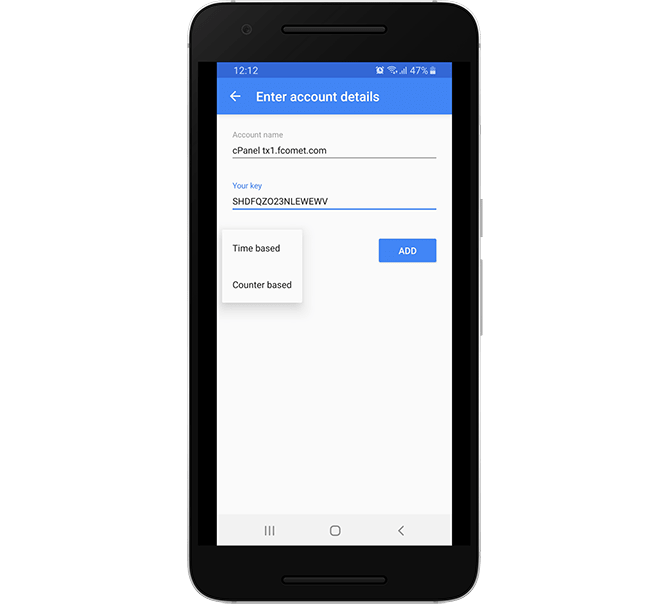
Use the QR code scan feature or add the code provided by cPanel manually. When manually adding a key code, you can select the Label for this record in the authenticator and select between timer or time-based code generation. Tap the Add button when you are finished.
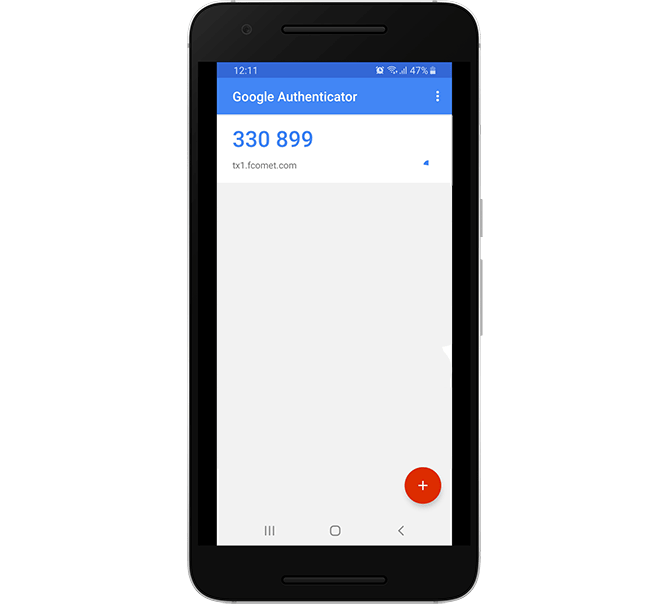
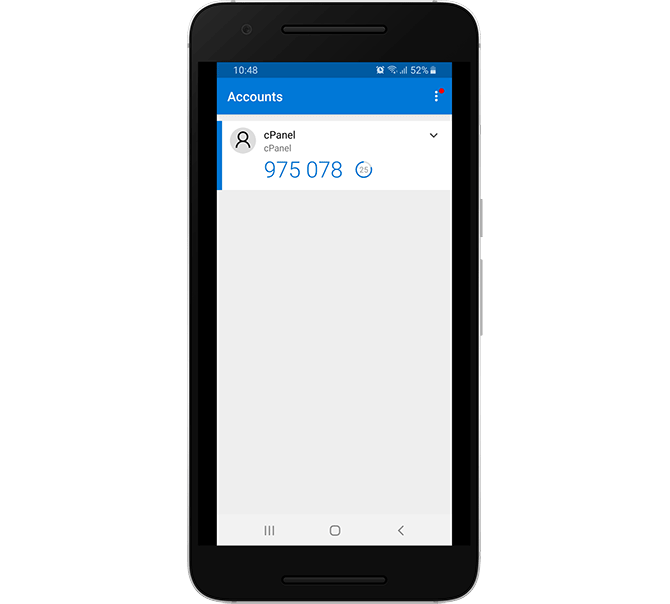
Now you will be able to see and use your newly generated codes.
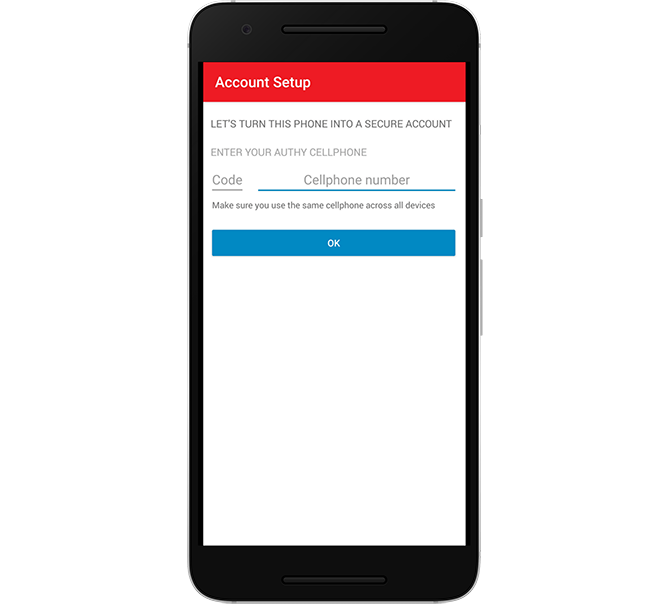
Authy
Authy's product is a bit different from the other Authenticators we mentioned due to some of the features it provides. Because of its Multi-Device support, you will first have to verify your phone, which is possible by creating an account. Input your country code and phone number to receive the SMS verification code.
Authy will automatically intercept the code so you won't have to copy it from your messages.
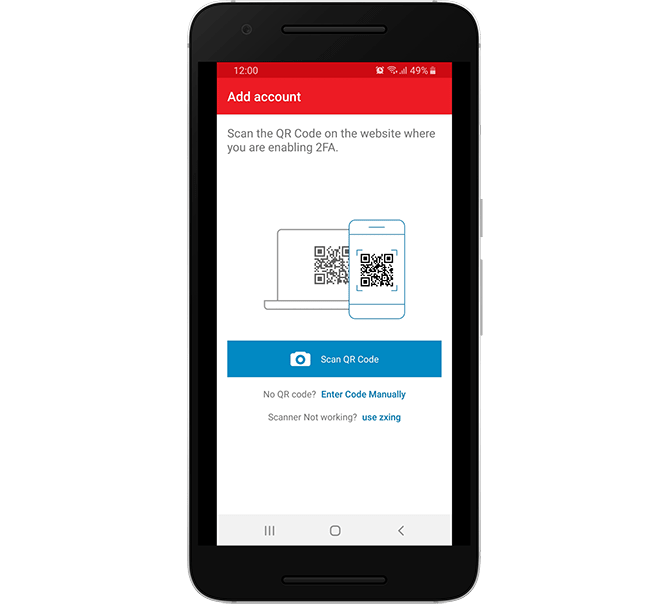
Now you can select if you want to scan a QR code or enter a key code manually.
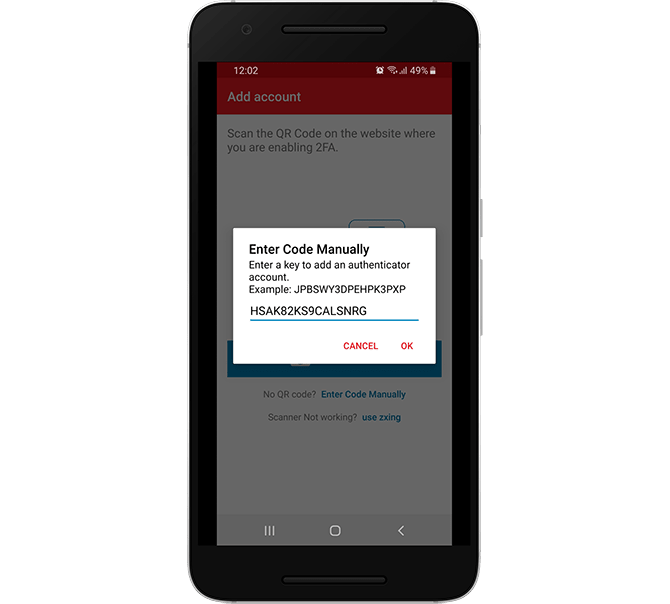
If you've chosen the latter option, carefully type your key, and press Ok.
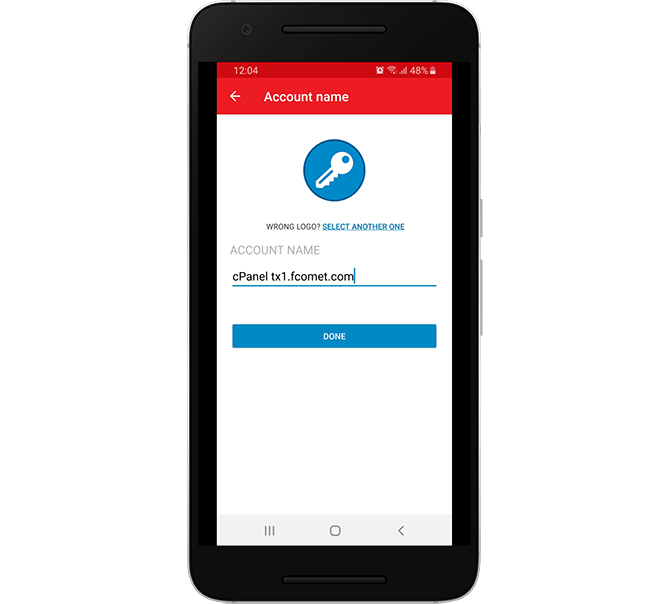
Name the account for ease of finding it later, and you are done. Due to Authy's security settings, we cannot provide a screenshot of how the code is displayed. However, the interface is more or less the same as the rest of the Authenticators listed here.
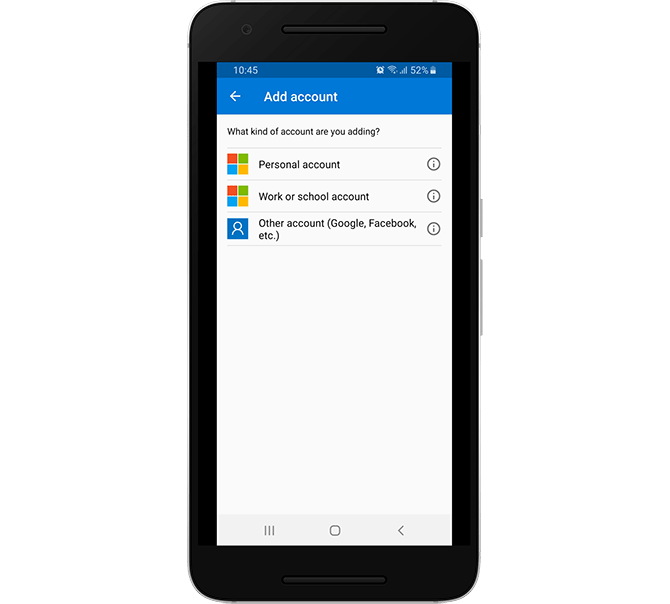
Microsoft Authenticator
Once you download the Microsoft Authenticator, tap the Add Account button to continue.
In the next step, you will be able to select the type of account which you want to add. Press the Other Account option to continue.
Scan the QR code or type the key manually and select the Label name for your account.

You have successfully added 2FA for cPanel in your Microsoft Authenticator.
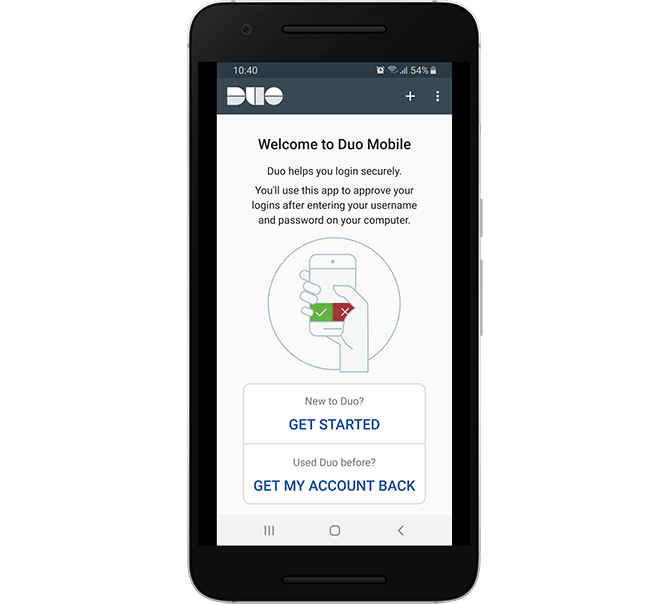
Duo Mobile
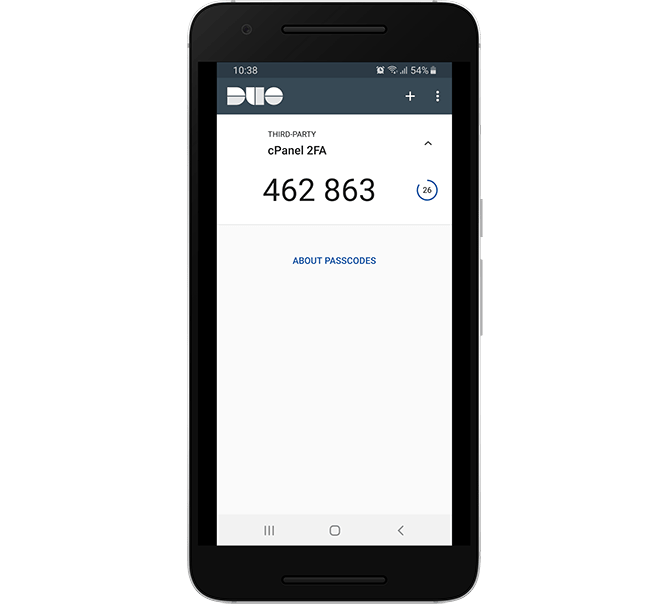
If you are new to Duo Mobile, tap the Get Started option to initiate a code scan.
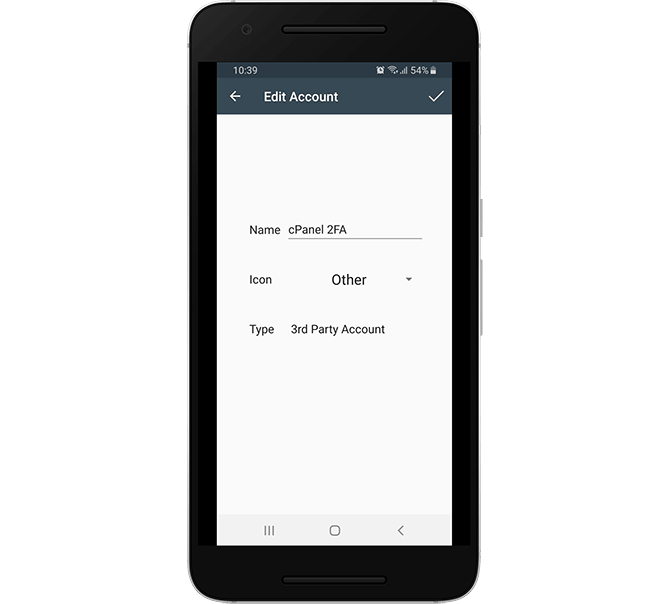
If you chose to add the code by yourself, you can change its Label name and Icon. There are a lot of icons available which can make navigating an authenticator full of codes easy. However, there is still no dedicated cPanel icon so you can choose Other as an option here.
You can now use the newly added account to generate a code and complete the Two-factor Authentication process.
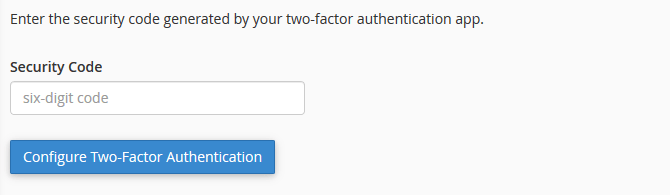
After you have configured your preferred authentication application, you need to enter the generated code in the field provided by cPanel and click the "Set Up Two-factor Authentication" button.
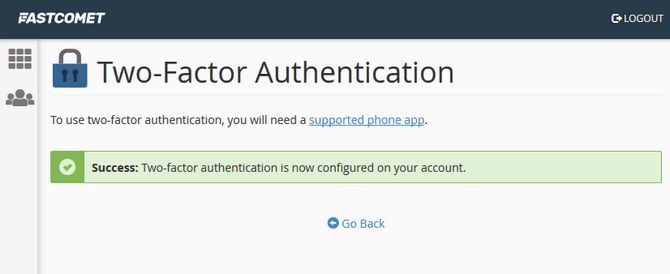
Once that is done, you should receive the following message:
How to Access cPanel with your Two-Factor Authentication Code
When you relog, after you input your password, you will also be prompted to provide the six-digit security code from your Authenticator.

If you have issues accessing your cPanel after you have enabled 2FA, consider requesting a 2FA remove or remove the authentication yourself in case you have access to the WHM. More on both of these can be read in the next section.
How to Remove Two-Factor Authentication from cPanel
Warning
If you have 2FA active, our support team will not be able to assist you with cPanel related issues when you open a ticket. In those situations, you will have to remove the Two-factor Authentication before you submit a ticket and re-enable it later after your case has been resolved.
To remove your Two-factor Authentication, access the 2FA interface in cPanel, and click Remove Two-Factor Authentication.
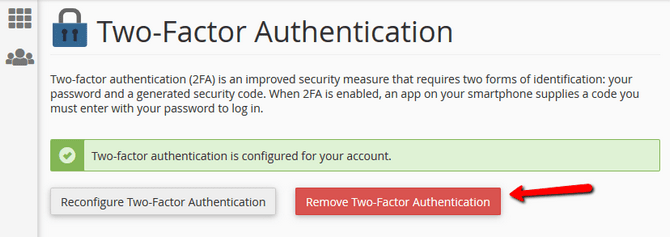
That will prompt you a confirmation window after which you will no longer have 2FA for cPanel.
Backup your Keys
Always Backup your Two-factor Authentication keys. All authenticators have a backup function which will provide you with access to your keys even if you lose your phone or uninstall the app.
If you somehow lose access to your keys and cannot access your backups of them. You can submit a ticket from your client area in the General Support or cPanel Help categories with subject "2FA key lost - cannot access cPanel".
If you are using our VPS/Dedicated Server plans or you have root access to the WHM on your server, you can remove 2FA from any cPanel by going to WHM → List Accounts → cPanel.
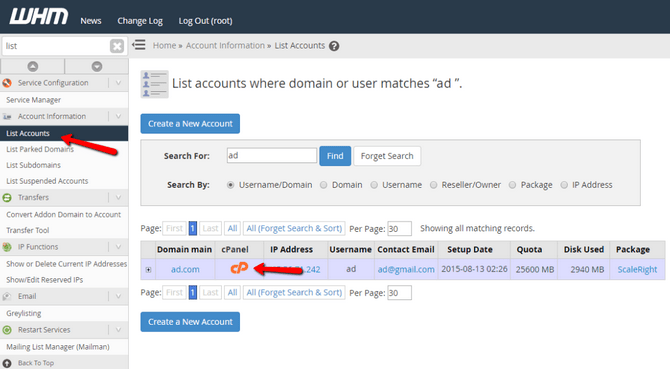
Once you click on the cPanel icon, you will be logged in that cPanel without the need of 2FA, and you can remove the current key by following the instructions mentioned above.
How to Reconfigure 2FA in cPanel
Reconfiguring your 2FA means that you will request from cPanel a new QR code and key code string. To do that, navigate to the 2FA feature in cPanel and click the Reconfigure Two-Factor Authentication button.
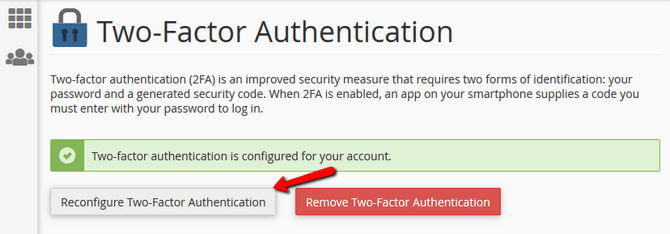
You will receive a warning that all active configurations will no longer produce valid codes after you confirm the reconfiguration.
Most of the cases when a need for 2FA reconfiguring arises is when the user has lost his phone/removed the authenticator app and has no backups on his keys but is still logged in his cPanel.
As Authenticators provide easy to set up backup services for your key codes, we strongly recommend that you take advantage of them. If you lost your key, and you are not logged in your cPanel, please take a look at the previous section of this tutorial.
With the end of this tutorial, you now know how to attach an additional layer of security to your cPanel account. Combined with our client area's Two-factor Authentication, your data is secured on all fronts.

cPanel Hosting
- Free Domain Transfer
- 24/7 Technical Support
- Fast SSD Storage
- Hack-free Protection
- Free Script Installation
- Free Website Transfer
- Free Cloudflare CDN
- Immediate Activation