Install FastComet free OpenCart 2 themes
Updated on Sep 8, 2016
Warning
As of June 1st, 2019 we no longer provide the Free Themes mentioned in this tutorial. As an alternatve, we recommend you to check the Official OpenCart Marketplace which offers a wide-range of such Themes.
This tutorial will review the process of installing our free OpenCart 2 themes. They are quick-start installation packages, which means that you will not be able to install them on existing websites. With the installation of the quick-start package, the system will set up a new OpenCart 2 instance, the theme and demo content for it.
To Install one of our OpenCart2 themse you will have to:
Download the Theme
The first thing that you need to do is to review our Free OpenCart 2 Themes. There is an excellent range that you can choose from and you can easily give your website the modern look it deserves. This will attract more new visitors and potential clients as well!
To download any of our themes, simply click on the Download button. This will download the archive that contains all of the files you need for the installation.
Prepare the Theme Files for Installation
The next step of the process is to prepare the files and upload them to the server. For this purpose, create a new folder first and then extract the files in it. This will make sure that you do not leave any files behind. This step is important as it will guarantee that the new installation is properly configured and your website looks like on the live demo.
When you extract the files on your local computer, you can now upload them to your account on the server. The important thing to consider here is the location, where you wish to install the theme. In our example, we will install the theme in a subfolder called "store", which indicates that we need to create such a folder within the public_html/ directory of our account and then upload all files in it.
To upload the files to the server, you can use your favourite FTP client or directly via the File Manager service within your cPanel account.
Upload Files
There are two ways of uploading your files to the server - using an FTP client, following our FTP tutorial, or uploading directly through your cPanel account > File Manager, following our cPanel tutorial.
Initiate Installation
We can now initiate the installation process and finalize the setup of our new OpenCart 2 theme. To initiate the process, point your web browser to the location, where you have uploaded the theme’s files. This will automatically redirect you to the installation screen of OpenCart.
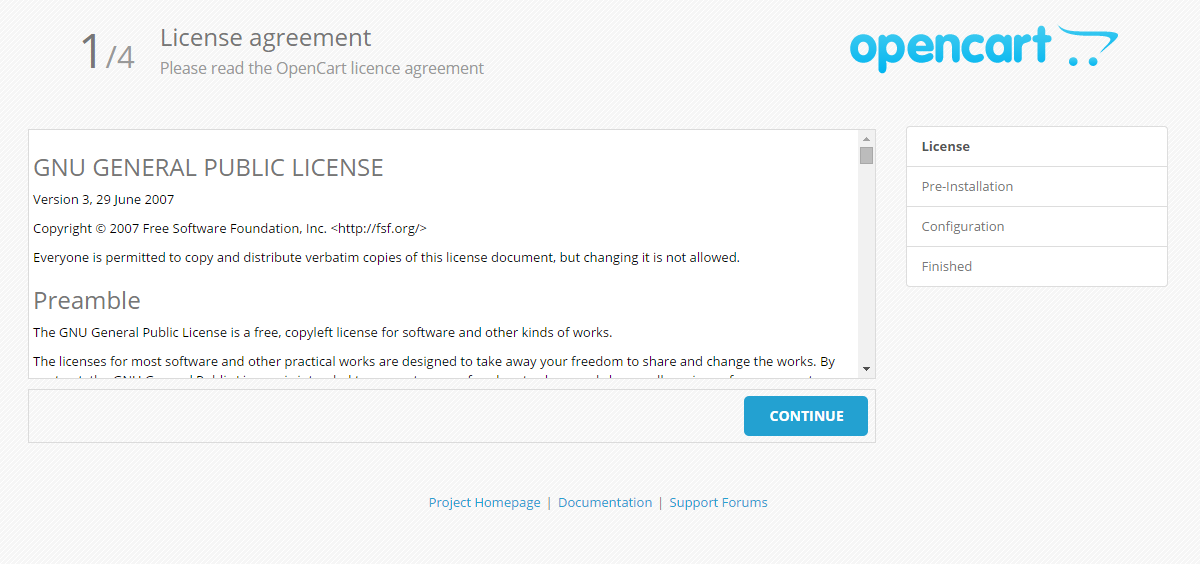
The first step of the process is the License Agreement. You need to read it through, so you can get a better understanding of the terms for using OpenCart. When ready, click on the Continue button to proceed.
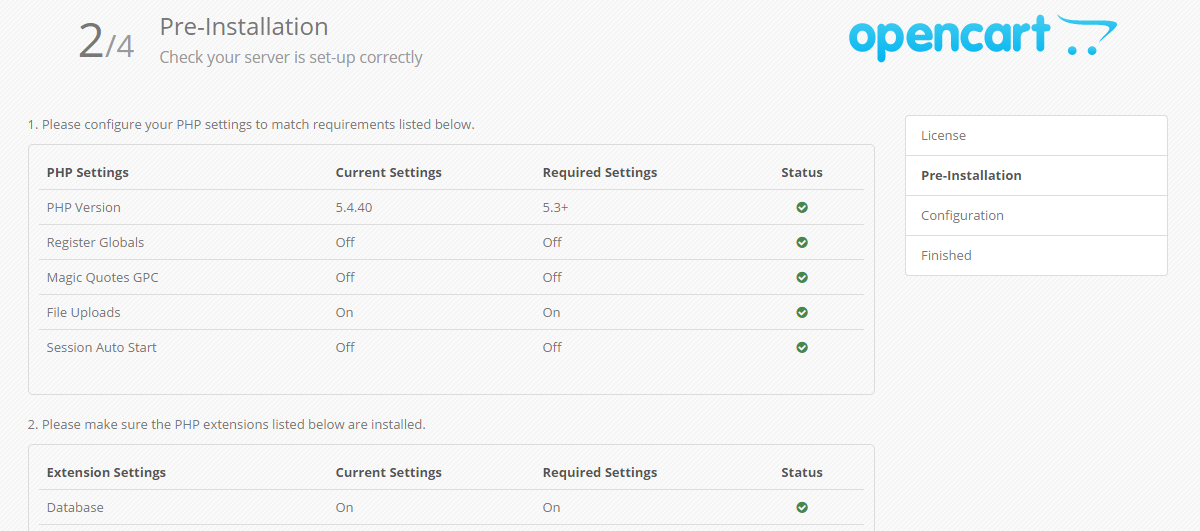
The second step of the process is the Pre-Installation checks. OpenCart will review the hosting environment and make sure that it matches all of the requirements for optimal performance. As always, FastComet offers optimized hosting platform for OpenCart websites so you will have no issues on this step. Scroll down and click on Continue to proceed.
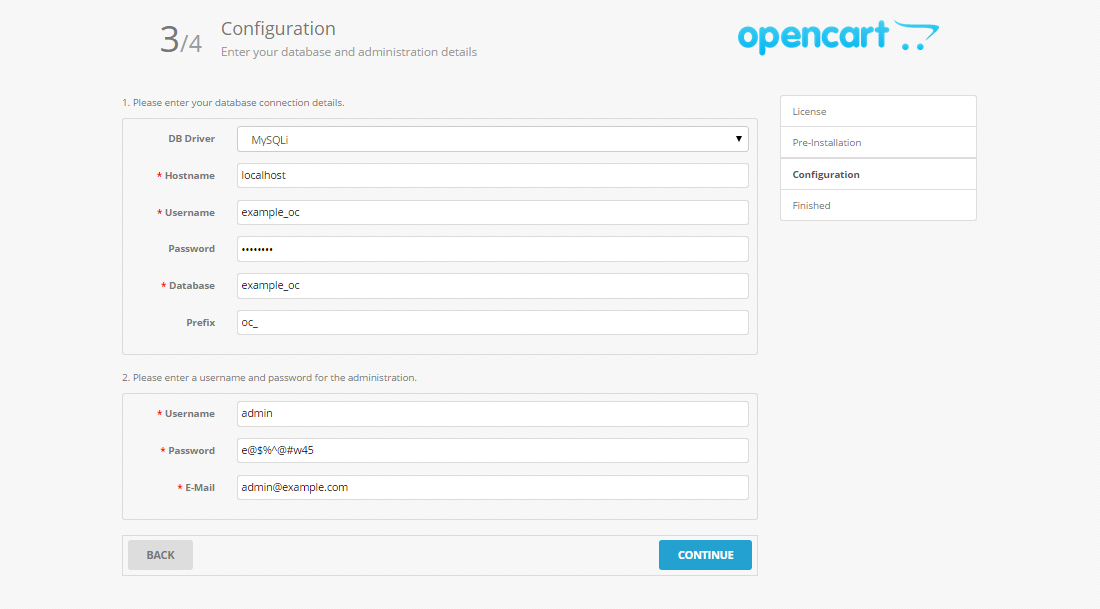
The third step is the last one and you will have to enter the database details for your website and create the administrative account. The fields you need to edit are:
- DB Driver - Select MySQLi, which is the first option by default.
- Hostname - Leave that to "localhost" without the quotes.
- Username - Enter the user that you will use for your OpenCart database.
- Password - Enter the password assigned to your user.
- Database - Enter the name of the database you will use on your new OpenCart website.
- Prefix - Set that to oc_ . This is important if you wish to import all demo data on your website.
- Username - Enter an administrative username for your new website.
- Password - Enter the password for the administrative user.
- Emial - Enter the email of the admin user on your new website.
MariaDB Configuration
You can create a new database and a user assigned to it via cPanel. Simply follow our Database Wizard tutorial for information on that.
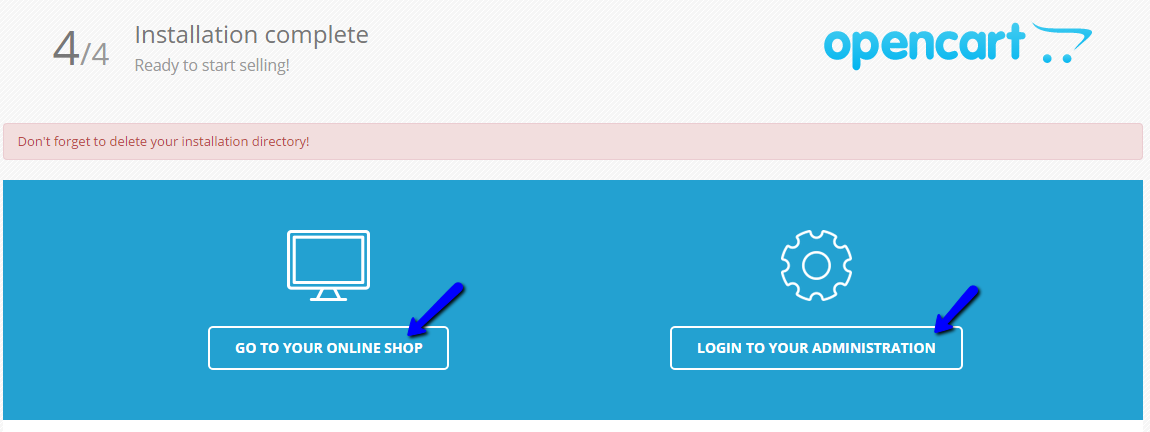
The installation process is now completed. You will be presented with two links - for the front end of your website, and the administrative area as well. Keep a note of those as you will need them both to manage your new online store!

OpenCart 2 Hosting
- Free Installation
- 24/7 OpenCart Support
- Free Domain Transfer
- Hack-free Protection
- Fast SSD Storage
- Free OpenCart Transfer
- Free Cloudflare CDN