How to enable Multi-Store in OpenCart 2
Updated on Sep 10, 2016
Most e-commerce entrepreneurs have found a niche in which they want to develop their business. They sell specific products in a hungry for supplies markets. However, some entrepreneurs do not limit themselves to one niche and instead decide to sell on a multitude of different markets thus expanding their influence and improving flexibility. Imagine how much work has to be put into building and maintaining websites if one businessman decides to create 3-5 different e-commerce projects at once. Luckily, platforms like Magento, PrestaShop and OpenCart have a multi-store capability integrated in them. This means that the user can control different stores from the same application installation. This is very useful when you need to install and maintain extensions, clean a database and remove bugs or push code or design updates. In this tutorial, we will show you how to create multiple stores in OpenCart 2.
To create multiple stores in OpenCart 2, you need to:
Create a Subdomain
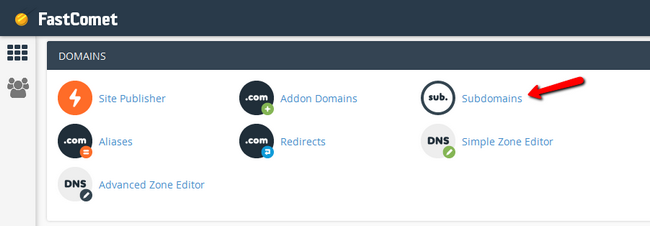
Before you can configure the multi-shop settings in OpenCart 2, you will need to create a subdomain for your new endeavor. This can be easily done via your cPanel by navigating to Domains → Subdomains or searching the latter by typing it in the search field. To learn how to create the same from your client area please visit our How to Add Subdomains tutorial.
Once you have clicked on the Subdomains icon, you will have to choose the domain for which to create a subdomain. This is the domain where your OpenCart 2 Installation is located. When you write a name in the Subdomain field the Document Root will be generated by the system. However, we want the subdomain to be at the same directory as your OpenCart 2 Installation. If you can access it directly via your domain name you will only have to add public_html. If your e-commerce is located in a folder named shop you will have to type public_html/shop.
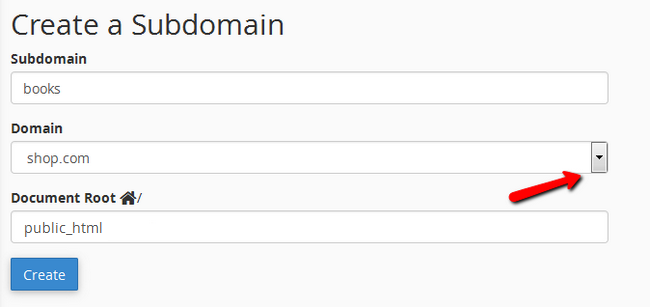
Click the Create button and you should see a text verifying the creation of the new Subdomain.
Create a New Store
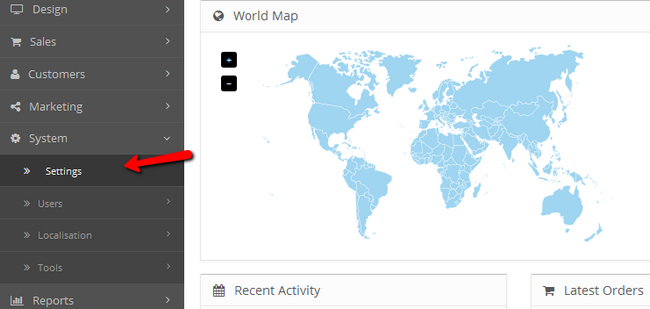
Access the administration area of your OpenCart 2 Installation and navigate to the System → Settings menu.
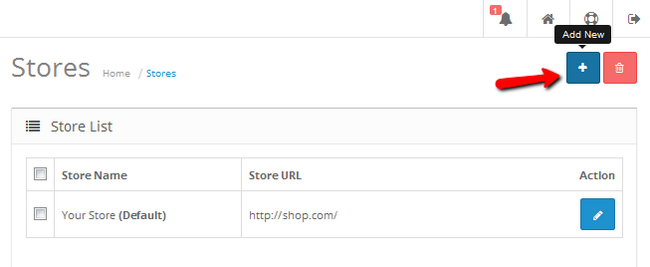
Now instead of going into your Store's settings, click on the Add New button at the top right corner of the page. This will create a new Store and make your OpenCart 2 installation a Multi-Store one. The process is similar to the one you did once you created your first store.
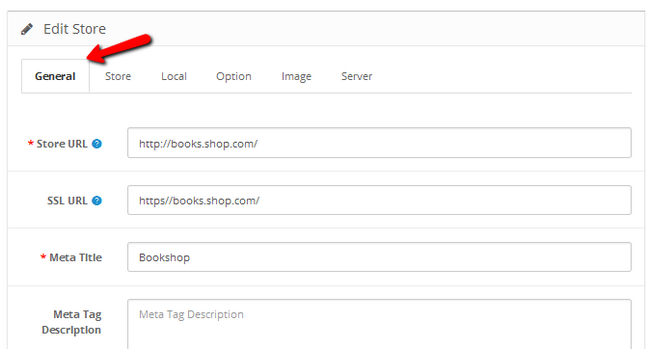
In the General tab of your new store, you can configure the Store URL, SSL URL, Meta Title and a Theme.
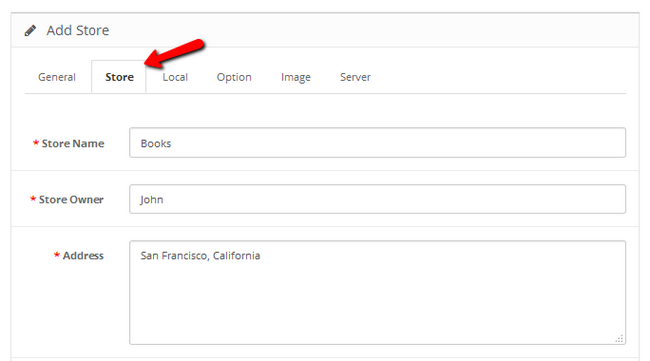
In the Store tab, you can configure the Store's name, Owner name, Address of the store as well as some other details regarding its location.
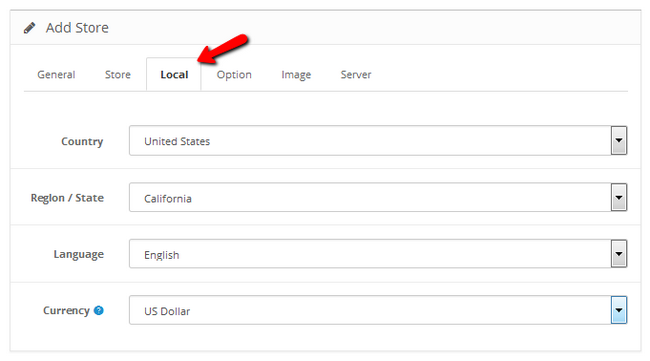
The Local tab is very straightforward. You have to Input the Country and State of your Store’s HQ as well as the used Currency and language.
In the Options tab you will be able to configure the behavior of your new store. The Image tab is used for adding a logo for your store and the server tab allows you to activate SSL. Don't forget to click the Save button in order to finalize the creation of the store.
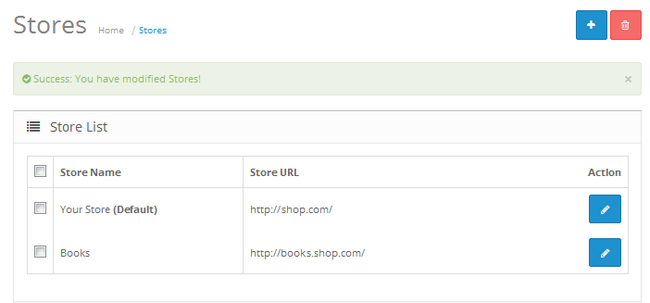
You now have a Store which you can alter without it affecting your original e-commerce project. This usually translates to you creating a new category of products and making it visible only to the visitors of this store. In our case that would be a category called Books. For more information on how to create a new category of products, visit our How to Add Product Categories tutorial.
Congratulations, you now have a Multi-Store OpenCart 2 Installation. You are ready to sell on different markets and build up your e-commerce companies.

OpenCart 2 Hosting
- Free Installation
- 24/7 OpenCart Support
- Free Domain Transfer
- Hack-free Protection
- Fast SSD Storage
- Free OpenCart Transfer
- Free Cloudflare CDN