How to configure NotifyWhenAvailable in OpenCart 2
Updated on Sep 8, 2016
When a customer visits your store and decides to buy something but at that time the desired product is out of stock, you can lose a customer if you don't have a system in place that can assure the user that he can get the product from your website as soon as possible. NotifyWhenAvailable is the right extension for the job. With it your users can request an email notification when a product is back in stock and you will have a detailed statistic of the users waiting for a product, those that have been notified of a restock and the exact products which needs better inventory management.
For more information on how to download, Install, and access the extension’s settings you can visit our Extension Management Tutorial.
The first thing to do after you activate your license for the extension is to go in the Control Panel tab and enable the module itself. To get access to the most of its functionality you will also have to enable scheduled tasks. Due note that you will have to add the module to the product page layout of your website. This operation has been explained in the 3rd step of our extension tutorial - Configure Extensions.
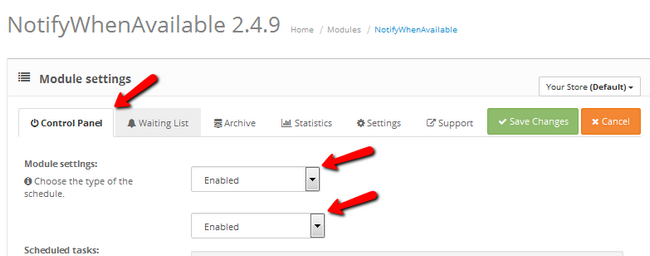
Enabling Scheduled tasks will open a bunch of more options for configuring. With them you can automate the work of the module and just leave it work for you without having to access it all that often.
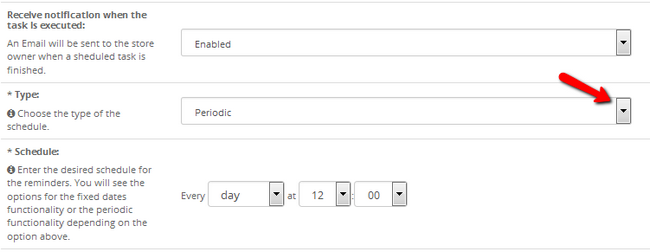
- Receive notification when task is executed - If you wish to receive regular updates on your administrator email when a task is being executed - enable this option
- Type - Here you can choose whether you want a one time "show" or a methodical notification system
- Schedule - Here you can configure the exact schedule based on the type you have chosen above
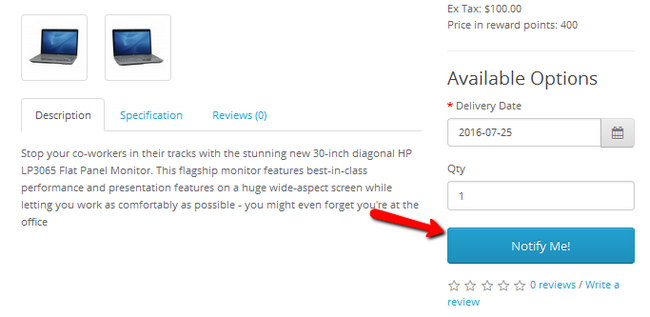
From a customer's point of view, when a product is out of stock, instead of seeing the Add to Cart button he will see the Notify Me! label. Once the user clicks on that he will be able to provide his name and email address on which he will receive an email when the product has been restocked.
Back to the module - if you check the second tab called Waiting list, you can see all of the users currently waiting for a notification as well as their Name, Email, IP address, Language, Date of submission and product of choice.
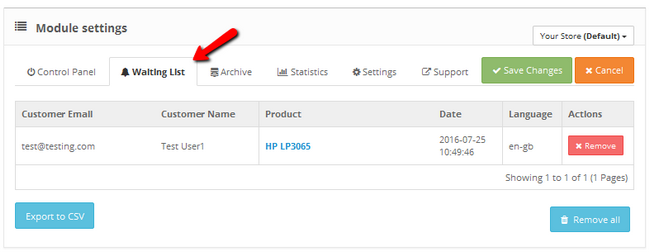
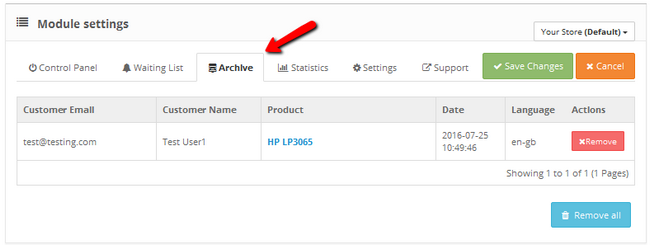
If we restock the product right now, the user will get notified and will be moved from the waiting list to the Archive.
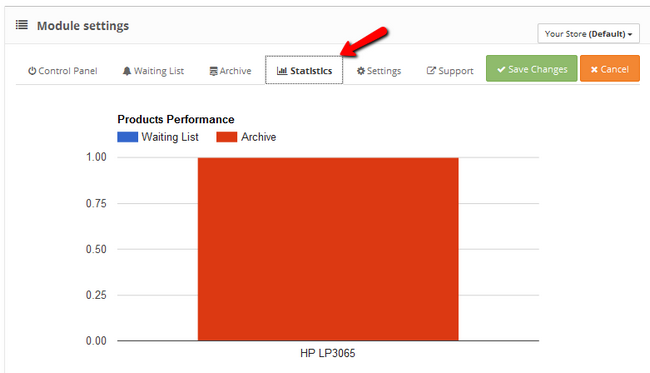
In the Statistic tab you can see the amount of waiting/archived users and the product which they wanted placed in a visually appealing bar chart.
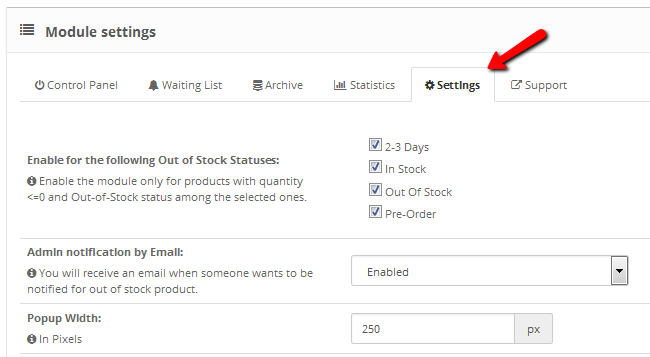
Last, but not least the Settings is the tab in which you can define on exactly what conditions the notify button will appear and the popup width.
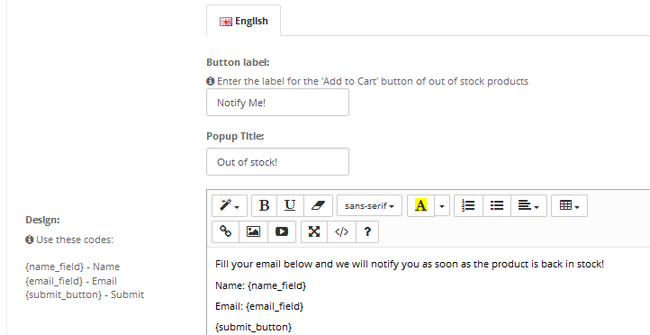
You can change the design of the button and the tooltip that will be shown when a user clicks on it.
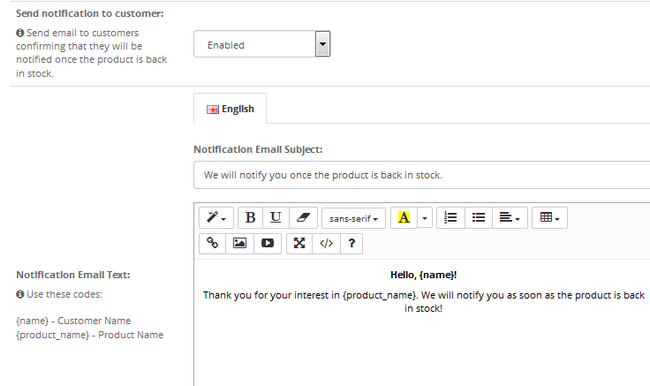
Of course, you can customize the email template which will be used when a user clicks the Notify button. This will tell the user that his inquiry has been saved and that he will receive an email when the product is back on stock. There are shortcodes implemented to help you with the variables of each client's case.
The last template you can view and edit is the actual notice that the product has been restocked and is ready for purchase.

OpenCart 2 Hosting
- Free Installation
- 24/7 OpenCart Support
- Free Domain Transfer
- Hack-free Protection
- Fast SSD Storage
- Free OpenCart Transfer
- Free Cloudflare CDN