Enabling the SMTP protocol
Updated on Dec 14, 2015
SMTP stands for “Simple Mail Transfer Protocol” and as the name suggests it is a protocol for sending outgoing messages to your members of to whom you would like to. By default your Social Community will use the php mail function for this purpose, however this not always is the correct approach for sending messages.
To actively use the SMTP Mailer, you will have to follow these steps:
Step 1 Enable and Configure the SMTP module
This module is part form the default Boonex Dolphin modules set and in order to install and activate the module you might want to check our other tutorial on the matter.
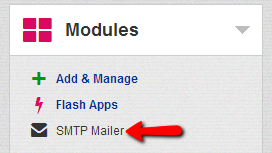
Once the module is installed you will need to configure it with the settings available for the mail server of your account with us. In order to do so first you will need to access the Administration Page of your website and to navigate to Modules>SMTP Mailer.
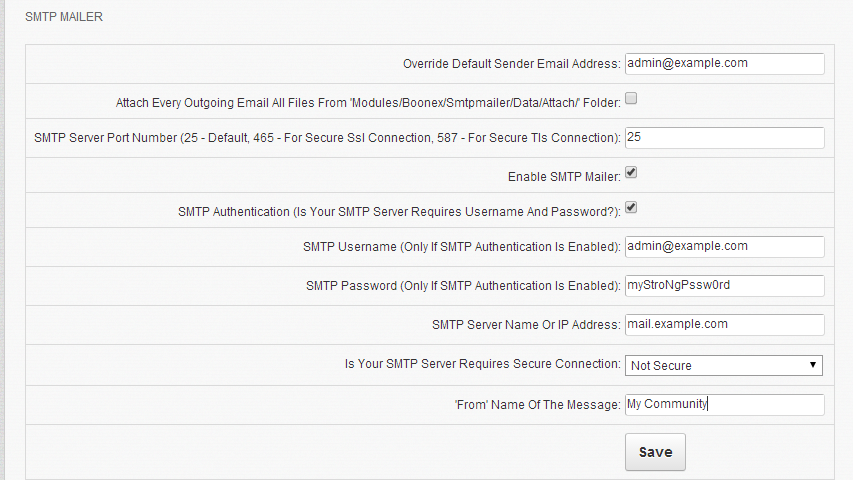
There you will notice 3 different sections of options and additional information. The first section is called “SMTP Mailer” – the same way as the module name. In this section you will be able to find the actual settings for the module which you will need to configure:
- Override Default Sender Email Address – This option is for changing the default email address of the sender assigned by the SMTP protocol. The value of this field should be the same as the one for your SMTP Username if you would like to avoid any issues related to your email being flagged as spam
- Attach Every Outgoing Email All Files - This is an actual checkbox which will allow you to attach the content of the Modules/Boonex/Smtpmailer/Data/Attach/ folder in the messages you are sending
- SMTP Server Port Number – The native SMTP port without SSL/TLS encryption of your email is 25. If however you would like to use SSL encryption please use port 465 or 587 for TLS encryption
- Enable SMTP Mailer – If the mailer should be enabled or not. Please check this option if you would like to have the SMTP mailer activated immediately after you save these settings
- SMTP Authentication – If the outgoing mail server requires authentication please use that option. Currently our mail service requires such thus if you are configuring the Mailer with your mail settings for your account with use check this option
- SMTP Username – The username you are using for connecting to the email service for your accountUsually this username is an actual email account you have. For example if your domain name is example.com and your email account is [email protected] you should use [email protected] as the SMTP Username.
- SMTP Password – The password for the email account you have used as username in the previous option
- SMTP Server Name Or IP Address – The hostname or IP address of the mail server you are connecting to for the use of the SMTP Protocol. If you are configuring the SMTP Mailer with the mail configuration for your account with use please use mail.yourdomain.com. So if your domain name is example.com you should use mail.example.com for SMTP Server name
- Is Your SMTP Server Requires Secure Connection – Entirely depends on the way you would like to have your messages encrypted. If you have chosen port 25 for the SMTP Server Port Number option you should leave the value of this option as “Not Secured”
- 'From' Name Of The Message – This name will be displayed as the mail sender and your recipients will be able to see that field once they receive an email. It would be appropriate if you set this option to your Site’s name
Once you have all of these properly configured you should use the Save button in order to save the configuration. If you have enabled your SMTP mailer in the configuration it will be activated once you have pressed the Save button.
The second section is called “HELP” and it basically describes what each field from the configuration stands for.
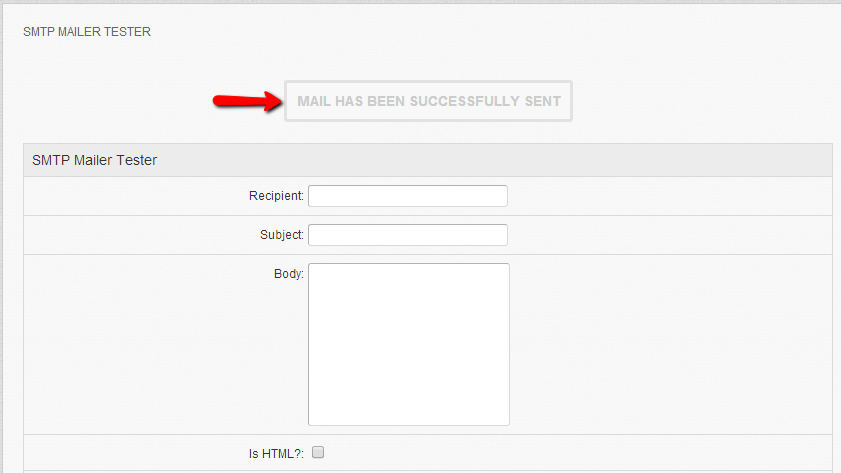
Step 2 Test the Module
The final third section is an actual tester for your SMTP Mailer. It is recommended once you have the configuration saved to test the service via this section. It will basically send a simple message to the email address you would like to. Thus you will need to simply fill the Recipient, Subject and Body fields with the values you would like to and press the Submit button so the message can be sent.
If everything was properly configured you will be prompted with a message indicating that the mail has been successfully sent.
That’s it! You can now activate and configure the SMTP protocol for outgoing messages on your Social Community!

Dolphin Hosting
- Free Dolphin Installation
- 24/7 Dolphin Support
- Hack-free Protection
- Fast SSD Storage
- Free Domain Transfer
- FFmpeg Support
- Free Cloudflare CDN