Managing Navigation Menu Links in Dolphin
Updated on Dec 15, 2015
The navigation menu is maybe the most important part of your website since it will be presented on all of the pages of your Social Community and it will provide the members of the community with the option to use all of the features it offers.
To manage the Menu links in Dolphin, you need to:
Step 1 Access the Menu Builder
The Navigation Menu management is performed via the Administration area >Builders>Navigation Menu.
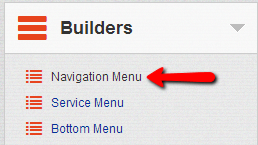
Once you click the Navigation Menu link you will be redirected to Menu Builder page where all of the menu items will be displayed as managed blocks. The blocks are grouped in 3 groups:
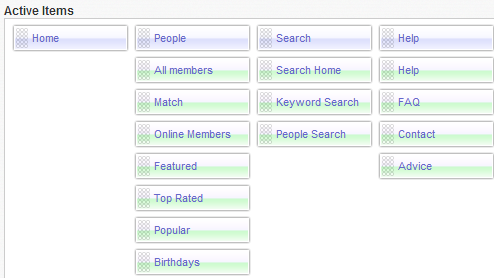
- Active Items – The actual items displayed in the navigation menu
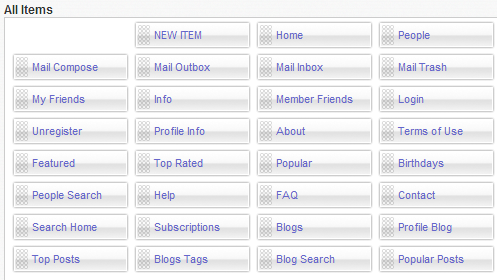
- All items – All of the blocks (links) you can use in your navigation menu
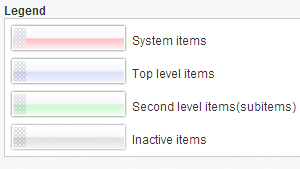
- Legend – The color of the blocks explained
Step 2 Add a Menu Item
In order to add a block to your menu you will need to first decide where you would like to add it - you can add an item either in the Top Level Items which are always displayed on your navigation menu or as a Second Level Items which are usually displayed once you hover the Top Level Item from the navigation menu.
Next you will need to decide where the new item should be displayed. If you would like it displayed as the first item then you should simply drag-and-drop it before the Home block (menu item).
For the purpose of this tutorial we will add a new menu item called Google before the Home menu item. Since the new ling does not have a block in the All Items group we will need to create a new item. This can be easily done by drag-and-drop the NEW ITEM block before the Home block.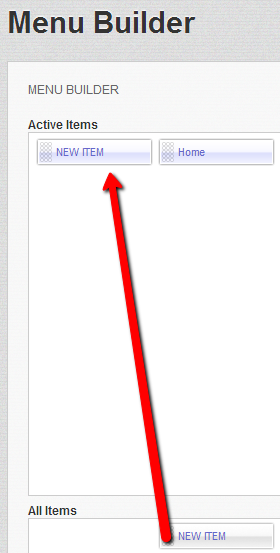
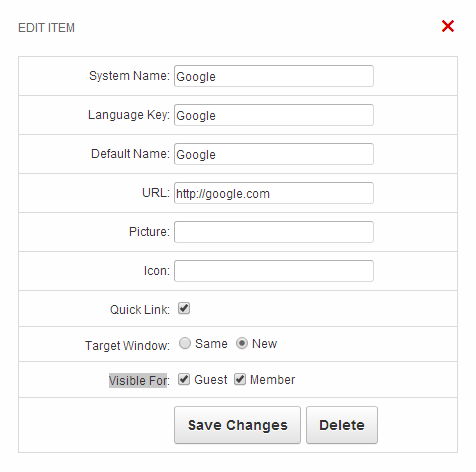
Once we have that done you will need to click on the newly added block so the Edit Item window can be displayed. There you will need to add information for the new block:
- System Name – The name of the menu Item
- Language Key – The language key used for this item
- Default Name – The default name of the menu item
- URL – URL to the website you would like this link leading to
- Target Window – If the link should be opened in a new window or in the same
- Visible For – The group of members this item should be visible for
Once the changes are saved the new menu item will be available on any of the pages of the Social Community.

Congratulations! Now you know how to add menu items to your Social Community!

Dolphin Hosting
- Free Dolphin Installation
- 24/7 Dolphin Support
- Hack-free Protection
- Fast SSD Storage
- Free Domain Transfer
- FFmpeg Support
- Free Cloudflare CDN