Adding a New Language in Dolphin
Updated on Dec 15, 2015
In order to make your Social Community available on different languages you will need to install a language pack for each of the languages you would like supported on your website.
To add a new Language in Dolphin, you will need to:
Step 1 Download a Language pack
First you will need to download a language pack for the language you would like your Social community to support. This can be easily done via the official Boonex Dolphin Marketplace. There you should be able to find some the desired language pack and to download it. Note that many of the language packs are absolutely free of charge no matter that they are listed in the official Boonex Dolphin Marketplace.
For the purpose of this tutorial we will use Italian language pack. Once you download the language pack archive and extract it you will be able to locate the language file which is usually named like the following:
lang-it-.php
The “it” string in that file name is the country abbreviation for the language you would like to install. Thus depending on the language these letters can be different.
Step 2 Upload the Language File
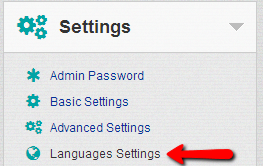
Now that you have downloaded the language pack you will need to actually add the pack to your Social Community. For this purpose you will need to login into the Administration area of the platform and navigate to Settings>Languages Settings.
There you will see a single section called Languages with few options in the header of the section. The option you are looking for is called Import Language.
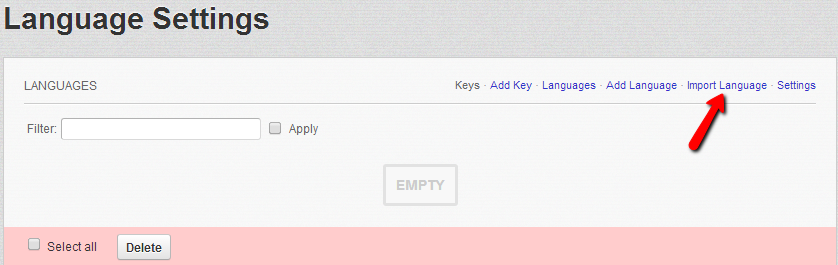
Once you access this option you will be presented with a simple upload form which you should use for uploading the earlier downloaded language pack.
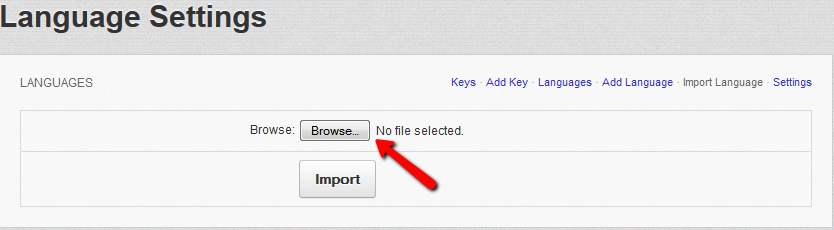
When the language file mentioned previously is selected and you press the Import button the language pack will be successfully imported and you will receive a message indicating that the upload has been successful.
Step 3 Enable the Language Pack
In order to verify the installed language you should simply access the Languages option from the Languages section and you will see the new language listed there.
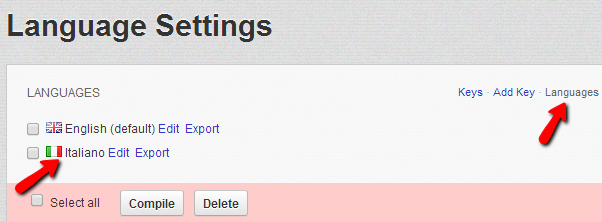
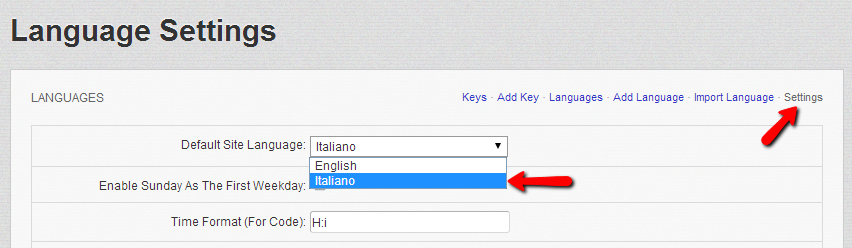
If you would like to activate the new language you should click on the Settings option from the Languages section and simply use the Default Site Language drop-down to select the default language for the administration area and also the frontend of your Social Community.
Note that this is the most common way of installing a language pack, however many of the language packs will include additional files folders that might need to be uploaded. Most of them are related to the translation of the default Boonex Dolphin modules and you will need to read carefully the installation instructions provided in the readme file of the language pack you would like to install.
Congratulations! You can now install as many as language packs you would like to!

Dolphin Hosting
- Free Dolphin Installation
- 24/7 Dolphin Support
- Hack-free Protection
- Fast SSD Storage
- Free Domain Transfer
- FFmpeg Support
- Free Cloudflare CDN