How to Enable Events in Dolphin
Updated on Dec 14, 2015
The events functionality is commonly used to mark certain real life event or any virtual event such as meeting, conversation or even a party in your social community. If you would like to enable your social community to provide the users with an easy to manage Events functionality you should do so by installing the Events module provided with the default modules set of the Boonex Dolphin platform.
In this tutorial we will show you how to enable that functionality and how to create your first event.
Since the functionality is related to installing a module you will need to know how a module should be installed. We have discussed that subject already in one of our other Boonex Dolphin tutorial series and if you believe that you are not familiar enough with the process you should check it out.
To enable the events module in Dolphin, you will need to:
Step 1 Install the Events Module
In order to install the events module you will need to login into your admin area and find the module in your Modules>Add & Manage page.
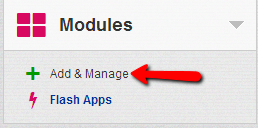
If the module is still not installed you will be able to find it respectively under the Not Installed Modules block.
Once your Events module is installed please find the module in the list of modules under your administration area>Modules and click on it so you can access the module’s administration page.

Step 2 Manage the Events Module
If you have just installed the module the administration page for the module will look similar to the following.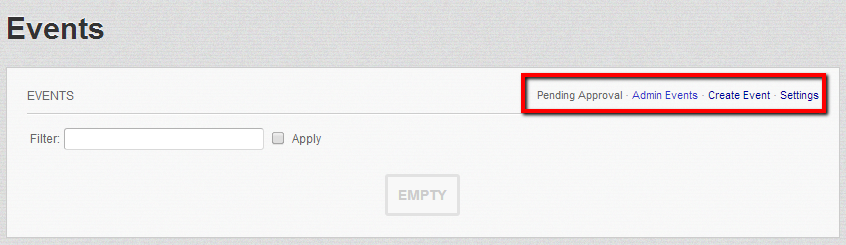
You will notice the management menu of the module in the top right corner of the only section displayed at this page. In order to add a new event please use the Create Event link from that menu. Then you will be redirected to a page where you will need to fill all of the information related to your new event.
- Title – The title for your event
- Description – Detailed description of your event
- Country – The country where the event will occur
- City – The city where the event will occur
- Place Name – The name of the place where the event will occur
- Date Start – The starting date of the event
- Date Ends – The ending date of the event
- Tags – The tags related to your event
- Categories – Categories your event is related to
- View Event – The allowed users for viewing the event
- Allow Viewing Participants – The group of users that will be able to see the participants of the event
- Allow To View And Post Comments – The allowed group of users that can view and post comments on the event
- Allow Rating – The allowed group of users that can rate the event
- Allow Joining – The allowed group of users that can join the event
- Join Confirmation – Confirmation for joining the event – you should consider enabling this option in order to avoid fake members participating in events
- Allow Joining By Membership – The allowed membership levels that can join the event
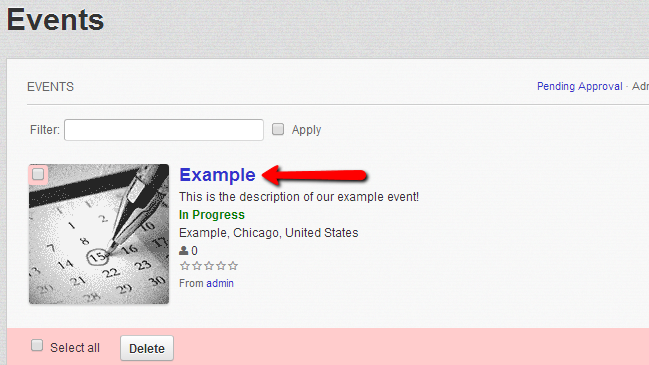
Once you fill all these fields and hit Submit your event will be created. The event will be then displayed under the Admin Events link on the Events page.
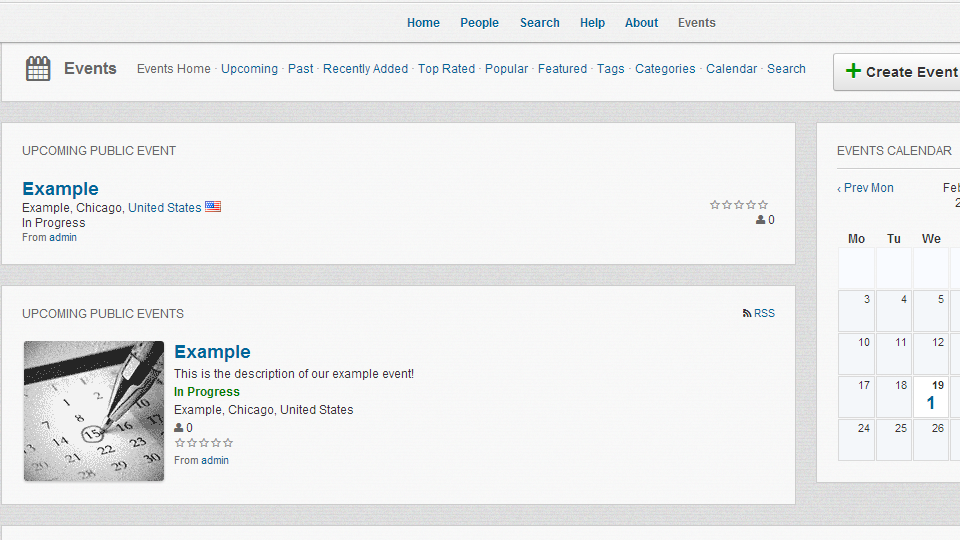
Additionally the event will be added to your social community and your users will be able to browse it under the Events link.
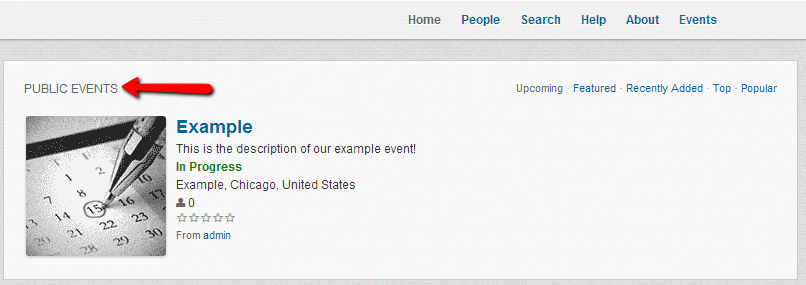
Step 3 Add a Block for the Module
The Events module also provides a block you can put on your pages. The block is called Public Events and can be found in the Inactive Blocks section of the Page Builder feature provided in your administration area> Builders.If you are not quite sure how to add the block to your home page you should check another tutorial we have for managing the blocks on your pages.
Once the block is added to your page it will be displayed as it follows.
Congratulations! You can now add and manage events on your Dolphin social community!

Dolphin Hosting
- Free Dolphin Installation
- 24/7 Dolphin Support
- Hack-free Protection
- Fast SSD Storage
- Free Domain Transfer
- FFmpeg Support
- Free Cloudflare CDN