Managing a store in Dolphin
Updated on Dec 14, 2015
Building a store for your online community has never been so easy. With the integrated Store module of the Boonex Dolphin platform you will be able to easily manage an online store within your Social Community.
To manage a store in Dolphin, you will need to:
Step 1 Enable the Store Default Module
Since this tutorial will involve the installation of a module you will most probably need to check our detailed tutorial related to the installation and management of the modules used by your Social Community.
The Store module cannot be directly installed due to the simple fact that the module require two additional modules to be installed in advance. If you attempt to install the Store module without the additionally required modules you will most probably get the following error message.
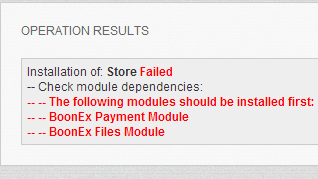
As you will probably notice the additionally required modules are the Payment Module” and also the Files Module. Fortunately these modules are included in the default installation and you will simply need to install them prior the installation of the Store module.
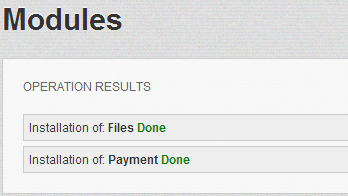
Once these modules are installed you can proceed with the installation of the Store module.
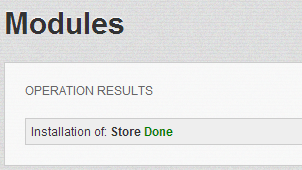
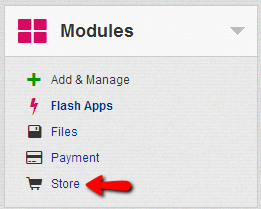
As soon as the module has been properly installed it will be listed in the Modules menu.
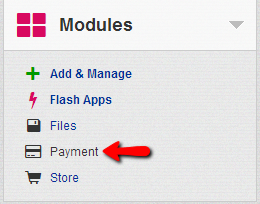
Step 2 Configure the Payment Modules
Before we can configure our new module we will begin with configuring the Payment module so the overall process of enabling entirely the store for your website to be in some order.The Payment module is available right above the Store module in the Modules administration menu.
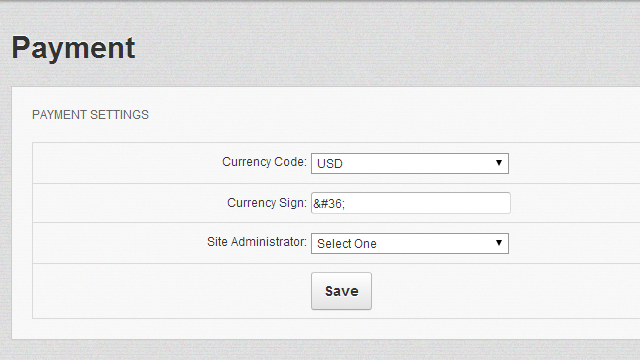
If you click on that module you will be redirected to the module administration page where you will be able to configure its options.The first option is actually the first section on that page called Payment Settings. This section contains the following fields:
- Currency Code – The code of the currency your store will be supporting
- Currency Sign – The actual sign of your currency
- Site Administrator – The administrative user having access to the store management
The next block of settings is called Payment Details and it actually contains the payment methods your store will be supporting. There are only two payment methods supported currently by that module and they are PayPal and 2Checkout
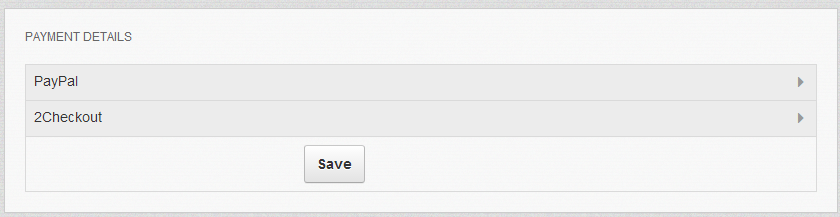
You should be able to easily configure both of the modules to accept payments on your website as their configuration is fairly simple and strict.
The next two blocks are actually blocks related to the order performed on your Store and there is nothing for configuring in these.
Step 3 Configure the Store Module
Now that you have configured your payment methods and other payment related options it is time to actually configure your shop .This can be easily achieved if you click on the Store module in the list of modules displayed under the Modules link in your administration area.
The first thing you will probably notice in the administration page of the module is the horizontal menu at the header of that page.

First we will show you how to configure your store. If you click on the Settings link from that menu you will be redirected to a page where you should configure the settings for the module. The settings of the store are fairly simple and you should be able to handle them easily.
The next link from that menu is the Add Product link which respectively serves for adding a product. This link will redirect you to a page where you will be able to fill the following options for your product:
- Name – The name of your product
- Description – The description of your product
- Tags – Tags related to your product
- Categories – Categories which your product can be classified to
- Product Files – Any files related to the product such as images or some other files if your product will be a virtual product
- Price – the price of the product
- Privacy settings – What type of members should be able to see the module
Once you fill all those fields use the Submit button at the bottom of the page in order for the settings to be properly saved.When you have added a product it will be displayed under the Admin Products link.
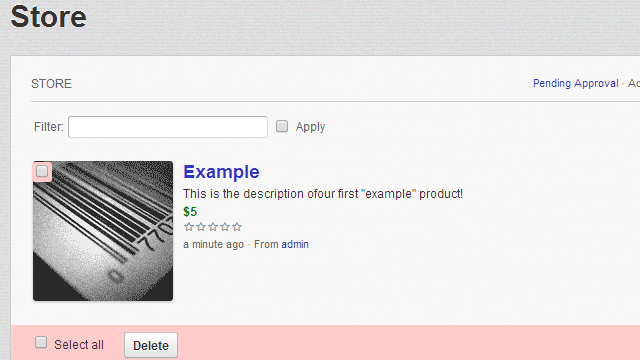
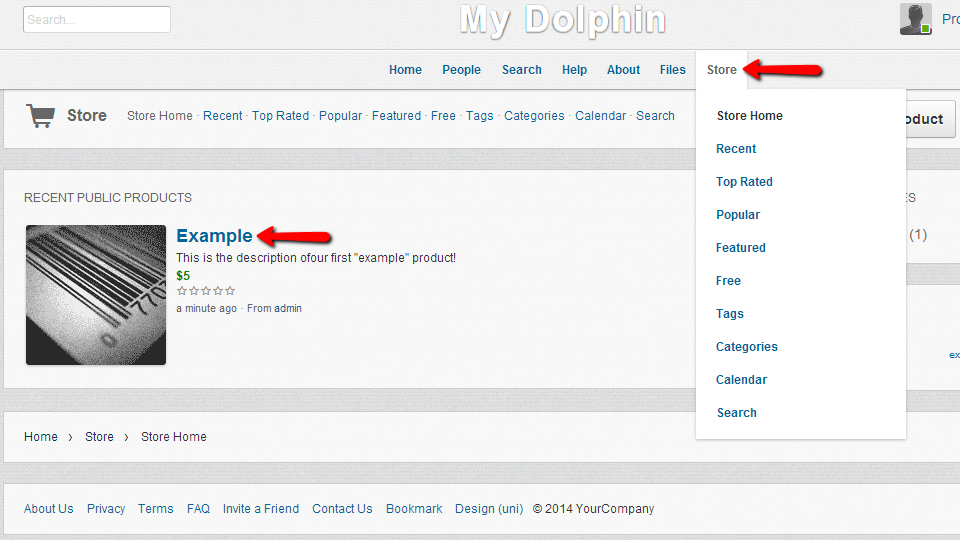
And finally your product will be automatically added to your Social Community under the Store menu item.
Now you have fully functional store for the members of your Social Community.
Congratulations! You have learned how to enable a store in your Boonex Dolphin social community!

Dolphin Hosting
- Free Dolphin Installation
- 24/7 Dolphin Support
- Hack-free Protection
- Fast SSD Storage
- Free Domain Transfer
- FFmpeg Support
- Free Cloudflare CDN