How to install Dolphin manually
Updated on Dec 14, 2015
If you prefer more customizable installation of the Boonex Dolphin social platform you will be able to find detailed information in the next lines of this tutorial.
Of course if you would like to have quick and easy installation you can check our how to install Dolphin using Softaculous tutorial.
The Manual Installation of Dolphin includes these steps:
Prepare the Dolphin Files
We will begin first with downloading the installation package for the platform. By the time we are writing this tutorial the latest stable release of the application is 7.1.4. This tutorial will cover the installation steps you need to take for installing trial version of the platform, however the installation of any other licensed version is the same.
If you visit the Boonex Dolphin official website you will be able to find the installation package for the trial version. On that page in the lower right corner you will be able to find the link for TRIAL DOWNLOAD.
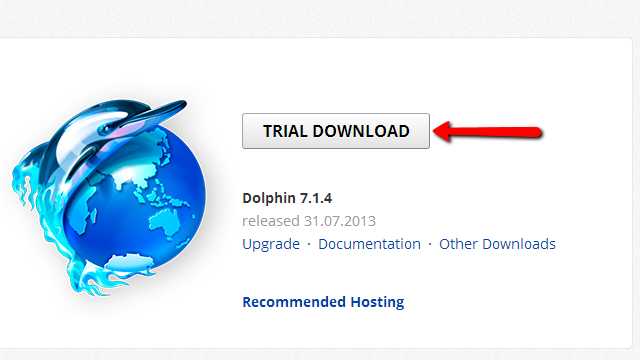
Once you press that button you will download the installation archive which you should extract in a convenient location on your local computer and prepare the files for upload on your hosting account.
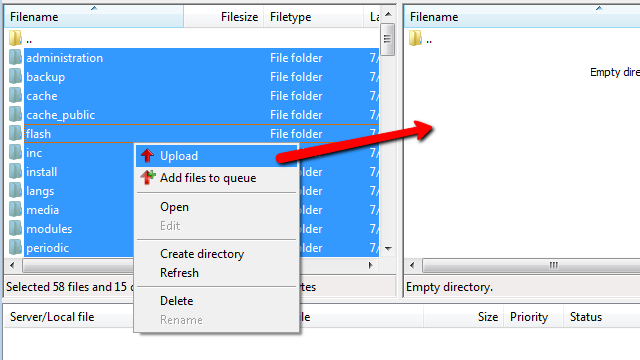
The preparation is fairly simple as connecting to the FTP service for your hosting account and uploading all of the files you have received after extracting the installation archive. If you are not quite sure how this should happen you can check our FTP Tutorial Series.
A note we should make here is that if you would like the Boonex Dolphin platform available on your domain name you should upload the files in the public_html folder of your account. Respectively if you would like the platform available in a subfolder of your domain (example.com/subfoldername) you should upload the files in the specific subfolder usually located in your public_html (public_html/subfoldername).
Once you have all the files uploaded in the correct location you should access that location in your web browser and the installation process will be initiated. It is conveniently structured into installation steps presented in different pages where all of the options you will need to configure are included.
Configure the Dolphin Web-Installer
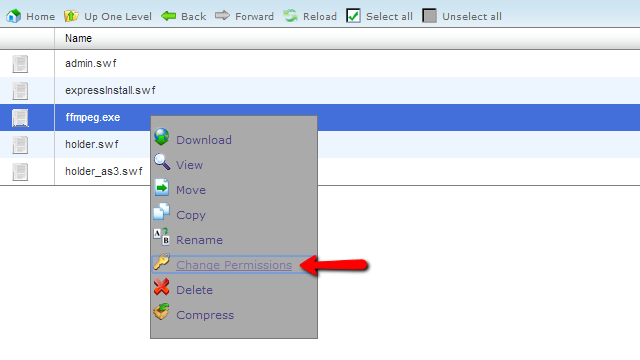
The first page from those will present information for if all of the files and folders you have just uploaded are with correct permissions on the file system. Most probably all of these will be with correct permissions except the ffmpeg.exe file which is part from the default installation package.
You will need to change the permissions of that file to fully writable and executable. In order to do so you will need to access cPanel → File Manager. There you will need to navigate to the folder where you have just uploaded all of the files from the installation archive and then to:
/dolphin-install-folder/flash/modules/global/app/
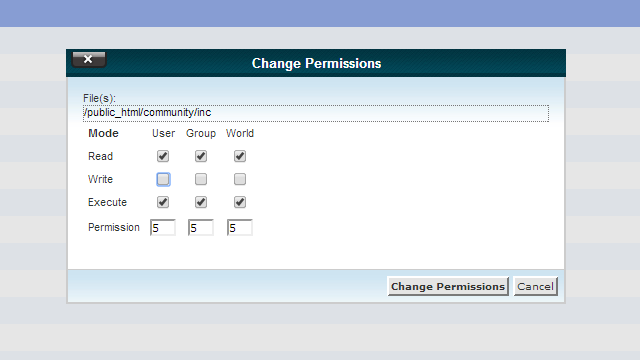
If the files for your Boonex Dolphin platform for example, are located in the public_html folder you will need to navigate to public_html/flash/modules/global/app/. There you will notice the ffmpeg.exe file and if you click with the right mouse button on that file and then use the Change Permissions option.
Set full permissions for that file or - 777 as numeric value.
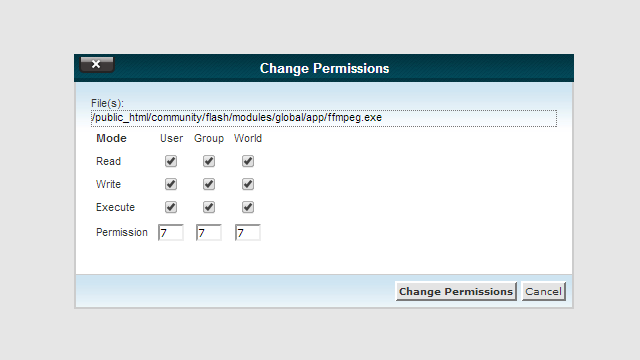
Once the permissions of that file are changed to the appropriate values you will need to reload the installation page and this time you will notice that all of the files will be with correct permissions without any warnings. Now you should proceed to the next page.
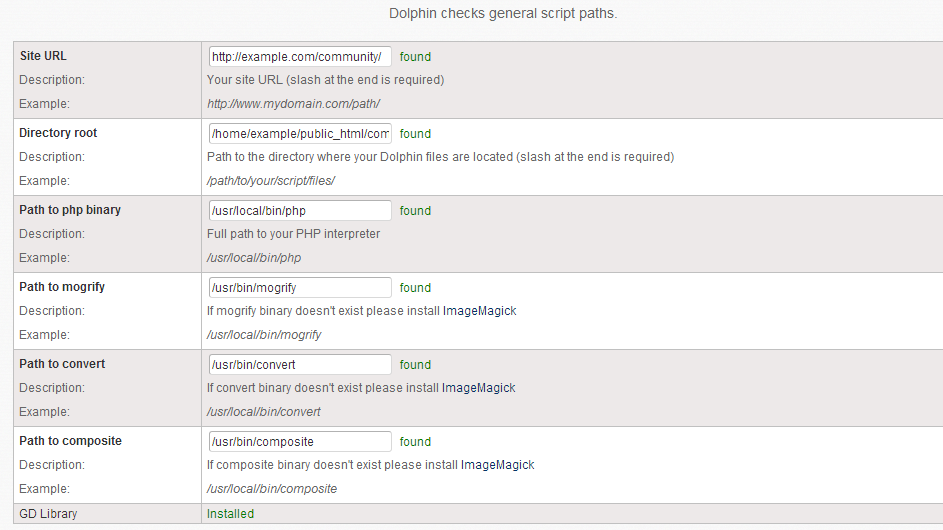
The second page from the installation process is related to paths information for the hosting environment your account is hosted at and required from the Boonex Dolphin platform to work properly once installed. Please check carefully the automatically detected paths and ensure that they are correct so you can proceed to the next page.
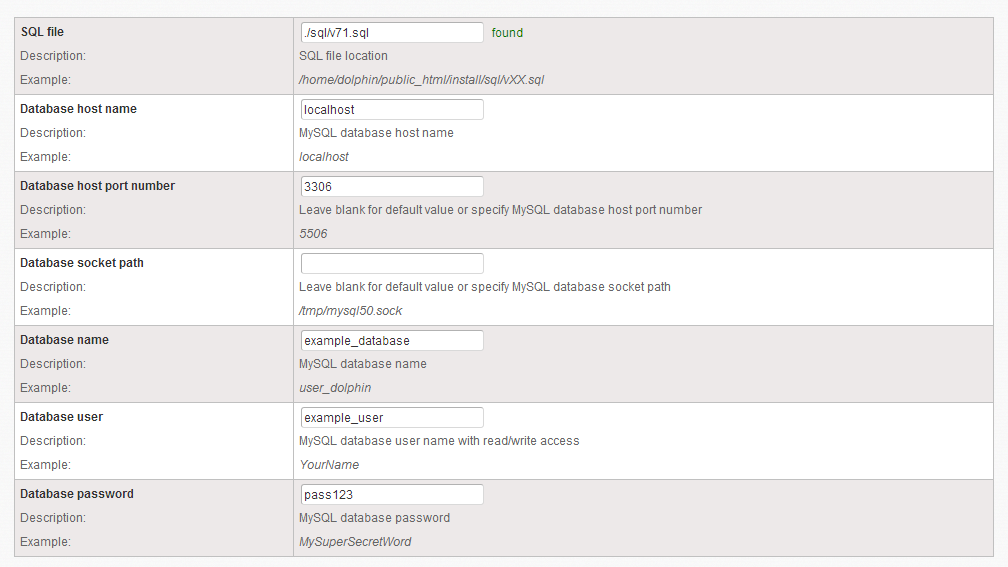
Configure the Dolphin Database
The third installation page will require from you to fill the information for the database which the Boonex Dolphin platform will use. You should be able to easily create a database and assign a user for the same via your cPanel → Database Wizard. If you are experiencing difficulties creating a database and assigning a user for the same please check our other tutorial on how to create a MariaDB database via the cPanel service.
Once you have the database create and you are aware of the user assigned for that database you will need to fill the required fields on that third installation page.
- Database host name - The hostaname of the database server. Usually this is localhost so you should leave the field as it is.
- Database host port number - The port where the MariaDB service is listening. On all our hosting packages this port is 3306.
- Database socket path - The path to the socket file. If you are not quite sure what this path is please leave the field empty.
- Database name - The name of the database you have created earlier via your cPanel → Database Wizard.
- Database user - The username for the user you have granted privileges to operate with the created database.
- Database password - The password for that user.
Once all of the fields are properly filled please click the Next button located at the bottom of the page so the installation process can proceed populating the tables in your database.
Configure your Website Information and Cron
The next page from the installation process is where the information for the tittle, description, emails and username and password for your website should be filled.
- Site Title - The tittle your website will be using.
- Site Description - Few words what your Social Network will be for.
- Site e-mail - The email address for your website.
- Notify e-mail - Email address which will be used for the notifications to be sent From.
- Bug report email - Email address where any bugs with your Social Network will be sent to.
- Admin Username - The username you would like to use for the admin user of your Social Network.
- Admin Password - The password for the admin user.
Please make sure that you are using strong type of password for your admin user so you can avoid any security issues. A strong type of password contains letters, numbers and special characters in it.
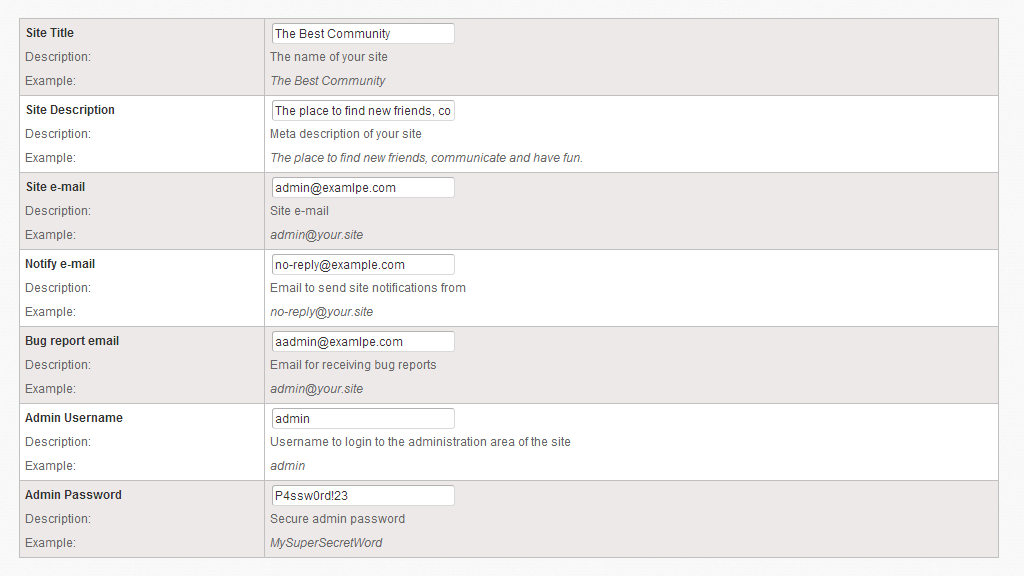
If you are ready filling all of the files on that page please use the Next button for moving forward with the installation process.
The next page from the installation process is informing you that you will need to configure a cronjob for your Boonex Dolphin platform to work properly.
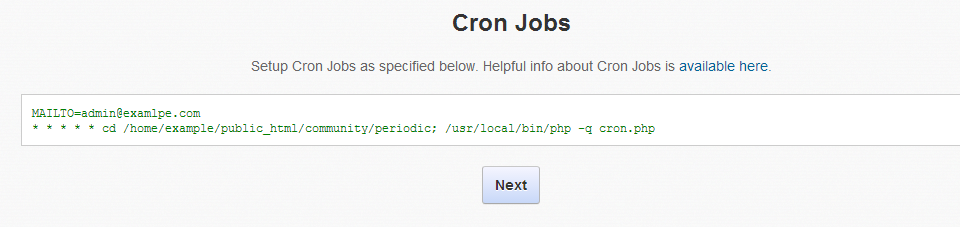
When you are done configuring your cronjob please use the Next button at the bottom of the page so you can proceed with the next page from the installation process.
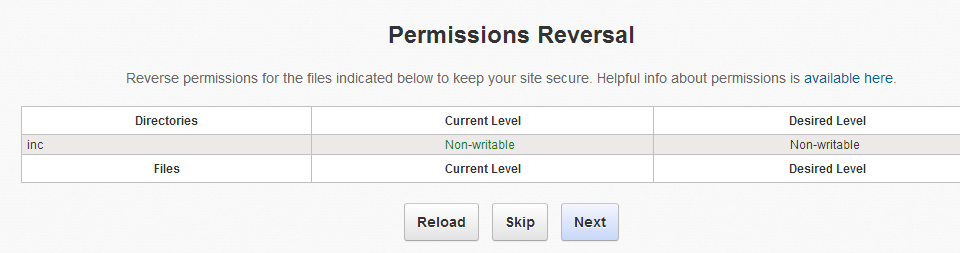
There you will find information that you will need to set non-writable permissions to the “inc” folder of your Boonex Dolphin platform and you should be able to easily perform that action if you have already set permissions earlier for the ffmpeg.exe file. The only difference is that this time the “inc” folder is located in the installation directory you have uploaded the installation files at and of course the permissions number which will be 555.
Once the permissions are properly changed and you reload the page you will notice how the Current Level will become Non-writable and green. Now is the time to click the Next button so you can proceed with the installation process.
The final page will congratulate you for the successful installation of your Boonex Dolphin platform and will remind you that you will need to remove the install directory from the files for your platform. This can be achieved either via the FTP service for your account or via the File manager feature of your cPanel.

Once that directory is removed the installation process will be finished and if you visit the home page of your website you should be able to take advantage of the features the platform offers.
Congratulations you have successfully installed Boonex Dolphin on your hosting account!

Dolphin Hosting
- Free Dolphin Installation
- 24/7 Dolphin Support
- Hack-free Protection
- Fast SSD Storage
- Free Domain Transfer
- FFmpeg Support
- Free Cloudflare CDN