How to optimize PrestaShop with XCache
Updated on Sep 12, 2016
Normally XCachewas not available for the shared hosting based packages we and other hosting companies are offering to their customers, however with the recent improvements of our Shared Hosting environment we have made this feature available for all our shared hosting packages.
Start using the world's first PrestaShop 1.6 optimized environment and benefit all the goods we provide:
- XCache Activation
- XCacheOptimization
- XCacheIntegration
XCache is a stable, opensource, opcode cache mostly used on dynamic websites for optimizing the loading time of a webpage to the edge. It works similarly to the APC cache engine as it caches the result of the compiled php scripts in the RAM so these can be reused upon future calls. This can dramatically reduce the loading time of your website especially if it relying on php which is the case with all of the most used Opensource platforms.
PrestaShop 1.6 does not make an exception and thanks to its developers now the platform is fully integrated with the XCache opcode cache. With the recent improvements of our Shared Hosting environment we have fully enabled our customers to take advantage of this great cache engine and in the next few lines of this tutorial we will show you how to configure PrestaShop 1.6 for the use of this cache engine.
To optimize your Online Store using XCache, you need to:
Activate the XCache php module
Now since XCache is an addition to the php service on the server it is activated additionally. This can be easily achieved if you login into the cPanel service and then navigate to the Select php version feature which will actually allow you to change the php version of your account and to select some additional module if of course you will need them. In order to get the Xcache activate you will need to put a tick into the XCache checkbox.
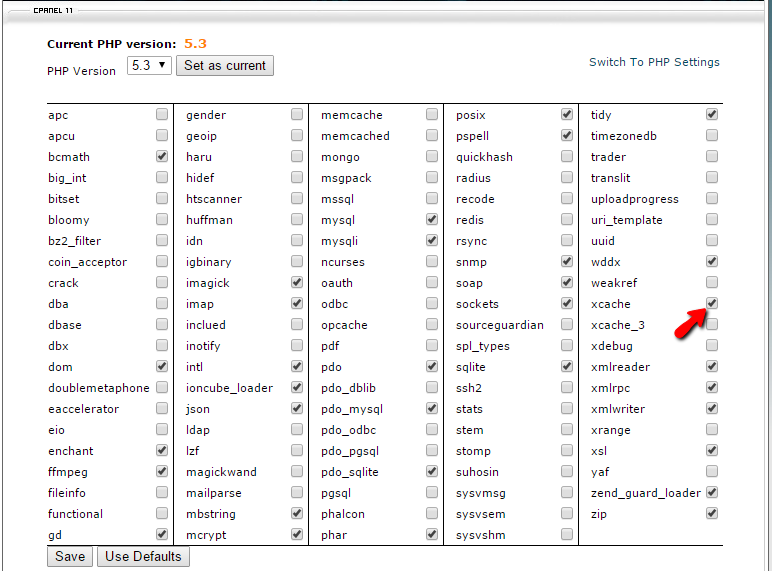
Once you have done that simply click on the Save button located right below the list of modules and the XCache will be activated properly for your entire account.
Configure XCache on your PrestaShop 1.6
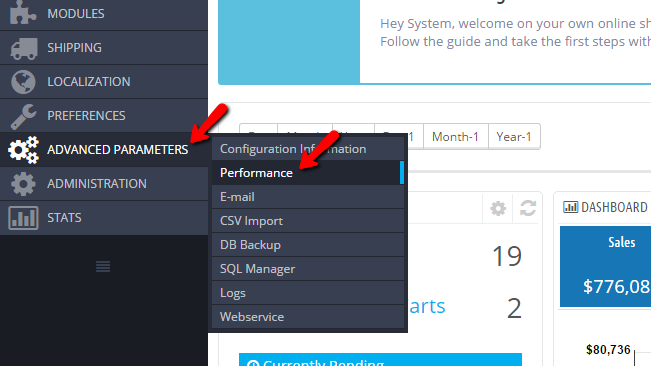
Now that you have the XCache cache engine activate let’s configure the PrestaShop 1.6 platform so it can begin using that opcode cache. In order to do so you will need to access the Advanced Parameters → Performance section.
There you will need to scroll down to the bottom of the page where you will find the Cache section. Please enable the caching on your Prestashop 1.6 based website by simply choosing the Yes option under the Use Cache setting.
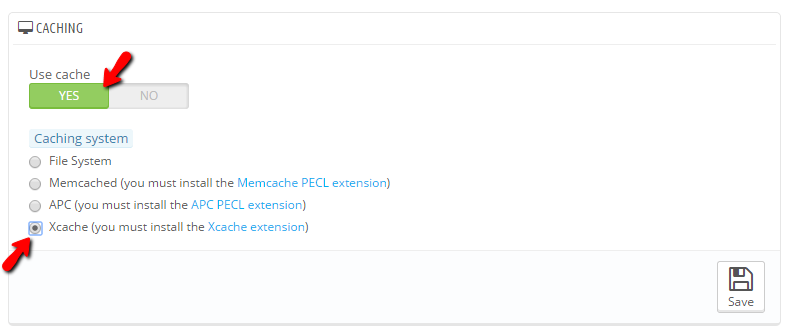
Once this is done you will be presented with the supported cache engines for which you should be able to find tutorials in this section. Please click on the XCache option and then please click on the Save button so you can save the configuration.
Once the changes is saved your website will immediately begin using the XCache cache engine.
Congratulations! You have successfully enabled the XCache cache engine on your PrestaShop 1.6 based Online Store!

PrestaShop 1.6 Hosting
- Free Installation
- 24/7 Tech Support
- Free Domain Transfer
- Hack-free Protection
- Fast SSD Storage
- Free Cloudflare CDN
- Free Website Transfer
- Immediate Activation