How to manage the Languages your Store will support
Updated on Sep 12, 2016
With the default setup of PrestaShop 1.6 you are provided with the option to allow multiple languages for your Store. This will allow for your customers to better understand the information shown on your website and also will increase the customer engagement with your Store.
In the next few lines of this tutorial we will provide you with detailed information on how exactly you should manage the languages on your website.
To manage the Languages your Store supports, you need to:
Add a New Language
All of the language settings can be managed via the Localizations → Translations section.
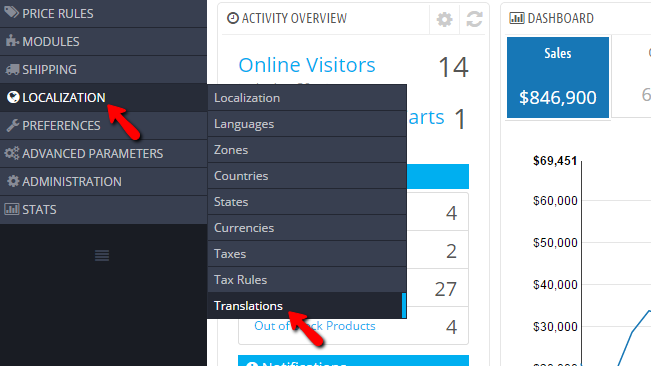
Once there you have quite a lot of options for the overall translations of your Store, however for the purpose of this tutorial we will focus on the second section called "ADD / UPDATE A LANGUAGE". There you will be able to select the language you would like to use and to add it to the list of languages supported by your Store.
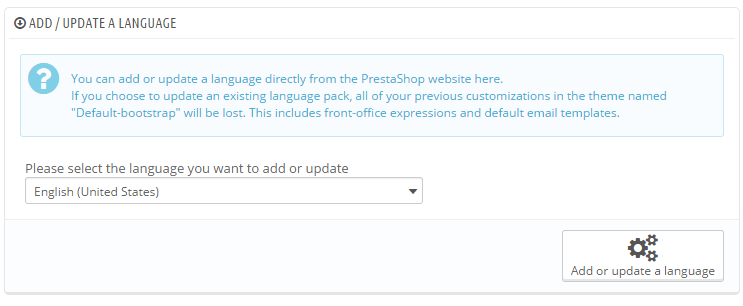
Once you click on the Add or update a language window, the language will be added to your Store and your customers will be able to select it from the Front Office.
Edit and Delete Language Configurations
Now that you have added the new language to your Store it is time to learn how to actually edit the configuration for that language and also how to delete the language from your Store entirely. Both of the processes are relatively easy for handling and we will begin with the editing process.
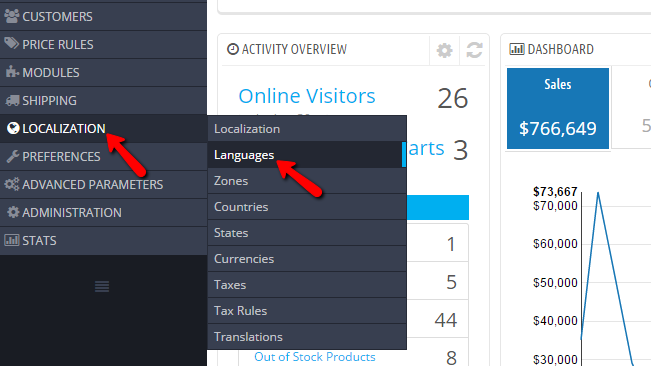
In order to edit the configuration of your language you will need to access Localization → Languages.
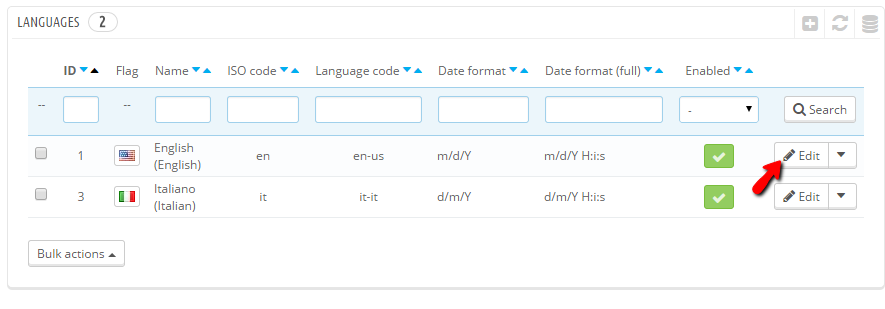
Once there you will notice a convenient table view representing the currently added languages to your website. In order to edit the configuration for a specific language you will need to simply click on the Edit button next to the language you would like to use.
There are few configuration options you will need to configure on the next page you will be directed to.
- Name - The actual name of the language - usually the language itself
- ISO code - The two letter ISO code of the language
- Language code - IETF language code for the chosen language
- Date Format - The short date format used by this language
- Flag - A small image to represent the flag for this language
- No-picture image - The image that would be displayed if no image for this language is found
- Is RTL Language - This should be enabled if the language should be read from right to left
- Status - The status of the language you have added. By default this status should be enabled
Once you are done with the configuration please click on the Save button so all the changes can be saved.
In order to delete a language you will need to back again to the Localization → Languages page and to click the little arrow icon next to the Edit button so you can bring the Delete action.
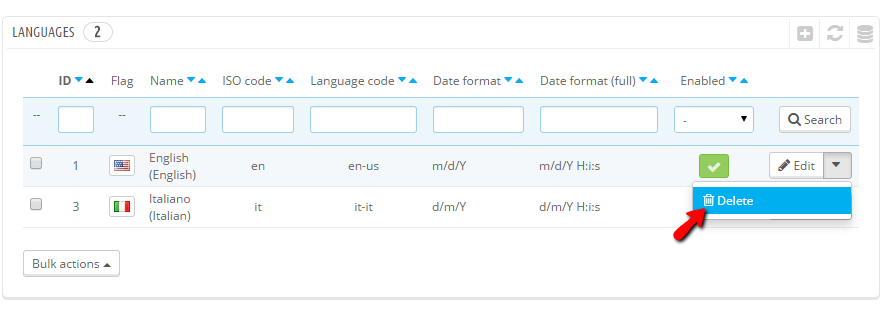
Once you click on that action the language will be removed from your website.
Congratulations! You can now fully manage the languages on your website.

PrestaShop 1.6 Hosting
- Free Installation
- 24/7 Tech Support
- Free Domain Transfer
- Hack-free Protection
- Fast SSD Storage
- Free Cloudflare CDN
- Free Website Transfer
- Immediate Activation