Configuring Attributes
Updated on Sep 12, 2016
The Product Attributes are often used for adding different additional information about your product to the product page. With our PrestaShop 1.6 Hosting package you can get this done all by our technical support team, however if you decide to do this on your own you can follow the next few simple steps.
To configure the attributes in PrestaShop 1.6, you need to:
Add a New Attribute
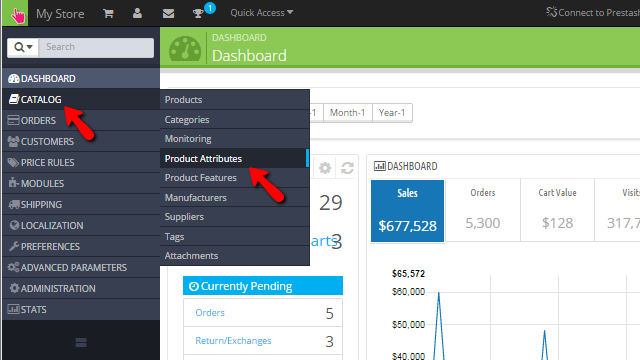
Accessing the dedicated page for the attributes your products will be using is quite an easy task which you should be able to achieve via the Catalog → Product Attributes menu link.
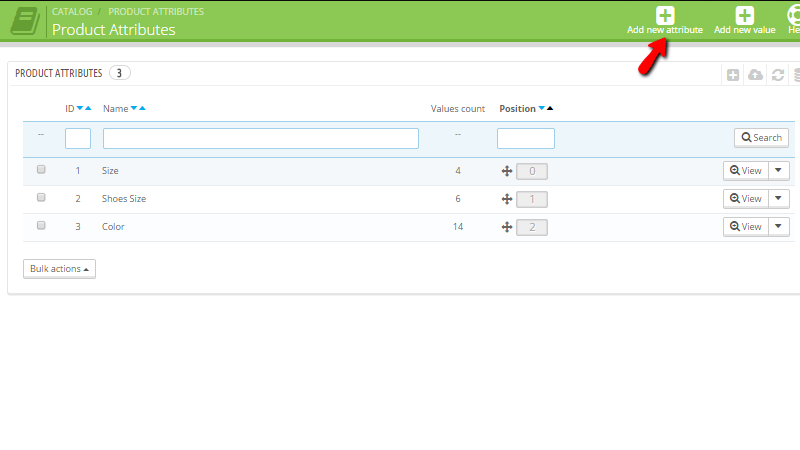
Next you will be presented with the home page for all the configured Attributes from which you will be able to fully manage those.
Let's add a new attribute. In order to do so you will need to click on the Add New Attribute button at the top horizontal menu.
You will be then directed to a dedicated page where you will be able to configure all the settings for this new attribute.
Let's discuss those settings one by one:
- Name - The internal name for your attribute. This name will be used for internal purposes by you and it will not be presented to your customers
- Public name - This is the publically visible name of this attribute. It will be displayed mainly to the customers purchasing this product
- URL - The URL for this attribute
- Meta title - The tittle for this attribute which will be displayed in the search engines
- Indexable - If the attribute should be indexed by the search engines
- Attribute type - From here you can choose how the Attribute will be displayed to the customers reviewing the product
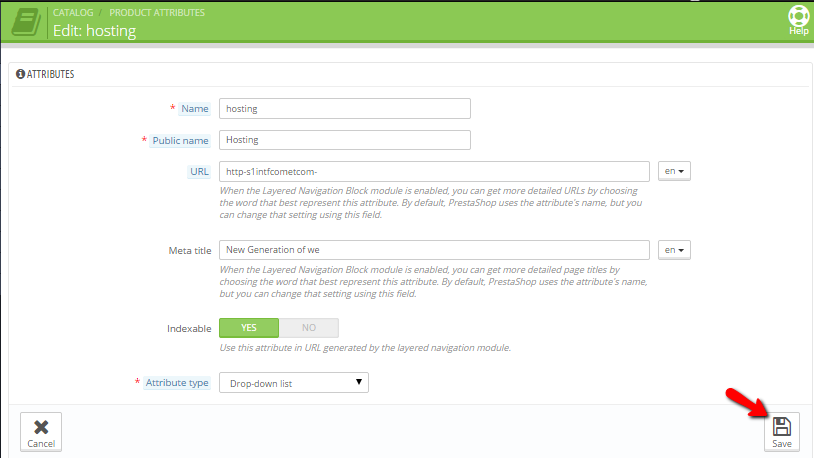
Once you are done with all those configuration hit the Save button so the changes can be saved and for your new attribute to be listed into the list of available attributes you will be presented with.
Edit or Delete an Existing Attribute
Now that you know how to create an attribute and to configure it properly it is important for you to understand the other available actions you can perform with the already created Attribute. Let's begin with the editing or deleting of already existing attribute.
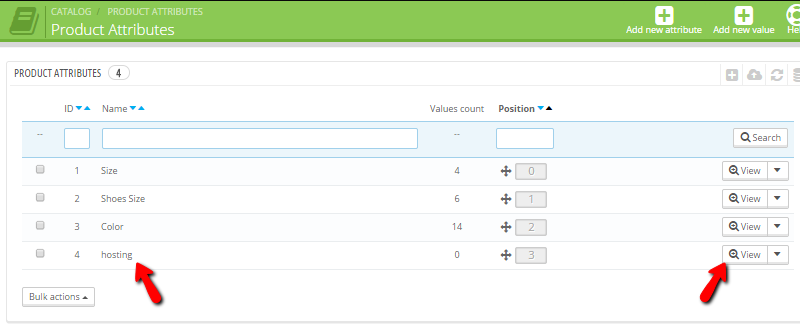
This is quite easy for achieving if you simply use the small arrow next to the View button available in the last column of the table view representing your products.
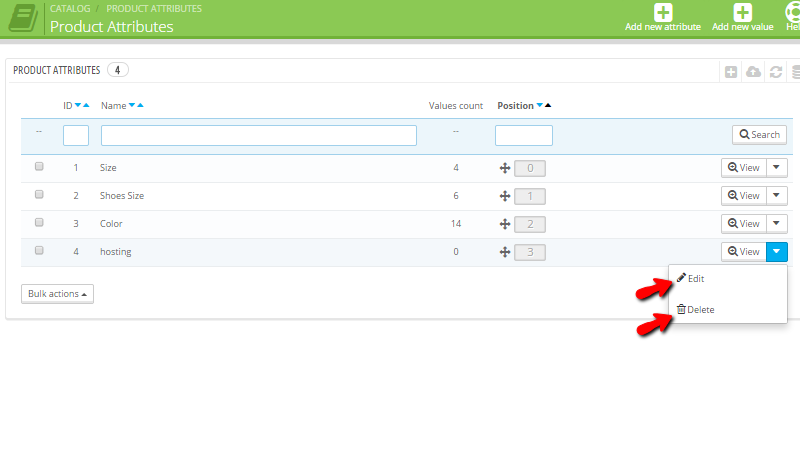
From there you will be able to either Edit or Delete an existing attribute. The editing process is relatively simple as it uses the same interface as the one used in the Add new attribute section.
The second important aspect of the attributes is that once created a single attribute will be empty. In simple words it will be listed as an additional option for your product but you will need to actually create its content based on the attribute type you have chosen.
In order to view the contents of certain attribute you will need to either click on the attribute's name directly or to use the small View button located in the last column of the table view with your attributes.
Once you do any of these actions you will be landed on the attribute's values page where you will be able to add new values to the concrete attribute. In order to add a new value you will need to simply click on the Add new value button from the top horizontal action bar.
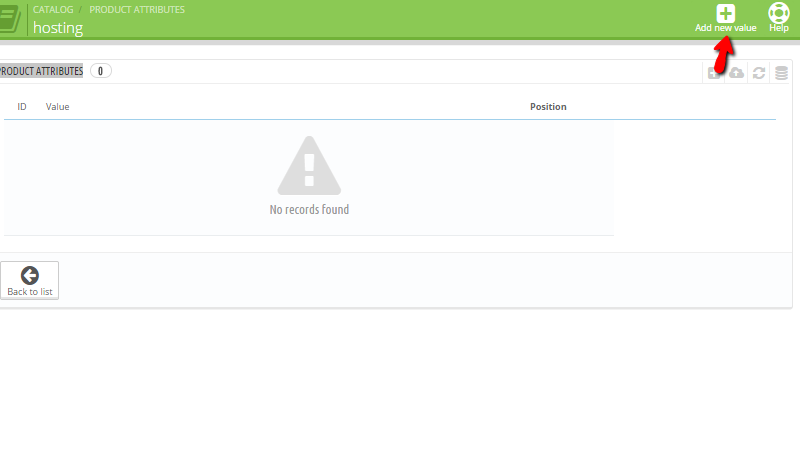
Adding a value is quite easy and by filling the few options listed in the adding interface you will be able to add the value you would like this attribute to have. Once you are done of course hit the Save button so the attribute can be saved or Save then add another value button if you would like to save the current value and proceed adding more values.
Congratulations! You can now fully manage the attributes of your Store in PrestaShop 1.6!

PrestaShop 1.6 Hosting
- Free Installation
- 24/7 Tech Support
- Free Domain Transfer
- Hack-free Protection
- Fast SSD Storage
- Free Cloudflare CDN
- Free Website Transfer
- Immediate Activation