Managing the Tags
Updated on Sep 12, 2016
The word "tag" means a non-hierarchical keyword or a term assigned to a piece of information. In PrestaShop 1.6 this word is used to add another classification level to your products besides their categories and in the next few lines of this tutorial we will show you how to fully manage the tags of your website.
To manage the Tags for the products of your Store, you need to:
Add a New Tag
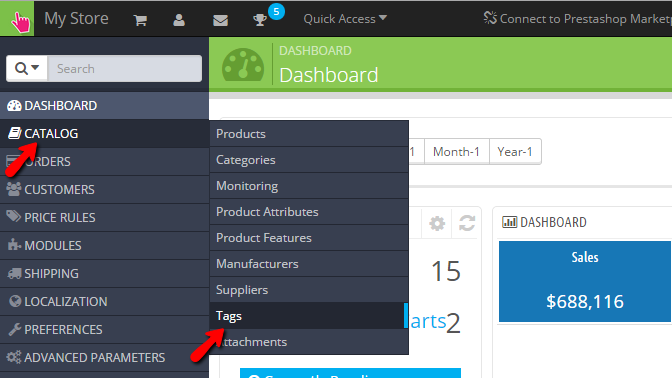
All of the tags on your website are managed in a separate page which you will be able to access via the admin dashboard from where you can navigate to the Catalog → Tags menu.
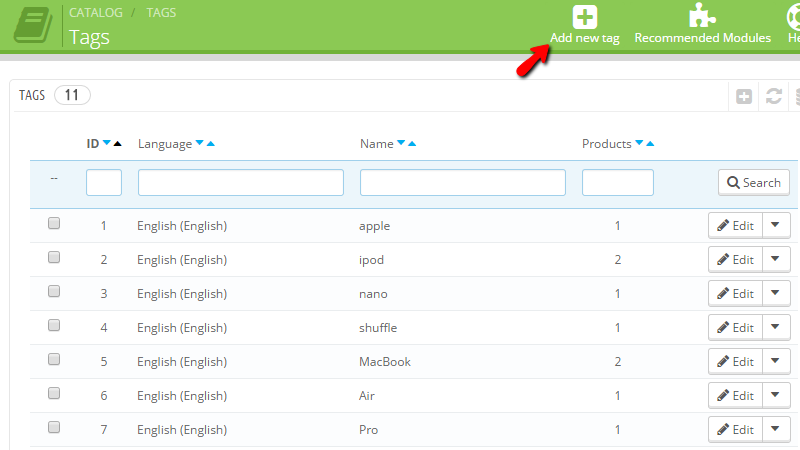
Right when you access the Tags page you will find a large table view in which all the tags added to your store will be listed.
In order to create a new tag you will need to use the Add new tag button which is located in the top action bar:
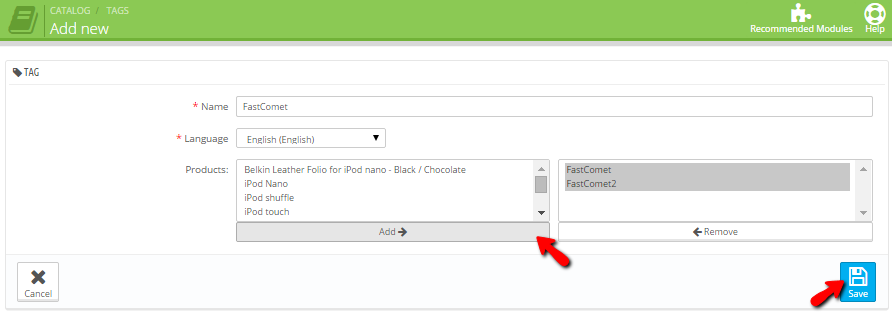
Once you click on that button you will be presented with a form which you will need to configure before you save the new tag you are currently adding. The fields required for the configuration of the new tag are the following:
- Name - The name of your tag
- Language - The language which this tag will be available for
- Products - The products you would like to associate with this tag
Once you are done with the configuration of these options please hit the Save button so you can save the new tag.
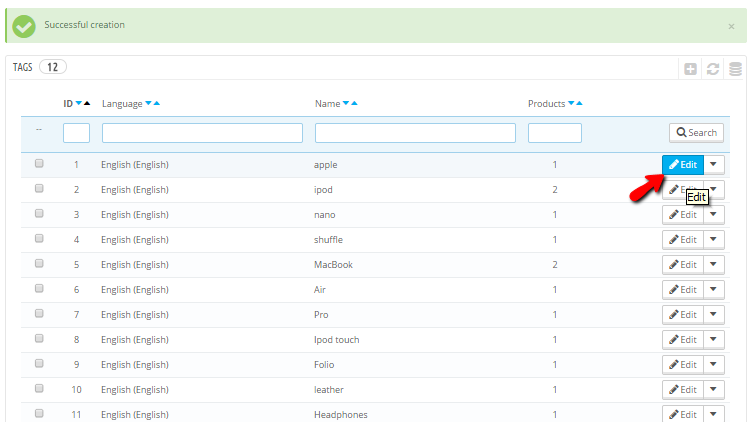
Once the tag is saved you will notice how the same will appear at the bottom of the table view representing all of the tags you currently have configured.
Edit and Delete Existing Tags
In order to edit or delete a tag you are provided with a dedicated drop-down menu for each of the tags you are able to see in the table view displayed on the Tags page. The menu is available with the Edit option being automatically selected and if you click on the button you will be then presented with the editing interface for the tag you have chosen:
The diting interface is nothing more than the tag adding form but with alredy filled fields which you can change based on your personal needs.
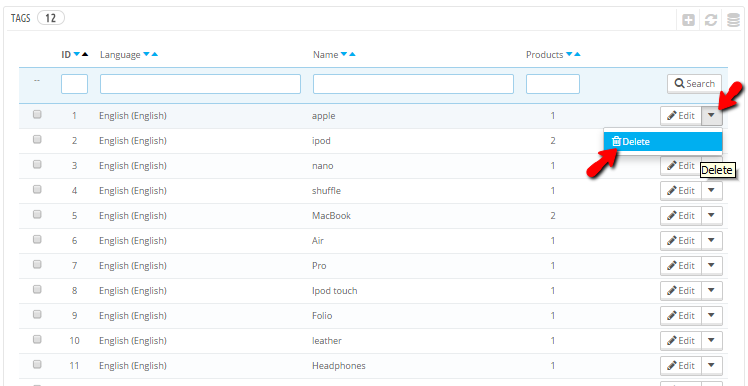
In order to delete a tag you should simply find the tag in the table view and then click on the small arrow next to the Edit button so you can be able to bring the drop-down with the delete option:
You will be then prompted with a confirmation window where you will be able to confirm the deletion of the selected tag.
Congratulations! You can now fully manage the tags of your website!

PrestaShop 1.6 Hosting
- Free Installation
- 24/7 Tech Support
- Free Domain Transfer
- Hack-free Protection
- Fast SSD Storage
- Free Cloudflare CDN
- Free Website Transfer
- Immediate Activation