Configuring Contacts and Our Store pages
Updated on Sep 12, 2016
PrestaShop 1.6 provides you with the option to show your customers key location of your physical shops or just a location where your customers can meet your representatives. In the next few lines of this tutorial we will show you how to configure the Our Store static page from within the Back office of your website.
To configure the Contacts and "Our Store pages", you need to:
Add a New Contact
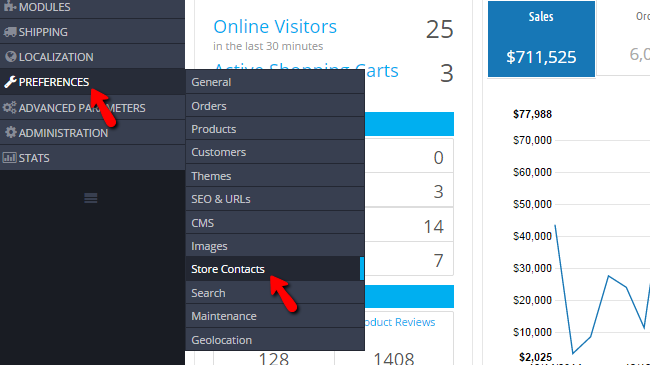
In order for you to be able to access the page where you can edit the contacts for your Store you will need to simply login into the admin area of your website and to navigate to the Preferences → Store Contacts menu item.
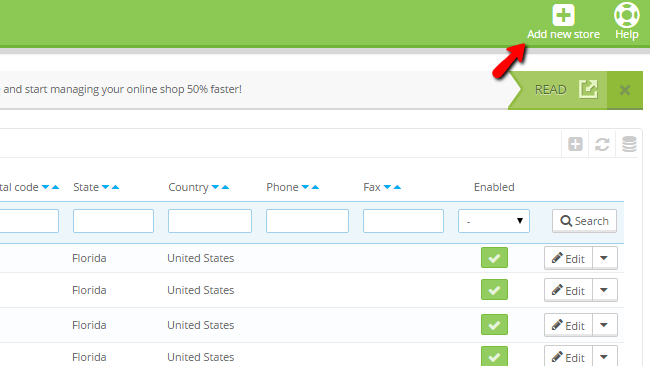
Once there you will notice that the page is separated on two sections which we will discuss in the next step of this tutorial. In order for you to add a new contact please click on the Add new store button located at the top action bar.
This action will bring a simple form where you will need to fill the required information before you can save it. The options available for editing on that page are:
- Name - The name of the contact store you are adding
- Address - The physical address of the contact store you are adding
- Zip/postal Code - The Zip Code of the contact store you are adding
- City - The city where the contact store is located
- Country - The country where the contact store is located
- Latitude / Longitude - The geographical coordinates for the contact store. This is used for the generation of a map
- Phone - The phone of the contact store you are adding
- Fax - The FAX for the contact store you are adding
- Email Address - The email address for the contact store you are adding
- Note - Here you can place any additional notes to the contact store you are adding
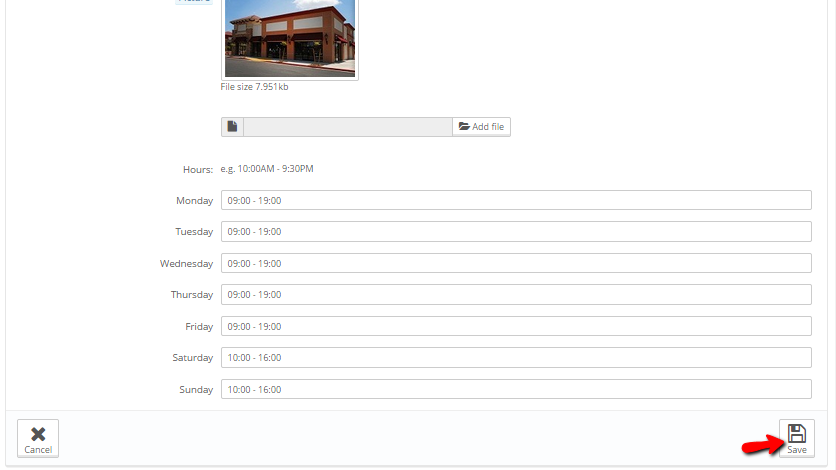
- Hours - The working hours for the contact store you are adding
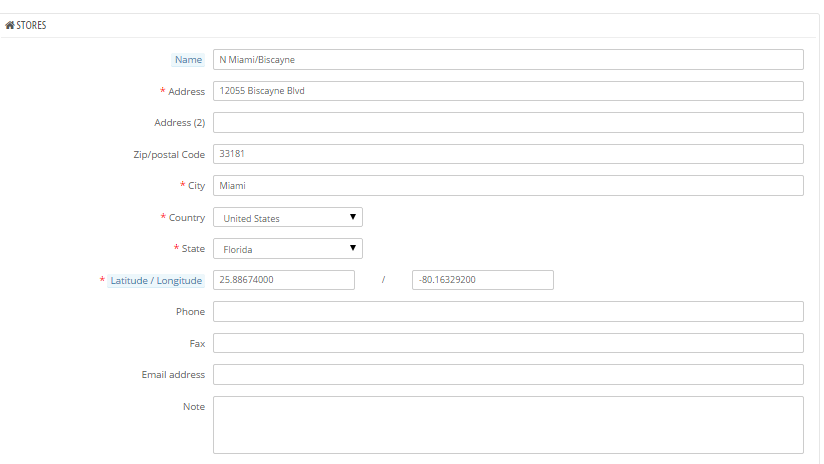
Once you are done with the configuration of all these fields you can hit the Save button located at the bottom of the page and the information for your contact store will be added.
Edit and Delete Existing Store Contacts
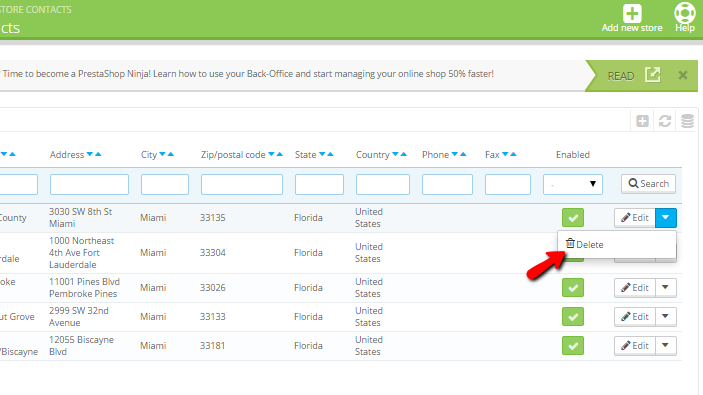
With the default setup of PrestaShop 1.6 you will notice how there will be 5 store contacts added to the Store Contacts section of the same page. Now since these are added only with sample purpose you might want to either edit them or delete them entirely.
Let's review the editing process. It is relatively simple process and the only thing you will need to do is to click on the Edit button provided next to every specific contact.
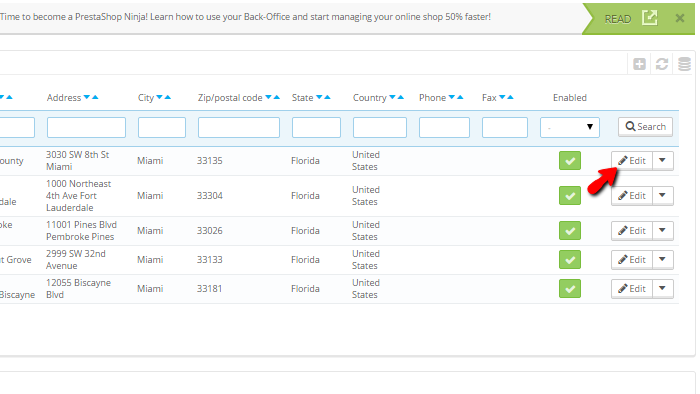
Then you will be presented with an interface similar to the one you have used for adding a new contact store, however this time you will notice how all the fields will be filled with the concrete data you have added when the store contact was created previously.
Once you set the options to their new values you should simply click on the Save button in order for these edits to be saved and that is all.
The second part of this step is if you would like to have a contact store deleted as you do not need it anymore. This is also quite a simple process which you will be able to achieve via the small arrow next to the Edit button. Once you click on the same you will be provided with the Delete option which you can use for deleting the concrete contact.
The only thing left on the Store Contacts page is the second section called Parameters. There you will be able to find few settings which we will discuss bellow.
- Display in the footer - Option which will allow you to have the store contact information displayed in the footer of your Store
- Display in the sitemap page - Option which will allow you to have the store contact information displayed on the Sitemap page
- Show a simplified store locator - Option which will allow you to hide the map and the search features and to show only the store directory
- Default latitude and longitude - The values will provide you with option to define the default latitude and longitude of the map view you will get whenever you access the Our Stores static page
Congratulations! You can now fully configure and edit the content of the Our Stores page.

PrestaShop 1.6 Hosting
- Free Installation
- 24/7 Tech Support
- Free Domain Transfer
- Hack-free Protection
- Fast SSD Storage
- Free Cloudflare CDN
- Free Website Transfer
- Immediate Activation