Managing the Currencies
Updated on Sep 12, 2016
If you are planning to sell products across multiple countries then most probably you would need to add additional currency support to your store the customers can choose from. PrestaShop 1.6 fully enables you to add as many as currencies you would like to and of course to provide those currencies as payment options to your clients. In the next few lines of this tutorial we will show you how to fully manage the currencies of your Store.
To manage the currencies available in your Store, you need to:
Add a New Currency
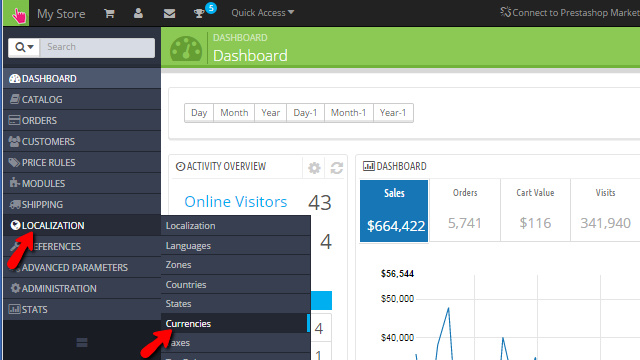
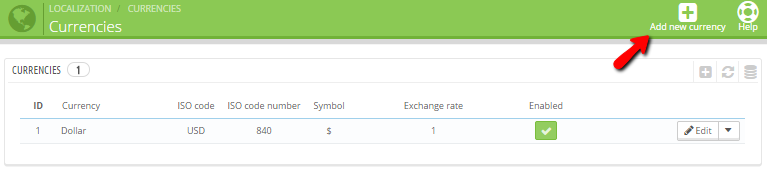
In order to access the currencies page you will need to login into the Back Office of your store and to navigate to Localizations → Currencies. There you will be able to see a table view representing all of the currencies you have added to your online Store.
In order to add a new currency you will need to use the Add new currency button located at the top action bar.
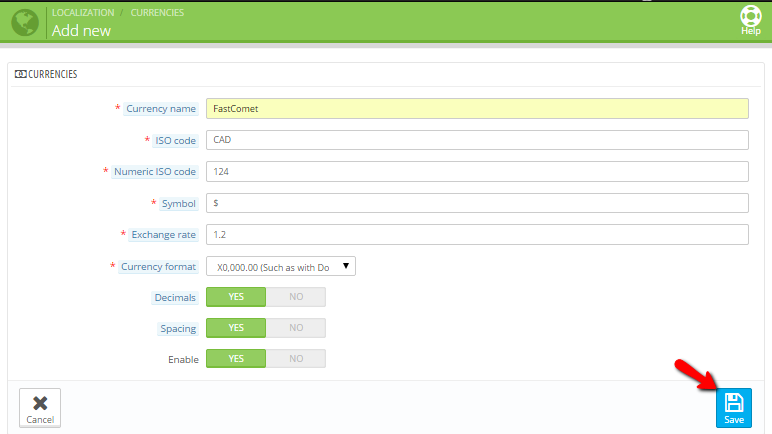
Once you click that button you will be presented with a simple form containing all the options you will need to configure for adding the new currency to your website. The available options you will need to configure are:
- Currency name - The actual name of the currency you will be adding
- ISO Code - The text code of the currency
- Numeric ISO Code - The numeric ISO code of the currency
- Symbol - The symbol of your currency
- Exchange Rate - The exchange rate this currency will be traded based on the default currency of your store
- Currency Format - The exact format of the currency or the way how the currency will be displayed
- Decimals - If the currency should include decimal values
- Spacing - If there should be any spacing between the currency symbol and the digits
- Enable - If the currency should be enabled immediately after you save it
Once you are done with the configuration please click on the Save button so you can be able to save the performed changes.
Once the currency is saved it will be displayed in the table view of your currencies so you can be able to manage it which we will review in the next step of this tutorial.
Edit and Delete Currencies
Now that you have added the currency to your Store it is time to learn how to edit and delete it. First let's review the editing process. In order to edit an already configured currency you will need to click on the Edit button which is displayed next to every currency in the table view.

Once you click that button you will be presented with the same interface of options as the one you were configuring when you were adding the currency. Edit the options based on your personal needs and then save it so the changes can be immediately applied.
The second action you can perform in order to manage a currency is to simply delete it. In order to delete a Currency you will need to click on the small arrow next to the Edit button and click on the Delete option.
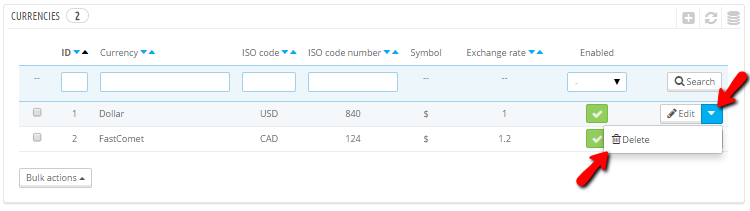
This will prompt a dialog window where you will need to confirm the deletion and then the currency will be deleted.
Congratulations! You can now fully manage the currencies on your PrestaShop 1.6 website!

PrestaShop 1.6 Hosting
- Free Installation
- 24/7 Tech Support
- Free Domain Transfer
- Hack-free Protection
- Fast SSD Storage
- Free Cloudflare CDN
- Free Website Transfer
- Immediate Activation