Managing Categories
Updated on Sep 12, 2016
In order to structure your products in convenient lists based on their type or some other property you are provided with the option to add and manage Categories as this is one of the default features of the new PrestaShop 1.6. In the next few lines of this tutorial we will show you how to easily create and manage the categories of your Store.
To fully get used to the categories in PrestaShop 1.6, you need to:
Access the Categories page
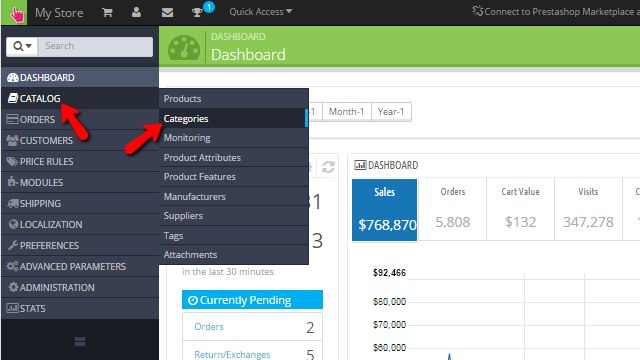
In order for all of your categories to be managed PrestaShop 1.6 provides you with dedicated page for this sole purpose. The page is accessible via the Back Office of your store and in order to access it you will need to navigate to Catalog → Categories.
The page you will be taken to will provide you with list of all the categories you have currently added to your website. Now let's learn how to create a new category.
Create New Categories
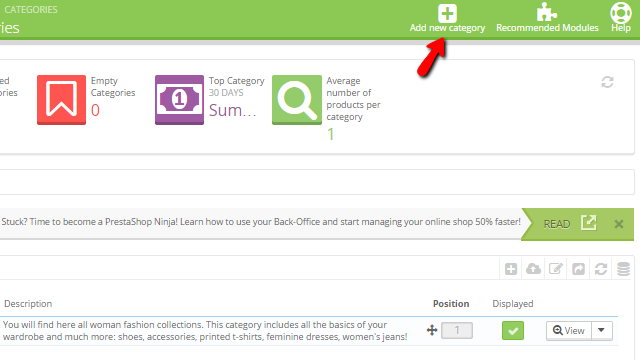
The process of creating new categories is relatively simple and in order to add such you category you will need to simply press the Add new category button located at the top horizontal action bar.
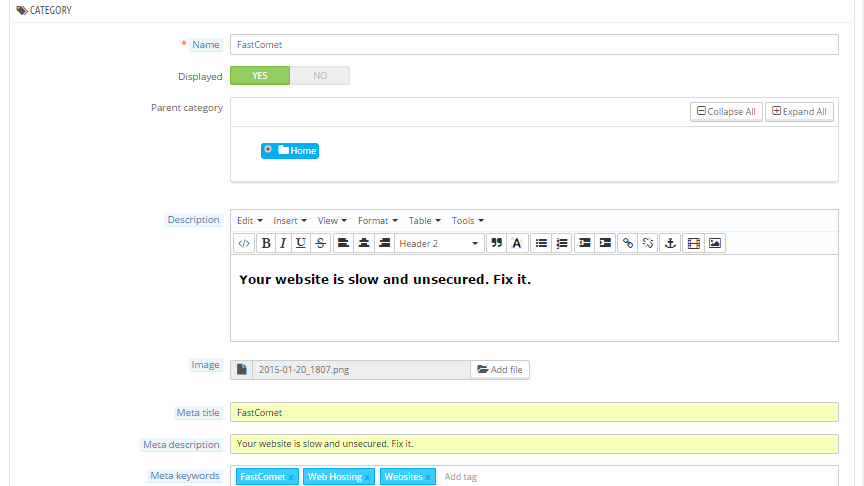
This will bring the default form for adding a category where you will need to configure the basic information and settings for that category. Let's review those settings now.
- Name - The actual name of the new category you are adding
- Displayed - If the category should be displayed immediately or you would like to add some products first
- Parent Category - If there should be a parent category for the one you are creating here is the place where you can configure it
- Description - Few words about the category and the products you will be adding to the same
- Image - An image to represent your category to your users
- Meta settings - Settings related to how the category will be displayed in the search engines
- Friendly URL - The human readable URL for your category. Note that here you will be configuring only the slug after your domain name
- Group Access - Who should be able to access the category in terms of employees and customers
Once you are done with those configurations please use the Save button at the bottom of the form so you can be able to save the changes.
Once the changes are saved your brand new category will be created and ready to use.
Manage Existing Categories
The management of your categories is simple as it sounds and in order to prove that we will review the process of editing and deleting a category. Both of these actions are available next to every category in the Categories home page where you can see all of the currently enabled categories.
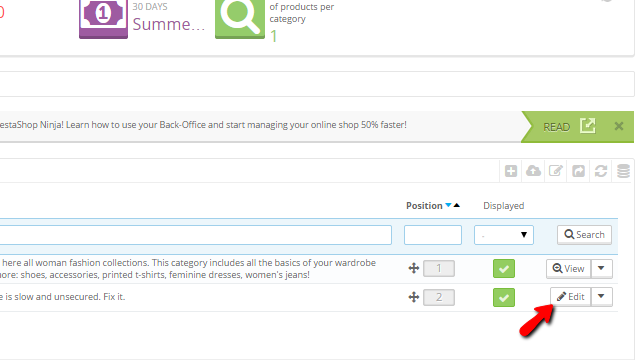
In order to edit a category you will need to click on the Edit button next to the category.
There you will be presented with all the settings and options in the category creation page so you can be able to edit the category you have clicked the Edit button for. Once you are done with the edits simply press the Save button at the bottom of the page so your changes can be saved and you can be brought back to the categories home page.
In order to delete a category you will need to simply click on the small arrow located right after the Edit button and to click on the Delete item from the displayed drop-down. Then the page will be reloaded and you will be asked for what action should PrestaShop 1.6 perform with the products existing in this category.
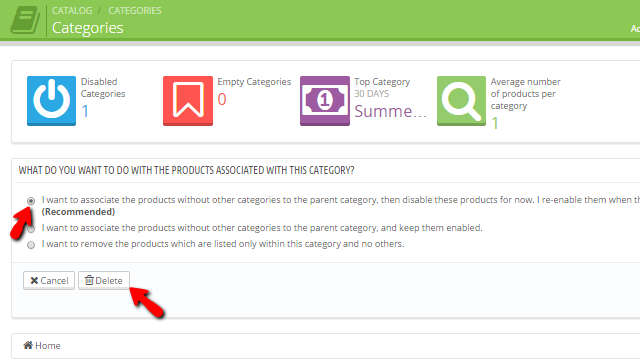
Please choose the option which will suite your needs the most and click on the Delete button so you can be able to delete the selected category.
Congratulations! You can now fully manage the categories of products on your Store.

PrestaShop 1.6 Hosting
- Free Installation
- 24/7 Tech Support
- Free Domain Transfer
- Hack-free Protection
- Fast SSD Storage
- Free Cloudflare CDN
- Free Website Transfer
- Immediate Activation