Managing the Tax Rates
Updated on Sep 12, 2016
Tax Rates refers to the actual tax rates applied for different countries or states of the same country. PrestaShop 1.6 allows you to fully manage all the tax rates on your store from a single dedicated to these features page. In the next few lines of this tutorial we will show you how to fully manage the Tax Rates of your Store.
To manage the Tax Rates of your Store, you need to:
Add a New Tax Rate
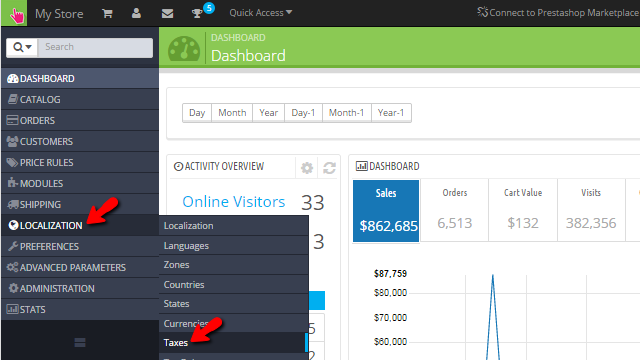
In order to manage all the tax rates of your Store you should login into the Back Office of your website and then navigate to Localizations → Taxes.
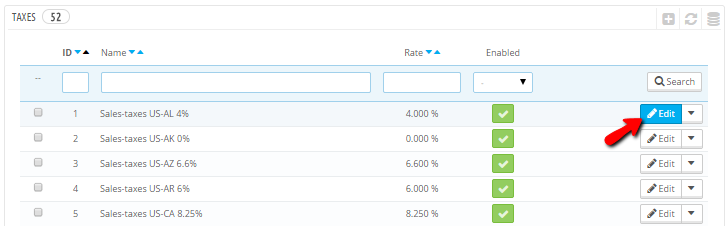
On the page you will be directed to you will see a list of all the currently configured Tax Rules. Note that with the default setup of PrestaShop 1.6 you are provided with large amount of Tax Rules which you can take benefit from.
In order to add a new Tax Rate you will need to click on the Add new tax button and you will be redirected to the page where you will be able to configure the options for your new Tax.

The options you will find into the newly displayed interface three and you will be able to easily configure them:
- Name - The name of your Tax Rate
- Rate - The actual rate this Tax will apply
- Enable - If the Tax rate should be enabled
Once you are done with all these options you should click on the Save button located at the bottom of the page and your new Tax Rate will be added.

The newly added Tax Rate will appear in the table view representing all other Tax Rates of your Store.
Edit and Delete Existing Tax Rates
The second step of this PrestaShop 1.6 tutorial aims to provide you with more information on how exactly you should be able to edit the already added Tax Rates. In order to begin with the editing process you will need to find the Tax Rate of your store you would like to edit and to press the Edit button next to the Tax Rate.
Then you will be presented with basically the same editing form as the one you have used when you were adding your Tax Rate in Step 1 of this tutorial. Edit the tax rate based on your needs and once you are ready please use the Save button so you can save all the performed changes.
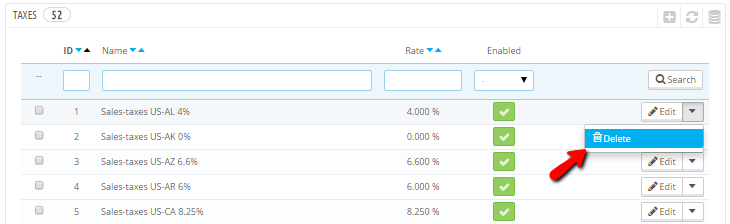
The final management action you can take with your Tax Rates is to delete them. In order to delete a Tax Rate you will need to locate the Tax Rate within the table view for all the Tax Rates and then to click on the little arrow next to the Edit button. This action will bring a small drop-down list where you will be able to located the Delete functionality.
Then you will be prompted with a confirmation window where you will need to confirm the deletion. Immediately after your confirmation the Tax Rate will be deleted.
Congratulations! You can now fully manage the Tax Rates of your Store!

PrestaShop 1.6 Hosting
- Free Installation
- 24/7 Tech Support
- Free Domain Transfer
- Hack-free Protection
- Fast SSD Storage
- Free Cloudflare CDN
- Free Website Transfer
- Immediate Activation