- phpFox Tutorial
- PHPFox overview
- Install/Upgrade PHPFox
- Configuration
-
Manage PHPFox
- User Groups
- Custom User Group
- Edit Users in PHPFox
- Custom Fields in PHPFox
- Custom tab on user profiles
- Manage Cancellations
- Manage Promotions
- Manage Menus
- Manage Blocks
- Manage Pages
- Manage Currencies
- Ban Members
- Manage Subscriptions
- Manage Countries and States/Provinces
- Manage Newsletters
- Manage Advertisements
- Manage Announcements
- Clear Cache
- Extend PHPFox
- Backup and Restore
- PHPFox Hosting
How to upgrade your PHPFox website
Updated on Dec 18, 2015
It is important to keep your PHPFox upgraded to the latest release at all times. Each new release provides bug fixes and improved functionality so this is a must for your website. In this tutorial, we will review the process of upgrading your PHPFox website to the latest stable release.
Create a Backup
It is recommended to create PHPFox backup, before making major changes on your website. This allows you to restore it to a fully operational state if something goes wrong.
Start a PHPFox website in just 3 minutes:
To help you get started with PHPFox our Technical Support team provides Free PHPFox Installation.
- Free PHPFox Upgrade by our Support Team
- Free Domain Name for Life
- 24/7 Technical Support team
- Optimized SSD PHPFox Hosting
- Fast and Secure Servers
The upgrade of PHPFox includes the following steps:
Step 1 Download and prepare upgrade files
You need to log into your account at the official PHPFox website. Then, simply click on the license for your domain and download the latest release as usual.
The next step is to extract the files of PHPFox on your local computer. When you do so, this will create two folders and a readme file.

You need to upload the contents of the upload/ folder of your newly downloaded contents to your account on the server. You can do that using your favorite FTP client or directly via the File Manager service within your cPanel account.
Make sure that you upload the files to the exact directory, where you have the PHPFox script installed, overwriting all of the existing files in it.
Upload Files
There are two ways of uploading your files to the server - using an FTP client, following our FTP tutorial, or uploading directly through your cPanel account > File Manager, following our cPanel tutorial.
Step 2 Initiate upgrade script
To initiate the upgrade process of your PHPFox website, you need to open your web browser and access the domain set on your website, followed by /install. This will initiate the upgrade process automatically for you and you will be able to proceed with the standard steps below.
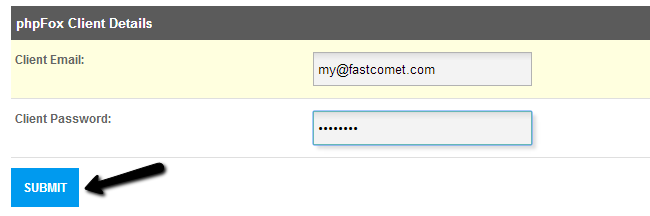
The first step is a verification if you have a valid license for PHPFox on your domain. Enter the username and password for your official PHPFox account.
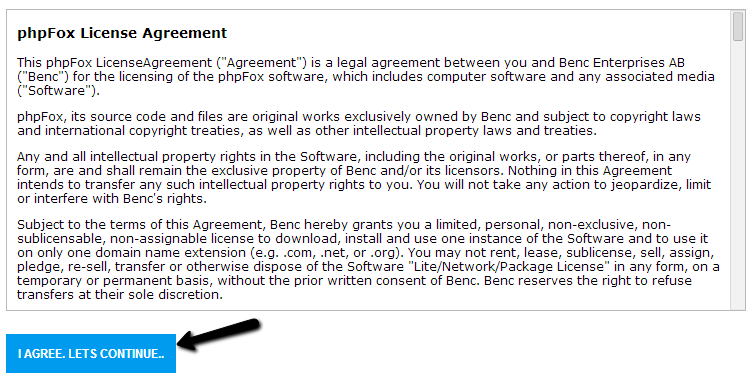
You need to read the License agreement and click on “I AGREE. LETS CONTINUE…” button to proceed.
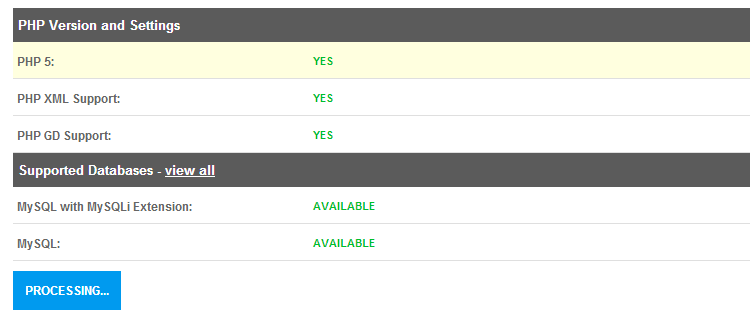
The system will check the system requirements and if they meet the ones for PHPFox. You will not have issues with this step on our servers.
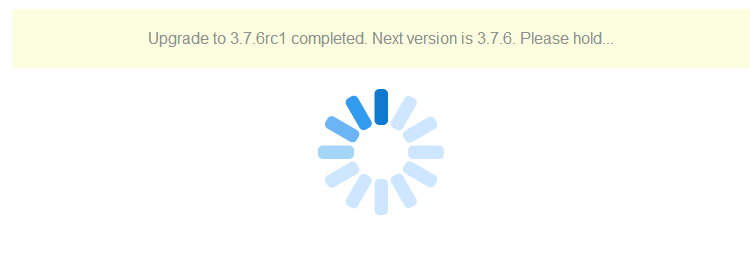
The system will automatically apply the required updates until the latest release you are upgrading to.
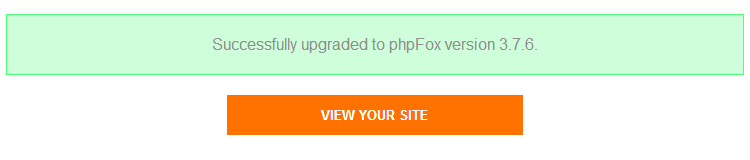
The upgrade of your PHPFox installation is now completed. You need to review your website carefully and see if all it's features are working properly. However, if you did not receive any error messages during the upgrade process, your website should perform properly after the upgrade.
Upgrade check
If you spot an issue with your website after the upgrade, you can resolve that by restoring a backup of your PHPFox installation. We recommend following our tutorial on how to restore PHPFox.

PHPFox Hosting
- Free PHPFox Installation
- 24/7 PHPFox Support
- Free Domain Transfer
- Hack-free Protection
- Fast SSD Storage
- Free PHPFox Transfer
- Free CloudFlare CDN
- Immediate Activation