How to Add a Signature to Emails in Thunderbird?
Updated on Jun 25, 2025
An email signature is used to sign your messages. It is applied automatically when you composing an email. You must configure it first, though, and we will show you how in this tutorial.
We are using the latest version of Thunderbird for this tutorial. You must firstly add an account to the application before assigning a signature. You can check our IMAP and POP3 tutorials on how to do that.
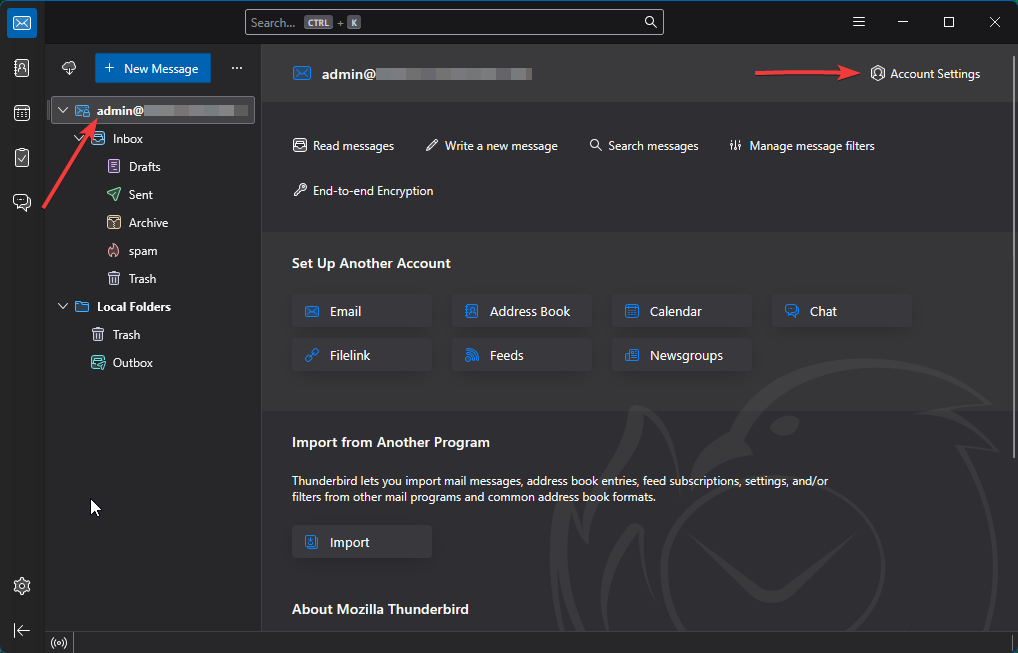
To start click on your account in Thunderbird and then go to Account Settings.
That will open a new tab with all the settings that you can change on your account. To find the signature space simply look on the right side of the window. You can enter your signature in the field there.
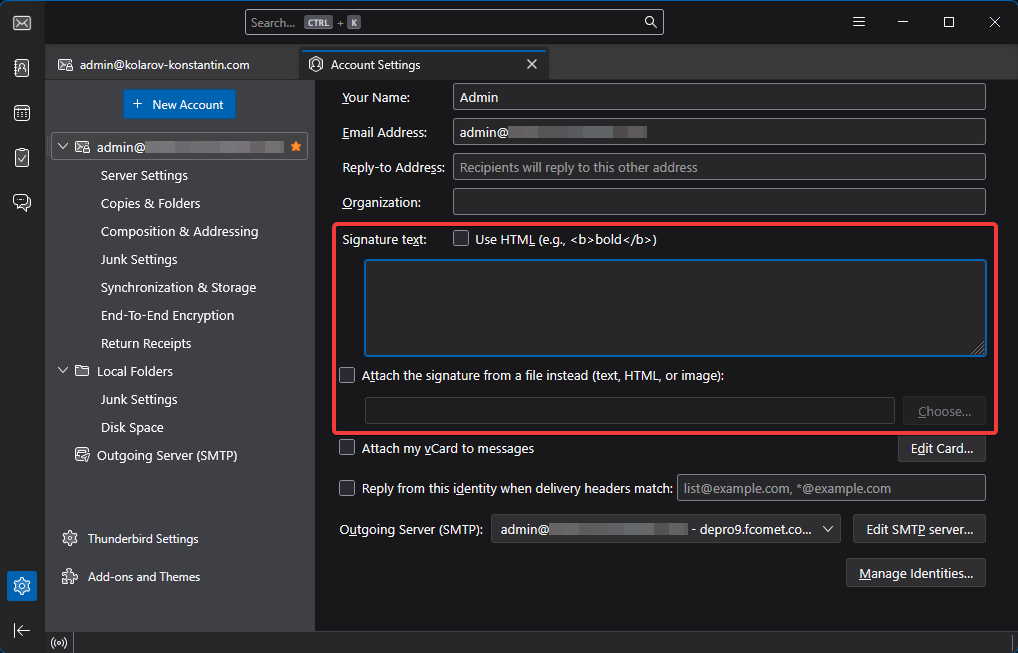
You can use simple text for your signature, or you can edit it further via HTML. Tick the Use HTML option to enable it. Additionally, you can see there is the option to add a signature from a file, in case you have one prepared already. The signature can be in the form of text, HTML or an image.
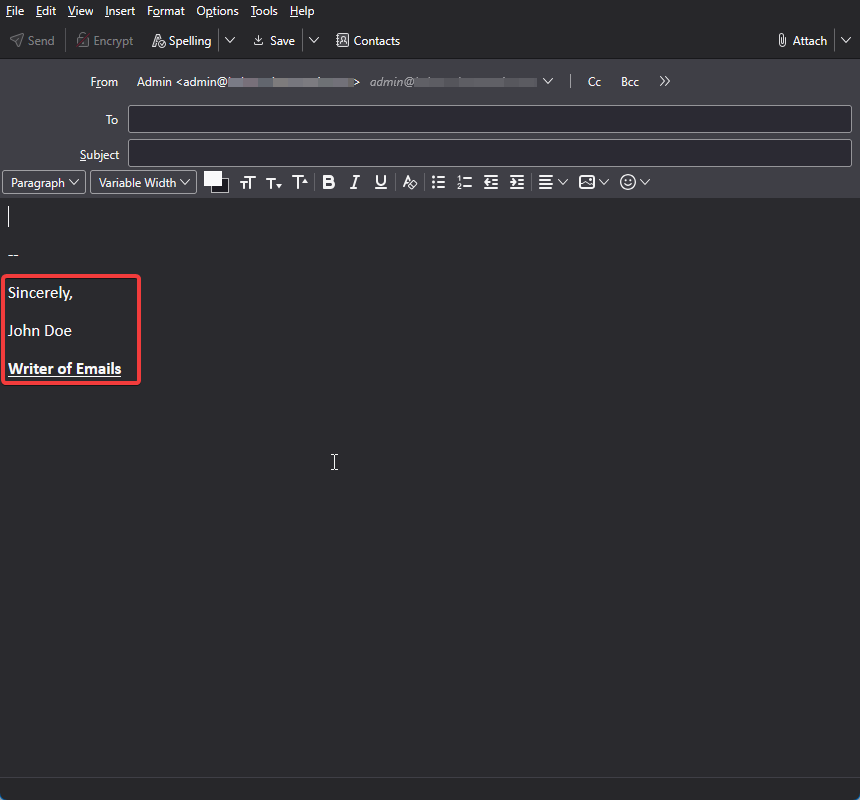
There is no OK button to click, changes are saved automatically. When you are ready with your signature it will appear at the bottom of each email you compose.
That is all you need to do. Adding a signature is simple, but can save you a lot of repetitive typing. Just make sure to double-check your HTML tags if you are using them, otherwise the signaure may not look as you expect it to.

Mail Hosting
- Free Domain Transfer
- Unlimited Email Accounts
- 24/7 Technical Support
- Fast SSD Storage
- Hack-free Protection
- Free Cloudflare CDN
- Immediate Activation