Set up an email account on your Android device
Updated on Jul 14, 2017
In this tutorial, we will show you how to configure the email client on your Android mobile device in order to send and receive emails via your phone. Due note that while the interface design might change a bit with each new version of Android, the settings are identical in all versions.
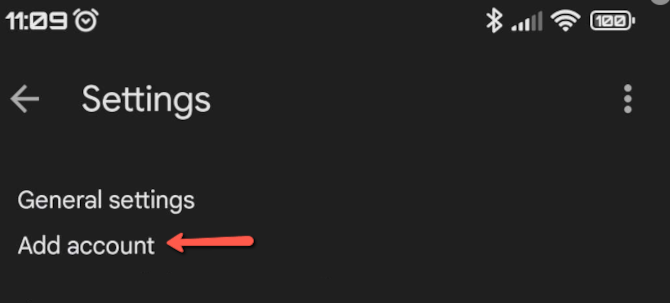
Let's begin by accessing the apps on your phone and navigating to the default Email application. For a while now, that default application has been GMail, which is what we will be using as an example, but the steps should be equivalent to any email application you are using. Once opened, tap the three dashes next to your search bar, and then tap Settings. You should see the Add Account option.
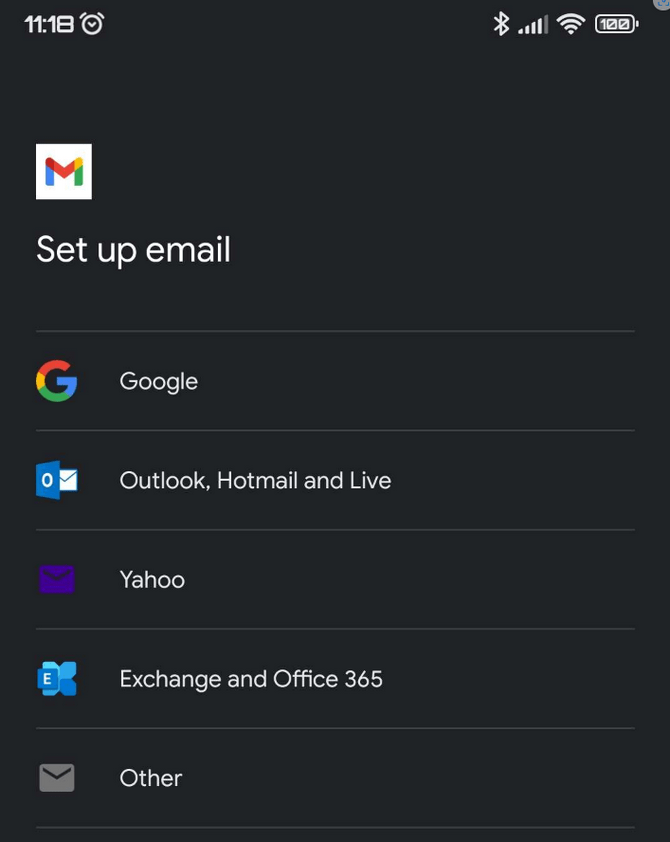
On the next screen, you will need to select the type of email account you wish to add, in order to advance to the configuration process. If you are adding an email account that does not fall under any of the suggested providers, then please select Other.
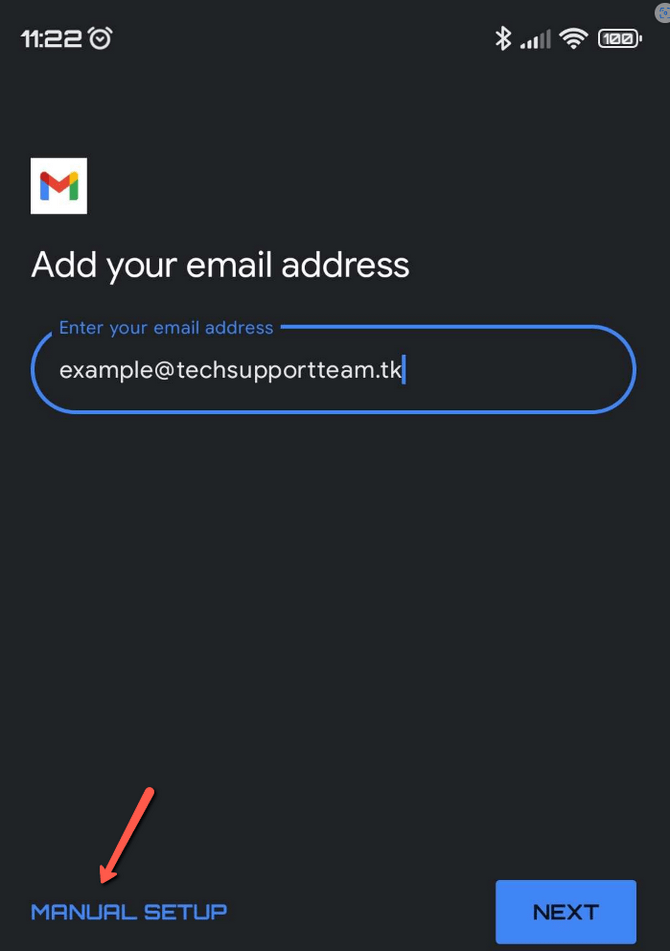
Next, you will have to input your email account, and then tap Manual Setup.
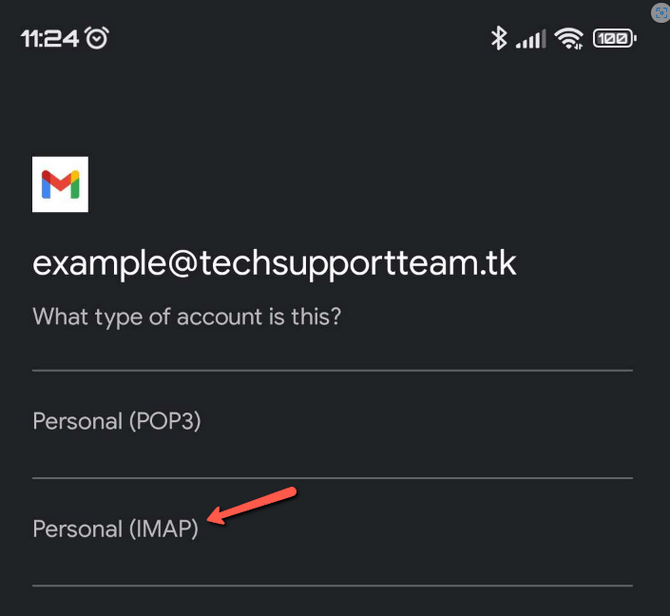
On this screen, you will have to choose the type of protocol for your incoming mails. Since IMAP is the preferred protocol due to its advantages over the POP3 protocol, we will continue with it.
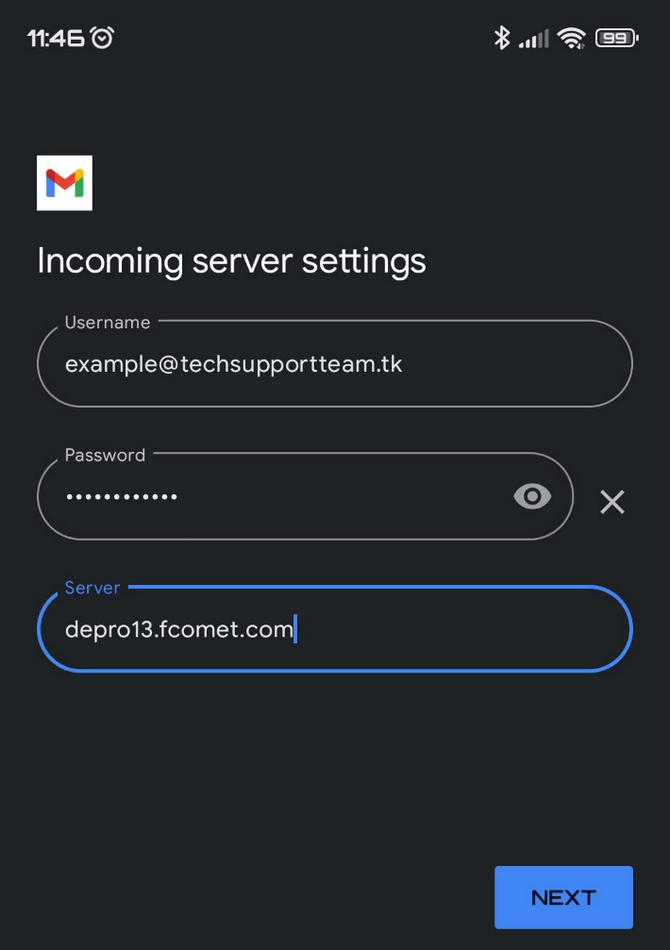
Please type in your email account's password when prompted. Next, you will proceed with the configuration of the Incoming Server Settings section. If you have created your email with us you will be able to easily see the required settings via your cPanel → Email Accounts → Manage → Set Up Mail Client as shown below.
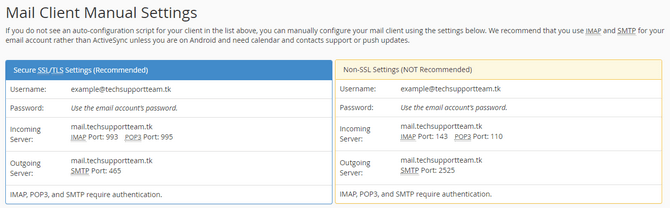
- Email Address - Your full email address
- Username - Your full email address
- Password - Enter the password for your email account
- IMAP Server - This is your domain name preceded by "mail." like mail.example.com. For SSL/TLS (which we recommend you always use) type in the hostname of your server which you can see when you look in the URL of the page. In our case, it is depro13.fcomet.com, without the https:// in front of it.

Insecure -Security Type: None and Port: 143
Secure - Security Type: SSL/TLS and Port: 993
- For those of you who want to use POP3, you can type:
Insecure - Security Type: None and Port: 110
Secure - Security Type: SSL/TLS and Port: 995
Once you have filled out everything, tap Next. In our case, we typed in our Server, and GMail will automatically assign the secure port.
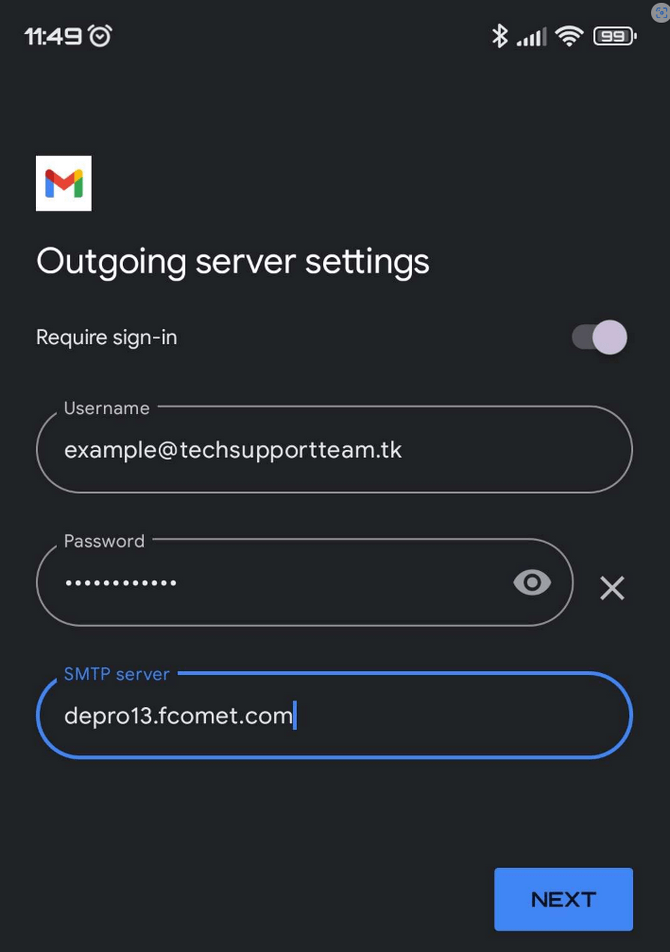
Now to configure the SMTP or Outgoing Settings:
- SMTP Server - This is your domain name preceded by mail like mail.example.com. For SSL/TLS use the hostname of your server which we showed you how to locate above. Alternatively, you can also configure more complex mailing options like Mailgun as explained in our blogpost on the subject.
- For SMTP Security Type and Port choose either:
Secure - Security Type - SSL/TLS and Port: 465 (For SSL), or 587 (For TLS)
Insecure - Security Type - None and Port: 25
- Username - Enter your full email address
- Password - Enter the password for your email account
Tap Next, to continue the setup.
Finally, you will likely be prompted to configure a few options, such as: sync interval, allowing this account to receive emails, and so on. It varies from application to application. By tapping Next you should be prompted to add your name for this account so you can recognise it easily if you use multiple accounts.
Congratulations! You can now send and receive emails form your Android based mobile device.

Mail Hosting
- Free Domain Transfer
- Unlimited Email Accounts
- 24/7 Technical Support
- Fast SSD Storage
- Hack-free Protection
- Free Cloudflare CDN
- Immediate Activation