Installing AbanteCart Manually
Updated on Mar 13, 2019
In case you are not the kind of person who would like to install things automatically, you most probably will go with the Manual Installation approach when you are installing the AbanteCart application on your website. For this reason we would like to provide you with a detailed description of the manual installation process of the AbanteCart application in the next few lines of this tutorial.
To install AbanteCart manually, you will need to:
Step 1 Download and Prepare the Files
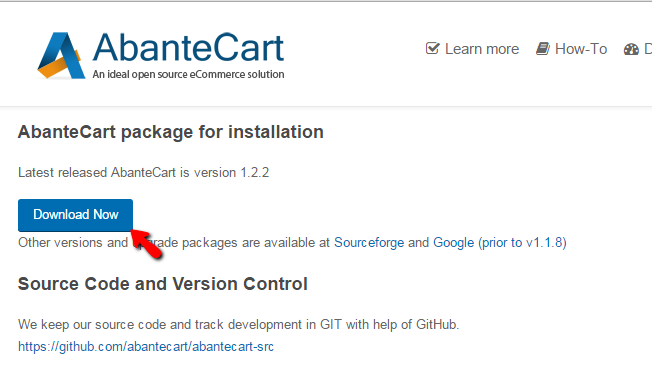
In order to start with the installation of the application you will need to obtain a copy of the installation files. This can be done quite easily at the official download page of AbanteCart. There you will be able to find the Download Now button which will provide you with the installation archive you need.
Once the file is downloaded you will need to of course upload if on your web hosting account, but first you will need to extract it on your local computer. After the extraction you will receive a folder called abantecart-src-master which is the master folder of the AbanteCart project.
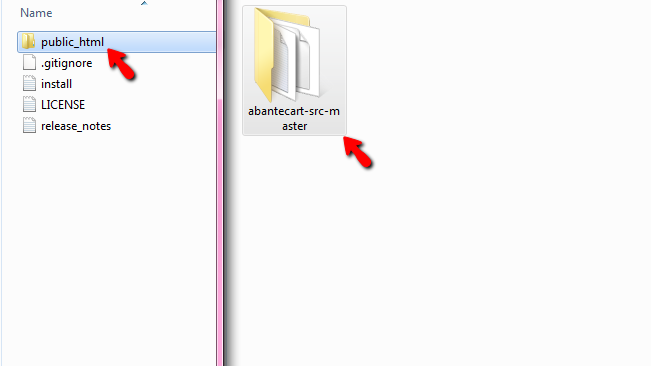
In that folder you will find few text files related to the Installation, license and of course the release notes. The thing you will need is the actual folder called public_html as in this folder you will find the installation files of the application.
The best way to upload the installation files is the FTP service for your web hosting account. Once you connect you will need to access the installation directory on your web hosting account and there you will need to upload all the installation files we mentioned above.
When this is completed you can move forward to the next step of this tutorial.
Step 2 Follow the Installation Wizard to complete the Install
Assuming that you have uploaded all the files correctly you should now access the location where the files are located. Keep in mind that if you have uploaded the files into the public_html folder of your account directly you will need to access the primary domain for your account. If the files are uploaded into a subfolder (public_html/subfolder/) you can access that subfolder with your primary domain name followed by the name of the subfolder (yourdomain.com/subfolder/).
The first thing you will notice when you access the location where the files are uploaded is the redirection to the installation folder of the AbanteCart application and respectively the first installation screen.
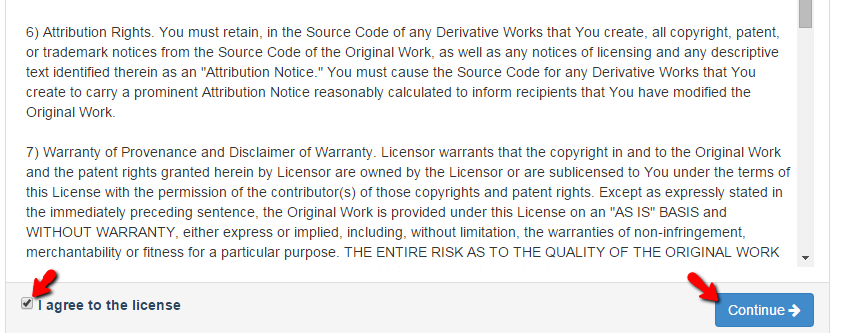
There you will find the license agreement which you should read carefully and accept before you can click on the Continue button. Once you click on that button you will be presented with the second installation step called Compatibility Validation.
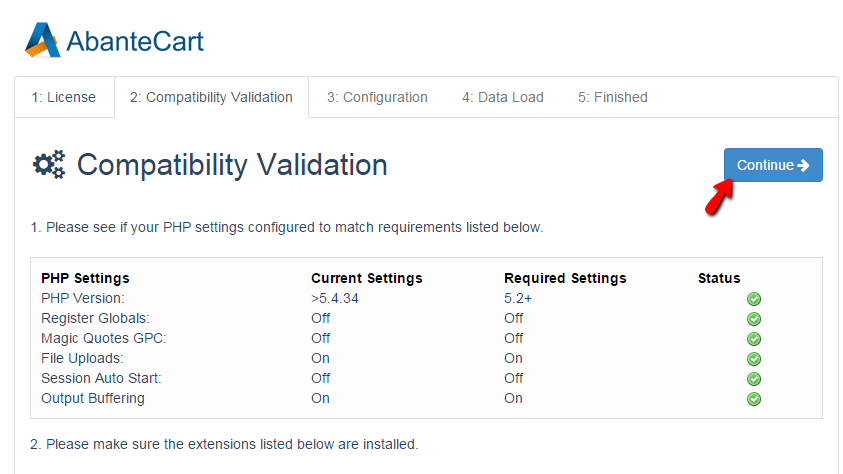
On that page you will find common information about the compatibility tests performed by the AbanteCart installer. If everything is listed green you can proceed with the installation by clicking on one of the Continue buttons located at the top and also at the bottom of the page.
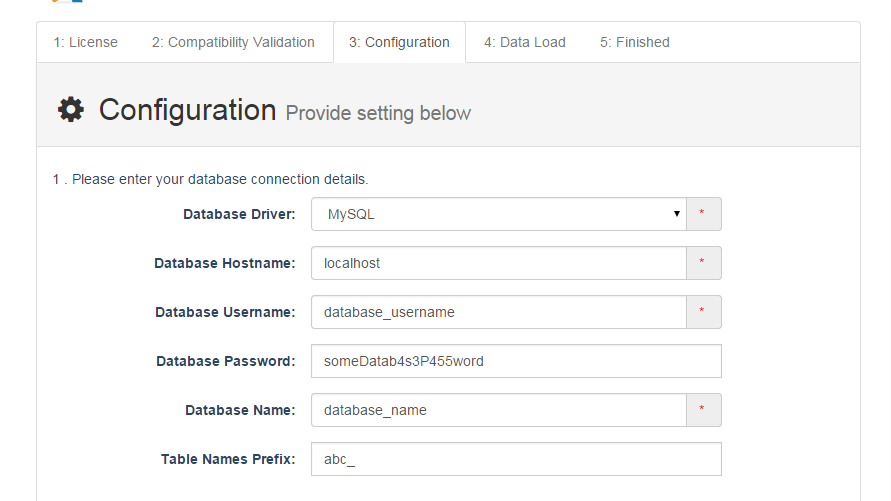
The next page of the install interface is called Configuration. On this page you will find various options to configure the database, the admin account and also if you would like to load some sample data.
First let’s begin with the database configuration. In the first section of the page you will find few fields related to the Database Connection.
In order to fill that section of settings you will need to create a database, create a username and grant all privileges on the same to operate with the created database. You can do that easily following our cPanel Database tutorial.
Once you are ready with the database creation you can move forward with the configuration of the following options:
- Database Driver – Here you should make sure that MariaDB is selected as default driver for the MariaDB service
- Database Hostname – The hostname of the database server. Usually here you should leave the localhost value, however if you are using a remote database service then you should enter the hostname or the IP address of that server
- Database Username – The username granted with privileges to operate with the database
- Database Password – The password for the username you have been using
- Database Name – The name of the database you will be using
- Table Names Prefix – The prefix of the database tables. Please either leave it as it is or change it based on your personal needs
The next section of settings is for the location of the admin section for your E-Commerce website. In the Admin section unique key you will need to enter the URL suffix that you should be used when accessing the admin area.
Then the final section you will need to configure here is for the admin username, password and email. These will be used by the administrator for accessing the admin area of the website once you finish with the installation.
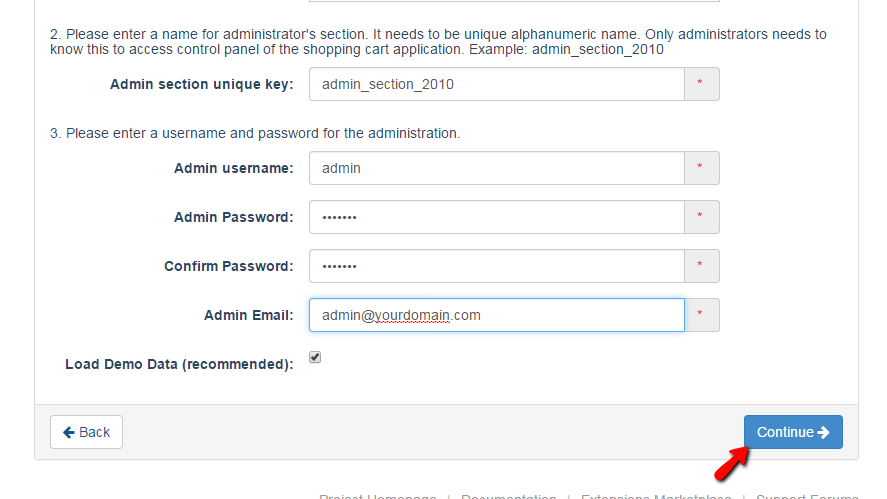
When you are ready with all of the settings you will need to click on the Continue button so you can be able to proceed further with the installation.
The next step is called Data load and there you will be presented only with the status of the installation. Once completed you will be redirected to the final page which is “Finished” and there you will be presented with information that the installation is completed.

As a final step you will need to remove the installation directory. This can be done quite easily if you simply access the installation directory of your application via the File Manager feature of the cPanel service.
Congratulations! You now know how to perform a complete manual installation of the AbanteCart E-Commerce platform.

AbanteCart Hosting
- Free Installation
- 24/7 AbanteCart Support
- Free Domain Transfer
- Hack-free Protection
- Fast SSD Storage
- Free Cloudflare CDN
- Free AbanteCart Transfer
- Immediate Activation