How to Create and Manage Product Categories
Updated on Mar 13, 2019
In order to provide a more easier and convenient way of your customers browsing the products of your website you probably would like to at least consider creating product categories. This structure is used often when you would like to categorize all the products you sell based on a common criteria. In the next few lines of this tutorial we will show you how to fully manage the product categories in AbanteCart.
To fully manage your product categories in AbanteCart, you need to:
Step 1 Add a New Product Category
In order to add a new product category you will need to login into the admin area of your AbanteCart and then to navigate to Catalog>Categories.
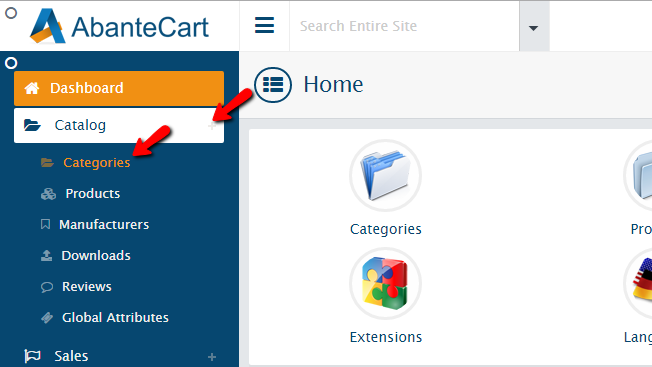
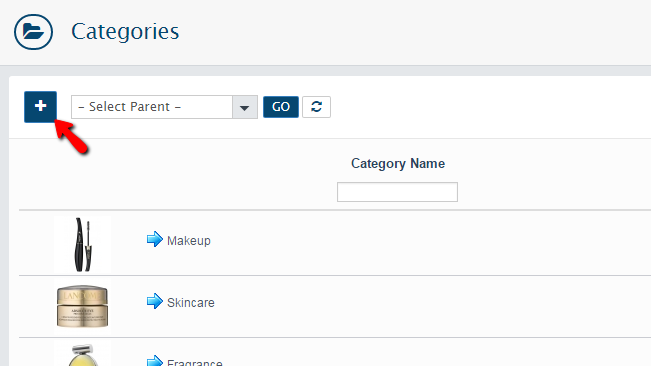
This will redirect you to a brand new page where you will see a table view for all of the currently configured categories on your online store. From there you can manage all of them but more for that in the next step of this tutorial. Now let’s add a new category. To do that, please click on the small “+” like button located at the top left side of the page.
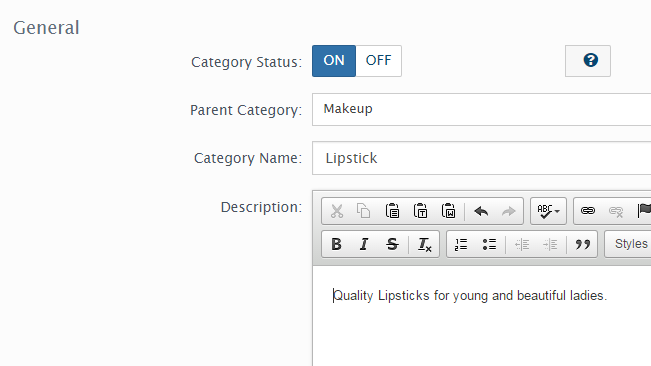
This will take you to a new page where there are few things you will need to configure for the newly created category. Let’s begin with the General section of settings. The configuration options you will find there are:
- Category Status – If the category should be available for usage immediately
- Parent Category – If this category is an actual child of other already existing category referred as parent
- Category Name – The name of the category
- Description – Few words of information describing this category
The second section of configuration options is the Data section and there you will be able to find the following:
- Meta Tag Keywords – The keywords usable for this category
- Meta Tag Description – The description which will be displayed in the search engines for this category
- SEO Keyword – If you would like AbanteCart to automatically generate some SEO keywords for your category
- Stores – In which of your stores this category should be included
- Sort Order – The default sorting order of this category
Once you are ready with all these settings click on the Save button located at the bottom of the page so all the information can be saved.
Step 2 Edit and Delete Categories
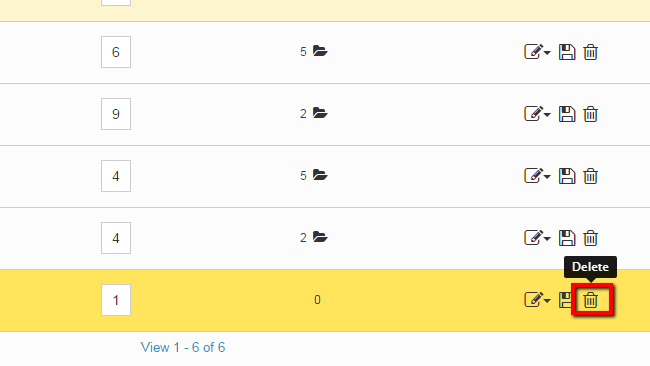
If you have added the categories you would like to on your AbanteCart based online store then you might reach a moment in which you would like to remove or edit any of those. This is pretty easy and in order to take these actions you will need to access the home page for the categories located in your Admin area>Catalog>Categories. Then you should find the category you would like to edit and use the actions depending on your needs.
The editing of a category can be achieved with the first icon in the Action column of the categories table view.
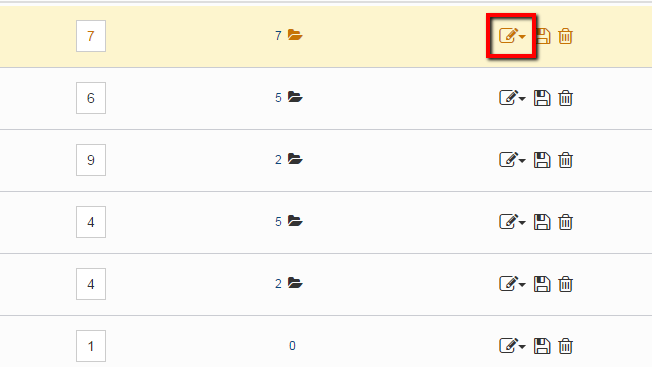
The edit button will prompt you with options to edit the General category options, the Data category options and the Layout of the category. Please chose the configuration options you would like to edit and do the edits according to your needs.
In order to delete a category, you will need to use the last option from the Action column. It is a small trashcan like icon which if you click will delete a category upon confirmation.
Congratulations! You can now fully manage the Categories of your AbanteCart based online Store!

AbanteCart Hosting
- Free Installation
- 24/7 AbanteCart Support
- Free Domain Transfer
- Hack-free Protection
- Fast SSD Storage
- Free Cloudflare CDN
- Free AbanteCart Transfer
- Immediate Activation