How to Use the Content Management System
Updated on Mar 13, 2019
AbanteCart provides you with an easy way to manage all the blocks on the pages of your Online Store. Since the application is so features rich you will be able to find a CMS feature with incredible drag-and-drop interface in the admin area of the application. In the next few lines of this tutorial we will show you how to use that feature in order to change the layouts of your Online Store.
To manage your content in AbanteCart, you need to:
Step 1 Access the Layouts Management page
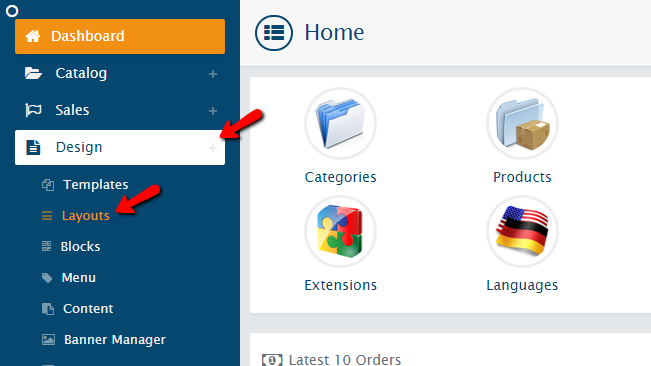
In order to begin managing the content of the pages for your Online Store you will need to login into the admin area of your Store and then to navigate to Design>Layouts.
Right when you access the Layouts page you will see quite a lot of configurable items. First let’s review what you are provided with.
Step 2 Layout page Structure
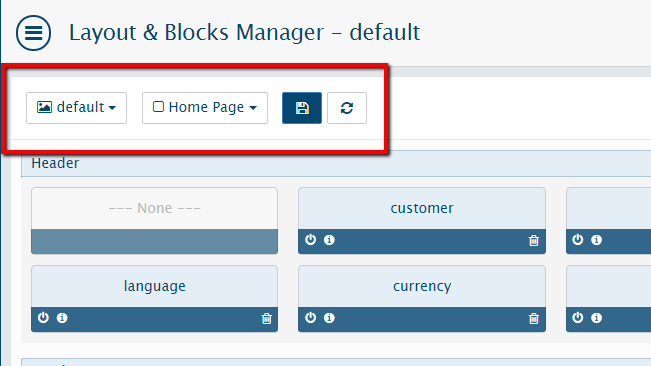
At the top of the layouts page you will find two options which will allow you to select the Template and the particular page you would like to edit the layout for. Let’s say that you would like to edit the layout for the Default template and for the Home Page of your website. Then you will need to choose “default” from the first field and “Home Page” from the second field.
Once this has been done you should pay attention to the second part of this page where all the blocks are actually displayed. The section is located right below the top part of the page where you have selected the template and the page you would like to edit.
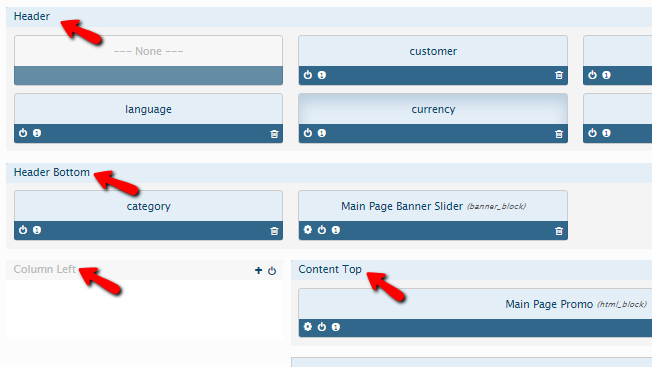
The section with the blocks is quite big and in order to get oriented you will need to understand the basics of the components typically used in a webpage. The components are:
- Header area – The area typically used for the useful client links such as Login, Register, Account and so on
- Header Bottom area – This area is usually used for displaying the categories menu and of course a nice sliding banner
- Content Area with Column Left area – This is the left column with features of your Store
- Content Area with Column Right area – This is the right column with features of your Store
- Content Top area – Area typically used for some promotion banners or any other informative materials
- Content area – The main content area of your store where all the products will be displayed
- Content Bottom area – Here you can put different ordering for your products and even promoted products from different categories
- Footer Top area – This is the area right above the footer of your website.
- Footer area – The main footer area of your website
The structure is pretty much self-explanatory and if you take few minutes to look at the content areas and matching them with the sample content of the home page for the application, you will be able to easily understand where goes where.
Step 3 Add Blocks with features
Now that you know how the CMS page is structured and you are well familiar with the layout structure it is time to understand how the different features can be added, moved or removed.
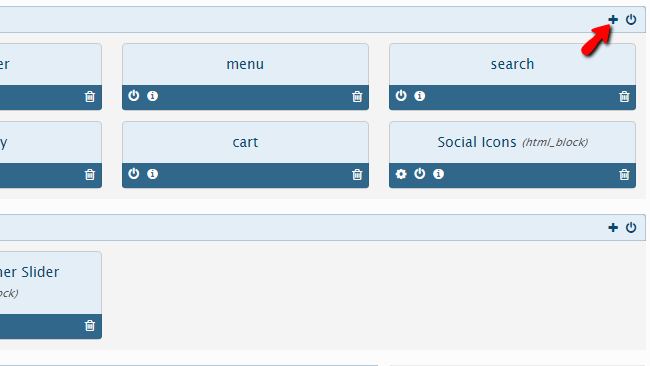
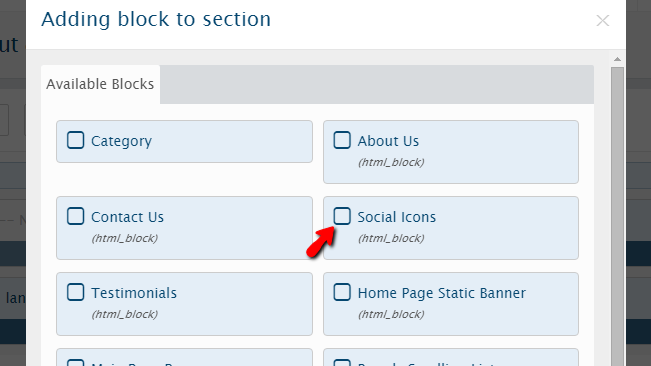
Every single content type is presented as a different configurable block. In order to add a block to concrete area you will need to click on the small “+” sign next to the area label.
The available blocks will be listed and you will need to select the one you would like to add to that content area.
Once this has been done you will notice how the background of the interface will be changed to Orange. This is because the application reminds you to save after you have added the block. The save button is located at the top part of the page with the form of small floppy disk.
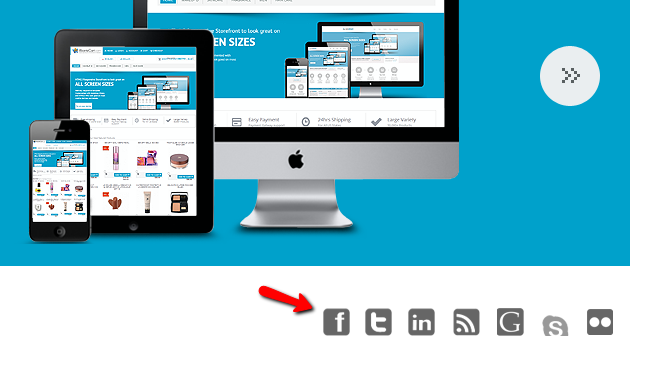
Once the page is save your Block will appear on the selected content area in the Frontend of your website.
Another actions you can perform with the blocks on your page are to Disable/Enable , Edit or even Remove the concrete block you would like to. All these options are presented in the lower part of every block.
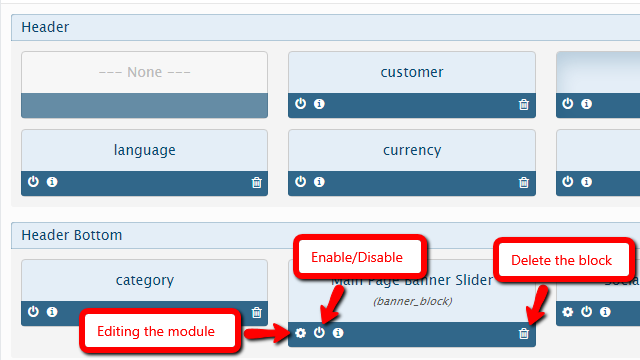
Also you have probably notice that you can move the blocks with your mouse changing their order so the layout can fit your needs the most.
Congratulations! You now know how to manage the CMS feature of your AbanteCart based Online Store!

AbanteCart Hosting
- Free Installation
- 24/7 AbanteCart Support
- Free Domain Transfer
- Hack-free Protection
- Fast SSD Storage
- Free Cloudflare CDN
- Free AbanteCart Transfer
- Immediate Activation