How to manage Modules in AbanteCart
Updated on Mar 13, 2019
AbanteCart comes preloaded with a bunch of useful extensions which will make your experience with one idea more smoother then with other E-Commerce applications. Since however the authors of the application cannot possibly know what extensions you will need, they have provided you with an easy to use Extension installation interface as well as intuitive extension management pages. In the next few lines of this tutorial we will show you how with the use of those pages you will be able to fully manage all of the installed Extensions on your Online Store.
To manage the modules of your AbanteCart, you will need to:
Step 1 Install a New Extension
Before you install a new extension of course you will need to find the same. You have few options but let’s say that you would like to spare some time and to check if the extension is not added already. You can do that by accessing the extensions management page which is located under the admin area of your AbanteCart online store. From there you need to navigate to Extensions>All Extensions.
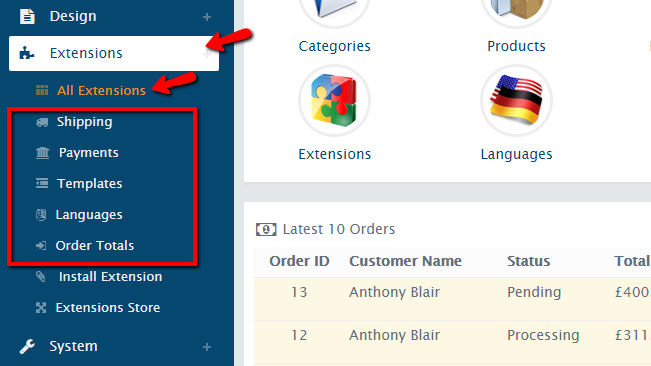
Right below the All Extensions link you will find the actual categories of extensions. This is simply for your convenience and if you know under which category the extension you are looking for is.
Assuming that you have accessed the All Extensions page. You will see a convenient table view for all the extensions currently added to your Online Store. Keep in mind that those are bundled by default and you will not need any Account to the Extension Marketplace of AbanteCart.
The extensions which are not installed on your store will be listed respectively as “Not Installed” in the “Status” column.
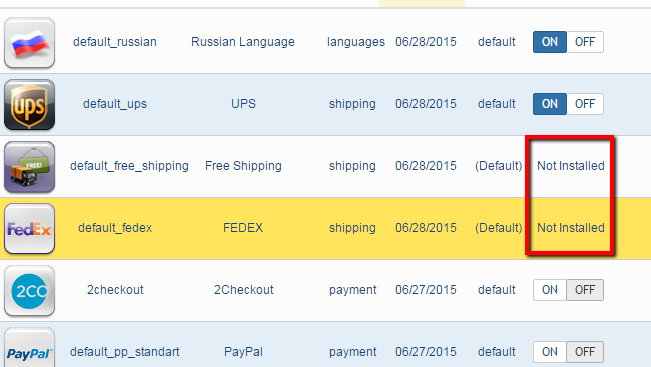
In order to install any of these you will need to simply click on the small triangle under the Quick Actions column.

Once a concrete extension is installed you will be then redirected to the extension’s configuration page as you will need to configure it. Then you will be able to save the configuration and if you go back to the All Extensions page you will be able to notice the newly installed extension.
That is not all, you will need to now activate the extension by changing it’s Status. This can be done if you find the extension in the list and simply click on the On button.
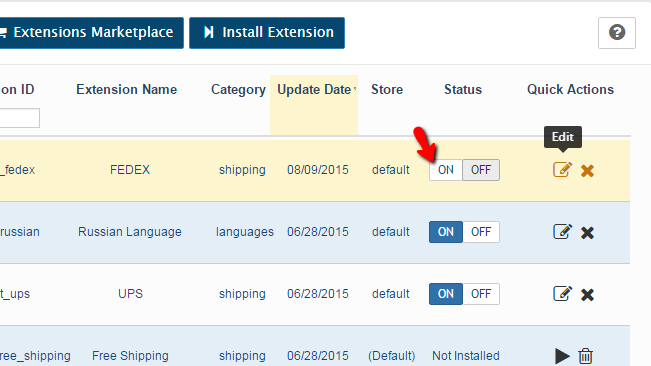
Then you should save the settings and that will conclude the installation of your extension.
With such extension structure and overall installation process you can clearly understand that you can keep certain extensions already configured but inactive and respectively you will be able to activate those whenever you need to.
Step 2 Editor Delete an Extension
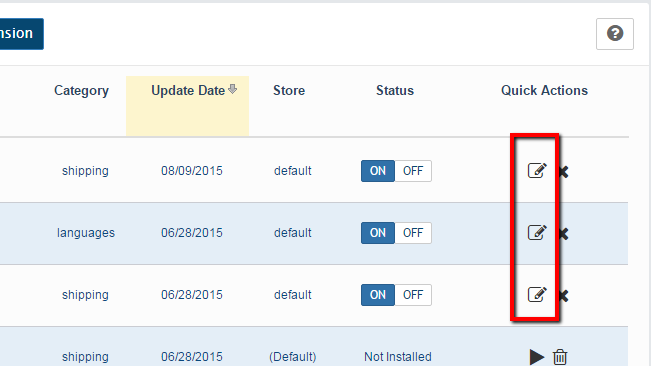
In order to edit the configuration you will need to find the extensions you will need to configure on the All Extensions page and then by simply using the editing icon you will be presented with the same configuration interface you have used right after you have installed the extension for first time.
In order to uninstall an extension - you should use the small “X”-like icon at the end of the Quick Actions column of the table view with extensions.
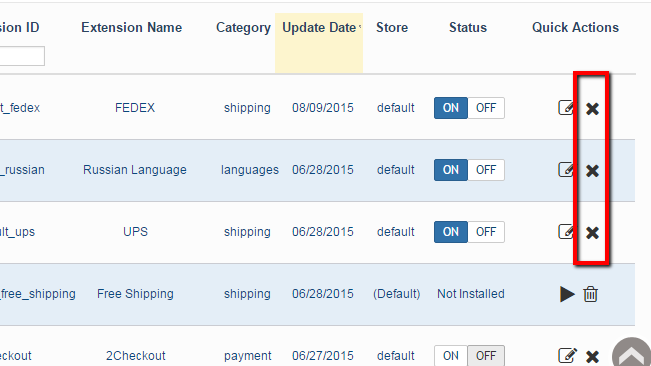
The complete deletion of an extension will require for the same to be already uninstalled and then you will notice a small trashcan icon appearing next to the Install icon. If you click on the same the extension will be then deleted.
Congratulations! You can now fully manage the extensions of your AbanteCart based Online Store!

AbanteCart Hosting
- Free Installation
- 24/7 AbanteCart Support
- Free Domain Transfer
- Hack-free Protection
- Fast SSD Storage
- Free Cloudflare CDN
- Free AbanteCart Transfer
- Immediate Activation