How to manage the Customers in AbanteCart
Updated on Mar 13, 2019
Every customer of your Online Store is presented with the option to create a client area by registering on your AbanteCart website. Once registered the customer will receive an account and this will allow you to maintain a records for all the customers you have. In the following lines of this tutorial we will show you how to fully manage all of the customers registered on your Online Store.
To manage the Customers in AbanteCart, you need to:
Step 1 Access the Customers Management page
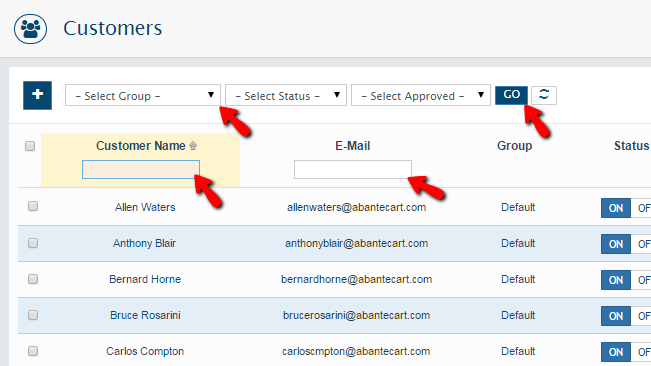
In order to perform different management related activities on the customers registered on your Online Store you will need to first and foremost be aware of where you will be able to find all of them. AbanteCart offers a dedicated page for this purpose and you will be able to find it by logging into the admin area of the application and then by navigating to Sales>Customers.

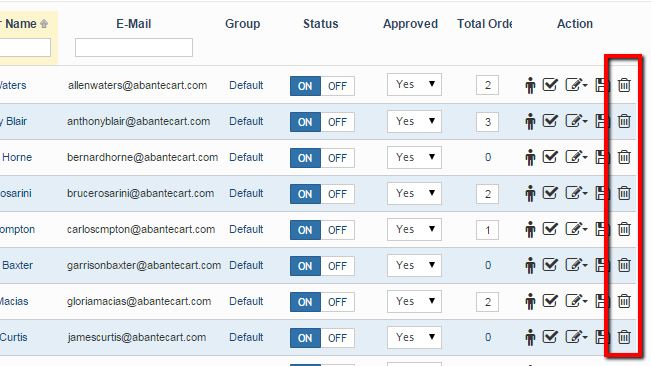
Once there you will see a large table view representing different pieces of information for your customers – Name, Email, Group, Total Orders and many more.
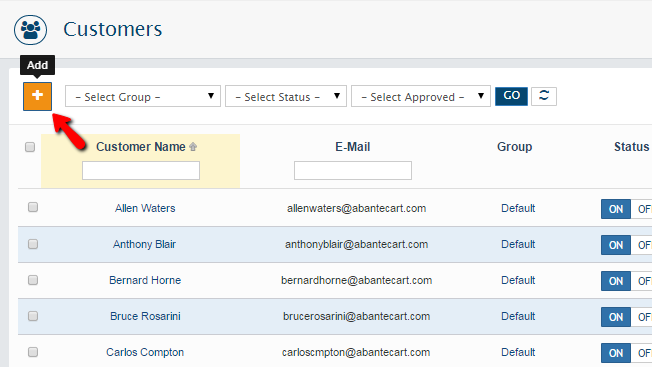
Step 2 Add a New Customer
If you need to add a new customer e.g. to create a profile for a customer, you should click on the small “+” like button at the top left corner of the Customers page.
Then you will be redirected to a new page where you will need to configure the following options for your brand new customer:
- Status – If the Customer’s profile should be activated immediately
- Approved – If the Customer’s profile should be approved immediately
- Login Name – The login username which the customer will be using
- First Name – The first name of your customer
- Last Name – The last name of your customer
- E-Mail – The email of your customer.
- Telephone – The telephone number of your customer
- Fax – The Fax of your customer
- Password - The password for your customer
- Newsletter – If the newsletter option should be enabled for this customer
- Customer Group – The group this customer belongs to
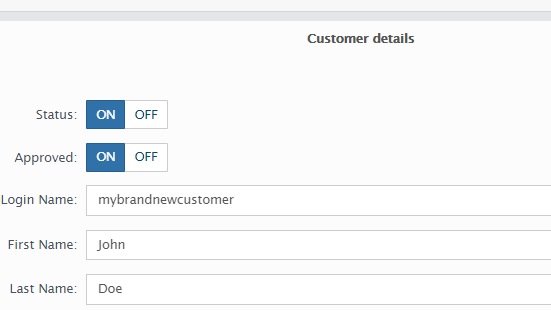
Once you are done with the configuration of these options, please click on the Save button so you can have the customer added.
Step 3 Edit and Delete Customers
If you have found that you do not need certain customer or that you need to edit the information for any of the already existing customers you might find this step quite handy.
In order to edit a customer you will need to access the Customers Page discussed in Step 1 of this tutorial and when you are presented with the list of the currently registered customers you will need to find the one you would like to Delete or Edit. You can use the search field on the first row of the table view for easing the finding process.
Once you find the customer you are looking for it is time to edit the information or the options for the same. You will notice that the final column of the Customers table representation is called Action. There you will be able to find the available actions you can take with each customer. In order to Edit a customer you will need to click on the Edit icon.
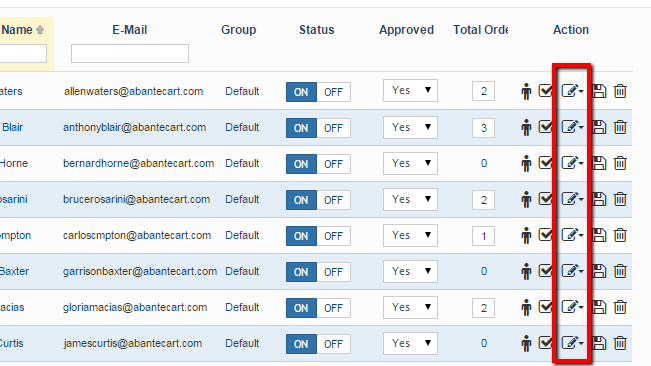
In order to Delete a customer you will need to use the small “trashcan” like icon represented last in the list of available actions.
Another action you can take is that you can login as customer using the first “human” like icon from the Actions column.
Congratulations! You can now fully manage the Customers of your AbanteCart based Online Store!

AbanteCart Hosting
- Free Installation
- 24/7 AbanteCart Support
- Free Domain Transfer
- Hack-free Protection
- Fast SSD Storage
- Free Cloudflare CDN
- Free AbanteCart Transfer
- Immediate Activation