How to edit the template used by ClipBucket
Updated on Mar 13, 2019
Clip Bucket allows you to edit the template you are using so you can implement any custom modifications you would like to. In this tutorial we will show you how to edit existing activate template.
This tutorial assumes that you have already logged into the admin area of your website.
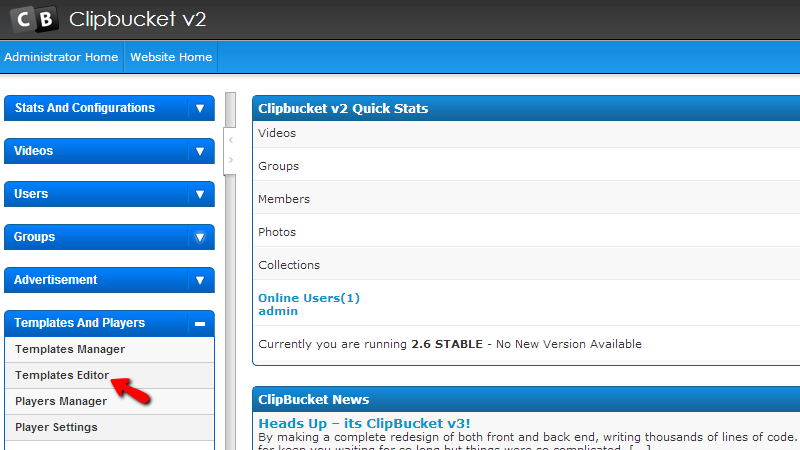
In order to access the page where you will be able to edit the currently used theme please navigate to Template and Players > Templates editor.
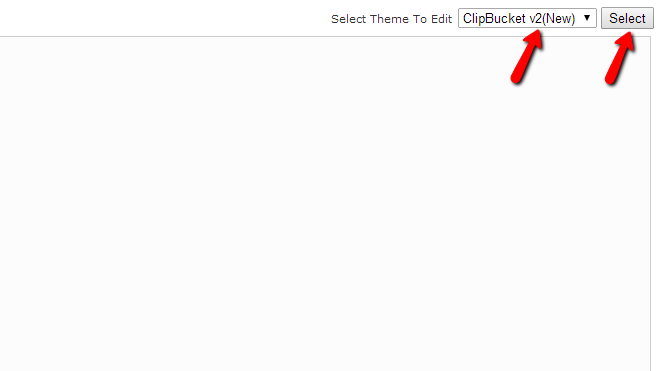
There you will need to first select a template. This can be easily done via the “Select Theme To Edit” drop-down list located in the upper right corner of the page. In the drop down list you will find all of the currently available templates for edit on your website. Once you select a template please click on the “Select” button so the template can be selected for edit.
Once this is done you will be presented with a complete list for all of the files the template uses in the left horizontal view called “Layout Files”.
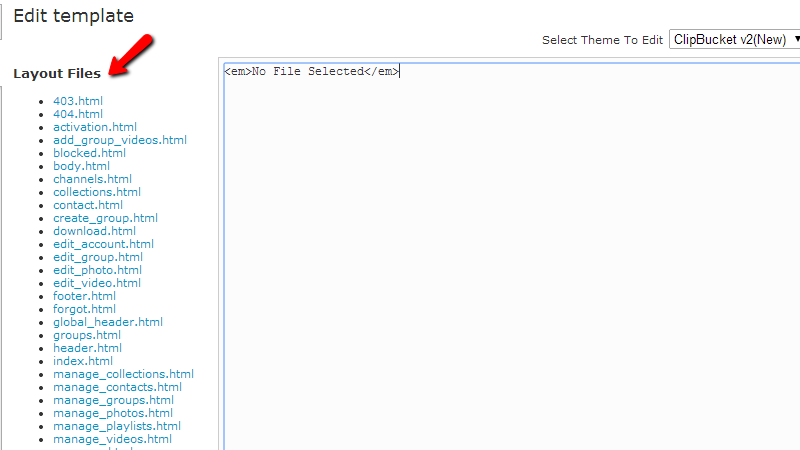
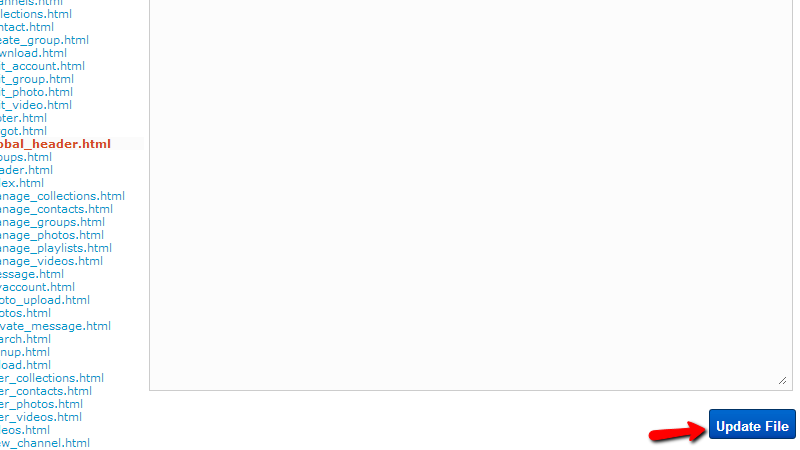
There you will need to click on a file to edit and once you do that the code of this file will be displayed in the central section of this page. That’s right, in order for a template to be edited you will need to manually edit the code of the same and once you are ready to click on the “Update File” button at the bottom of the page.
Congratulations! You can now edit the template used by your website!

ClipBucket Hosting
- Free Installation
- 24/7 ClipBucket Support
- Free Domain Transfer
- Hack-free Protection
- Fast SSD Storage
- Free ClipBucket Transfer
- Free Cloudflare CDN
- FFmpeg Support